Source: https://gilacoding.com/read/membuat-crud-laravel-hanya-dengan-5-menit
- Create a new laravel project named ‘latihan-crud’
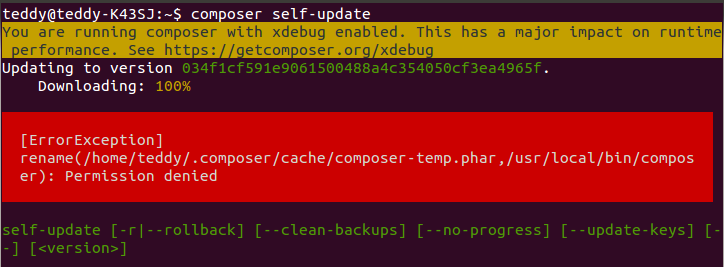
Type this command: composer create-project –prefer-dist laravel/laravel latihan-crud
123456789101112131415161718192021222324252627282930313233343536373839404142434445464748495051525354555657585960616263646566676869707172737475767778798081828384858687888990919293949596979899100101102103104105106107108109110111112113114115116117118119120121122123124125126127128129130131132133134135136137138139140141142143144145146147148149150151152153154155156157158159160161162163164165166167168169170171172173174175176177178179180181182183184185186187188189190191192193194195196197198199200201202203204205206207208209210211212213214215216217218219220221222223224225226227228229230231232233234235236237238239240241242243244245246247248249250251252253254255256teddy@teddy-K43SJ:~/Documents/works/laravel$ composer create-project --prefer-dist laravel/laravel latihan-crudWarning: This development build of composer is over 60 days old. It is recommended to update it by running "/usr/local/bin/composer self-update" to get the latest version.Installing laravel/laravel (v5.3.16)- Installing laravel/laravel (v5.3.16)Downloading: 100%Created project in latihan-crud> php -r "file_exists('.env') || copy('.env.example', '.env');"Loading composer repositories with package informationUpdating dependencies (including require-dev)- Installing vlucas/phpdotenv (v2.4.0)Downloading: 100%- Installing symfony/polyfill-mbstring (v1.2.0)Loading from cache- Installing symfony/var-dumper (v3.1.5)Downloading: 100%- Installing symfony/translation (v3.1.5)Downloading: 100%- Installing symfony/routing (v3.1.5)Downloading: 100%- Installing symfony/process (v3.1.5)Downloading: 100%- Installing psr/log (1.0.2)Downloading: 100%- Installing symfony/debug (v3.1.5)Downloading: 100%- Installing symfony/http-foundation (v3.1.5)Downloading: 100%- Installing symfony/event-dispatcher (v3.1.5)Loading from cache- Installing symfony/http-kernel (v3.1.5)Downloading: 100%- Installing symfony/finder (v3.1.5)Downloading: 100%- Installing symfony/console (v3.1.5)Downloading: 100%- Installing swiftmailer/swiftmailer (v5.4.3)Loading from cache- Installing paragonie/random_compat (v2.0.3)Downloading: 100%- Installing ramsey/uuid (3.5.1)Downloading: 100%- Installing jakub-onderka/php-console-color (0.1)Loading from cache- Installing jakub-onderka/php-console-highlighter (v0.3.2)Loading from cache- Installing dnoegel/php-xdg-base-dir (0.1)Loading from cache- Installing nikic/php-parser (v2.1.1)Downloading: 100%- Installing psy/psysh (v0.7.2)Loading from cache- Installing nesbot/carbon (1.21.0)Loading from cache- Installing mtdowling/cron-expression (v1.1.0)Loading from cache- Installing monolog/monolog (1.21.0)Loading from cache- Installing league/flysystem (1.0.32)Downloading: 100%- Installing symfony/polyfill-util (v1.2.0)Loading from cache- Installing symfony/polyfill-php56 (v1.2.0)Loading from cache- Installing jeremeamia/superclosure (2.2.0)Loading from cache- Installing doctrine/inflector (v1.1.0)Loading from cache- Installing classpreloader/classpreloader (3.0.0)Loading from cache- Installing laravel/framework (v5.3.19)Downloading: 100%- Installing fzaninotto/faker (v1.6.0)Loading from cache- Installing hamcrest/hamcrest-php (v1.2.2)Loading from cache- Installing mockery/mockery (0.9.5)Loading from cache- Installing symfony/yaml (v3.1.5)Downloading: 100%- Installing sebastian/version (2.0.0)Downloading: 100%- Installing sebastian/resource-operations (1.0.0)Downloading: 100%- Installing sebastian/recursion-context (1.0.2)Loading from cache- Installing sebastian/object-enumerator (1.0.0)Downloading: 100%- Installing sebastian/global-state (1.1.1)Loading from cache- Installing sebastian/exporter (1.2.2)Loading from cache- Installing sebastian/environment (1.3.8)Downloading: 100%- Installing sebastian/diff (1.4.1)Loading from cache- Installing sebastian/comparator (1.2.0)Loading from cache- Installing doctrine/instantiator (1.0.5)Loading from cache- Installing phpunit/php-text-template (1.2.1)Loading from cache- Installing phpunit/phpunit-mock-objects (3.4.0)Downloading: 100%- Installing phpunit/php-timer (1.0.8)Loading from cache- Installing phpunit/php-file-iterator (1.4.1)Loading from cache- Installing sebastian/code-unit-reverse-lookup (1.0.0)Downloading: 100%- Installing phpunit/php-token-stream (1.4.8)Loading from cache- Installing phpunit/php-code-coverage (4.0.1)Downloading: 100%- Installing webmozart/assert (1.1.0)Downloading: 100%- Installing phpdocumentor/reflection-common (1.0)Loading from cache- Installing phpdocumentor/type-resolver (0.2)Loading from cache- Installing phpdocumentor/reflection-docblock (3.1.1)Downloading: 100%- Installing phpspec/prophecy (v1.6.1)Loading from cache- Installing myclabs/deep-copy (1.5.4)Downloading: 100%- Installing phpunit/phpunit (5.6.1)Downloading: 100%- Installing symfony/css-selector (v3.1.5)Downloading: 100%- Installing symfony/dom-crawler (v3.1.5)Downloading: 100%symfony/var-dumper suggests installing ext-symfony_debug ()symfony/translation suggests installing symfony/config ()symfony/routing suggests installing doctrine/annotations (For using the annotation loader)symfony/routing suggests installing symfony/config (For using the all-in-one router or any loader)symfony/routing suggests installing symfony/dependency-injection (For loading routes from a service)symfony/routing suggests installing symfony/expression-language (For using expression matching)symfony/event-dispatcher suggests installing symfony/dependency-injection ()symfony/http-kernel suggests installing symfony/browser-kit ()symfony/http-kernel suggests installing symfony/class-loader ()symfony/http-kernel suggests installing symfony/config ()symfony/http-kernel suggests installing symfony/dependency-injection ()paragonie/random_compat suggests installing ext-libsodium (Provides a modern crypto API that can be used to generate random bytes.)ramsey/uuid suggests installing ircmaxell/random-lib (Provides RandomLib for use with the RandomLibAdapter)ramsey/uuid suggests installing ext-libsodium (Provides the PECL libsodium extension for use with the SodiumRandomGenerator)ramsey/uuid suggests installing ext-uuid (Provides the PECL UUID extension for use with the PeclUuidTimeGenerator and PeclUuidRandomGenerator)ramsey/uuid suggests installing moontoast/math (Provides support for converting UUID to 128-bit integer (in string form).)ramsey/uuid suggests installing ramsey/uuid-doctrine (Allows the use of Ramsey\Uuid\Uuid as Doctrine field type.)ramsey/uuid suggests installing ramsey/uuid-console (A console application for generating UUIDs with ramsey/uuid)psy/psysh suggests installing ext-pdo-sqlite (The doc command requires SQLite to work.)monolog/monolog suggests installing aws/aws-sdk-php (Allow sending log messages to AWS services like DynamoDB)monolog/monolog suggests installing doctrine/couchdb (Allow sending log messages to a CouchDB server)monolog/monolog suggests installing ext-amqp (Allow sending log messages to an AMQP server (1.0+ required))monolog/monolog suggests installing ext-mongo (Allow sending log messages to a MongoDB server)monolog/monolog suggests installing graylog2/gelf-php (Allow sending log messages to a GrayLog2 server)monolog/monolog suggests installing mongodb/mongodb (Allow sending log messages to a MongoDB server via PHP Driver)monolog/monolog suggests installing php-amqplib/php-amqplib (Allow sending log messages to an AMQP server using php-amqplib)monolog/monolog suggests installing php-console/php-console (Allow sending log messages to Google Chrome)monolog/monolog suggests installing rollbar/rollbar (Allow sending log messages to Rollbar)monolog/monolog suggests installing ruflin/elastica (Allow sending log messages to an Elastic Search server)monolog/monolog suggests installing sentry/sentry (Allow sending log messages to a Sentry server)league/flysystem suggests installing league/flysystem-aws-s3-v2 (Allows you to use S3 storage with AWS SDK v2)league/flysystem suggests installing league/flysystem-aws-s3-v3 (Allows you to use S3 storage with AWS SDK v3)league/flysystem suggests installing league/flysystem-azure (Allows you to use Windows Azure Blob storage)league/flysystem suggests installing league/flysystem-cached-adapter (Flysystem adapter decorator for metadata caching)league/flysystem suggests installing league/flysystem-copy (Allows you to use Copy.com storage)league/flysystem suggests installing league/flysystem-dropbox (Allows you to use Dropbox storage)league/flysystem suggests installing league/flysystem-eventable-filesystem (Allows you to use EventableFilesystem)league/flysystem suggests installing league/flysystem-rackspace (Allows you to use Rackspace Cloud Files)league/flysystem suggests installing league/flysystem-sftp (Allows you to use SFTP server storage via phpseclib)league/flysystem suggests installing league/flysystem-webdav (Allows you to use WebDAV storage)league/flysystem suggests installing league/flysystem-ziparchive (Allows you to use ZipArchive adapter)laravel/framework suggests installing aws/aws-sdk-php (Required to use the SQS queue driver and SES mail driver (~3.0).)laravel/framework suggests installing doctrine/dbal (Required to rename columns and drop SQLite columns (~2.4).)laravel/framework suggests installing guzzlehttp/guzzle (Required to use the Mailgun and Mandrill mail drivers and the ping methods on schedules (~5.3|~6.0).)laravel/framework suggests installing league/flysystem-aws-s3-v3 (Required to use the Flysystem S3 driver (~1.0).)laravel/framework suggests installing league/flysystem-rackspace (Required to use the Flysystem Rackspace driver (~1.0).)laravel/framework suggests installing pda/pheanstalk (Required to use the beanstalk queue driver (~3.0).)laravel/framework suggests installing predis/predis (Required to use the redis cache and queue drivers (~1.0).)laravel/framework suggests installing pusher/pusher-php-server (Required to use the Pusher broadcast driver (~2.0).)laravel/framework suggests installing symfony/psr-http-message-bridge (Required to use psr7 bridging features (0.2.*).)sebastian/global-state suggests installing ext-uopz (*)phpunit/phpunit-mock-objects suggests installing ext-soap (*)phpunit/php-code-coverage suggests installing ext-xdebug (>=2.4.0)phpunit/phpunit suggests installing phpunit/php-invoker (~1.1)phpunit/phpunit suggests installing ext-xdebug (*)Writing lock fileGenerating autoload files> Illuminate\Foundation\ComposerScripts::postUpdate> php artisan optimizeGenerating optimized class loaderThe compiled class file has been removed.> php artisan key:generateApplication key [base64:2uccC5SynOBfgPZAA1zWrAQRWroPmxdMxnCT0KkXSew=] set successfully.
- Modify .env file in /laravel/latihan-crud/ directory to set the database setting:
123456DB_CONNECTION=mysqlDB_HOST=127.0.0.1DB_PORT=3306DB_DATABASE=latihan-crudDB_USERNAME=(your db username)DB_PASSWORD=(your db password) - Create the new database ‘latihan-crud’ on phpmyadmin
- Install new package ‘crud-generator’ from ‘appzcoder’: composer require appzcoder/crud-generator
DONT FORGET TO GO INTO ‘latihan-crud’ DIRECTORY FIRST!
1234567891011121314teddy@teddy-K43SJ:~/Documents/works/laravel/latihan-crud$ composer require appzcoder/crud-generatorUsing version ^1.2 for appzcoder/crud-generator./composer.json has been updatedLoading composer repositories with package informationUpdating dependencies (including require-dev)- Installing appzcoder/crud-generator (v1.2.2)Loading from cacheWriting lock fileGenerating autoload files> Illuminate\Foundation\ComposerScripts::postUpdate> php artisan optimizeGenerating optimized class loaderThe compiled class file has been removed.
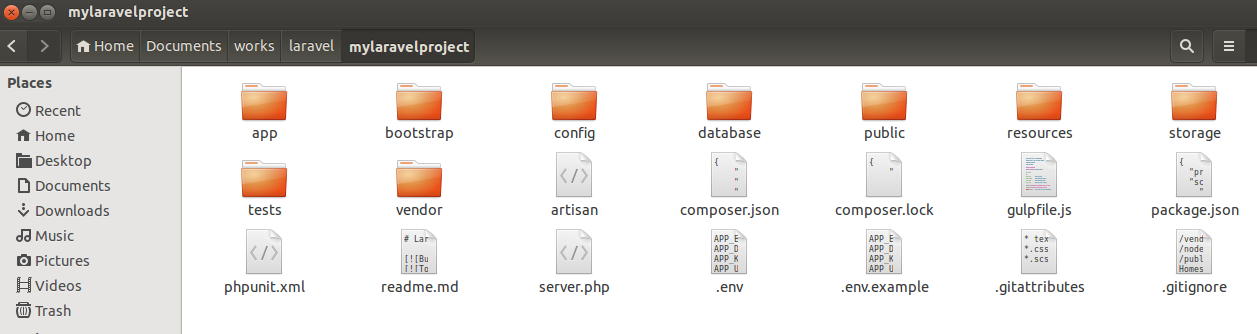
Look up ‘appzcoder’ directory in /latihan-crud/vendor/ - Add the new package ‘Appzcoder\CrudGenerator\CrudGeneratorServiceProvider::class’ in /config/app.php in ‘providers’
12345678910111213141516171819202122...'providers' => [/** Laravel Framework Service Providers...*/...Illuminate\View\ViewServiceProvider::class,/** Package Service Providers...*////** Application Service Providers...*/...App\Providers\RouteServiceProvider::class,Appzcoder\CrudGenerator\CrudGeneratorServiceProvider::class,],
- Install another package ‘laravelcollective/html’
1234567891011121314teddy@teddy-K43SJ:~/Documents/works/laravel/latihan-crud$ composer require laravelcollective/htmlUsing version ^5.3 for laravelcollective/html./composer.json has been updatedLoading composer repositories with package informationUpdating dependencies (including require-dev)- Installing laravelcollective/html (v5.3.0)Downloading: 100%Writing lock fileGenerating autoload files> Illuminate\Foundation\ComposerScripts::postUpdate> php artisan optimizeGenerating optimized class loaderThe compiled class file has been removed.
Then do the same with #5 to add the new package ‘Collective\Html\HtmlServiceProvider::class,’ in /config/app.php in ‘providers’:
123456789101112131415161718192021'providers' => [/** Laravel Framework Service Providers...*/...Illuminate\View\ViewServiceProvider::class,/** Package Service Providers...*////** Application Service Providers...*/...Appzcoder\CrudGenerator\CrudGeneratorServiceProvider::class,Collective\Html\HtmlServiceProvider::class,],
- In the same file (app.php), add the new facades ‘Form’ and ‘HTML’ (????) in ‘aliases’ section:
12345678910...'aliases' => [...,'Form' => Collective\Html\FormFacade::class,...'HTML' => Collective\Html\HtmlFacade::class,...], - Do ‘composer update’ to update the dependencies
123456789teddy@teddy-K43SJ:~/Documents/works/laravel/latihan-crud$ composer updateLoading composer repositories with package informationUpdating dependencies (including require-dev)Nothing to install or updateGenerating autoload files> Illuminate\Foundation\ComposerScripts::postUpdate> php artisan optimizeGenerating optimized class loaderThe compiled class file has been removed. - Then publish our files and setting
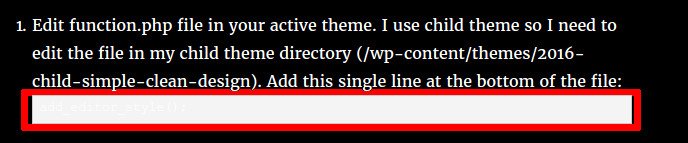
1234567teddy@teddy-K43SJ:~/Documents/works/laravel/latihan-crud$ php artisan vendor:publishCopied Directory [/vendor/laravel/framework/src/Illuminate/Notifications/resources/views] To [/resources/views/vendor/notifications]Copied Directory [/vendor/laravel/framework/src/Illuminate/Pagination/resources/views] To [/resources/views/vendor/pagination]Copied File [/vendor/appzcoder/crud-generator/config/crudgenerator.php] To [/config/crudgenerator.php]Copied File [/vendor/appzcoder/crud-generator/publish/app.blade.php] To [/resources/views/layouts/app.blade.php]Copied Directory [/vendor/appzcoder/crud-generator/src/stubs] To [/resources/crud-generator]Publishing complete for tag []! - Create a new class ‘Posts’ for our crud generator with two fields ‘title’ and
<OLD>
1php artisan crud:generate Posts --fields="title#string, body#text"
BUT I GOT THIS ERROR:
12345678teddy@teddy-K43SJ:~/Documents/works/laravel/latihan-crud$ php artisan crud:generate Posts --fields="title#string, body#text"Controller created successfully.Model created successfully.Migration created successfully.[ErrorException]Undefined index: string, body
</OLD
<NEW>
From this https://packagist.org/packages/appzcoder/crud-generator, I found the source of the error, I supposed to use ‘;’ (“title#string; body#text”) instead of ‘,’ (“title#string, body#text”) between the fields like this (DONT USE THIS COMMAND. THIS IS ONLY JUST A CORRECT COMMAND)
123456teddy@teddy-K43SJ:~/Documents/works/laravel/latihan-crud$ php artisan crud:generate Posts --fields="title#string; content#text; category#select#options=technology,tips,health" --view-path=admin --controller-namespace=Admin --route-group=adminController created successfully.Model already exists!Migration created successfully.View created successfully.Crud/Resource route added to /home/teddy/Documents/works/laravel/latihan-crud/routes/web.php
USE THIS COMMAND INSTEAD TO MAKE IT CONSISTENT WITH THE ORIGINAL TUTORIAL:
123456teddy@teddy-K43SJ:~/Documents/works/laravel/latihan-crud$ php artisan crud:generate Posts --fields="title#string; body#text"Controller already exists!Model already exists!Migration created successfully.View created successfully.Crud/Resource route added to /home/teddy/Documents/works/laravel/latihan-crud/routes/web.php
</NEW>
The script for the table migration would be exist in /database/migrations/ directory (IF YOU FIND MORE THAN ONE SCRIPT WITH SAME TABLE ‘Posts’ LIKE ‘2016_10_22_081014_create_posts_table.php’ AND ‘2016_10_22_074719_create_posts_table.php’, PLS REMOVE THE OLD ONE FIRST! OR WE’D GET THIS ERROR: “Cannot declare class CreatePostsTable, because the name is already in use”)
1234567teddy@teddy-K43SJ:~/Documents/works/laravel/latihan-crud$ php artisan migrateMigration table created successfully.PHP Fatal error: Cannot declare class CreatePostsTable, because the name is already in use in /home/teddy/Documents/works/laravel/latihan-crud/database/migrations/2016_10_22_075907_create_posts_table.php on line 33[Symfony\Component\Debug\Exception\FatalErrorException]Cannot declare class CreatePostsTable, because the name is already in use - Push the table script to our database with ‘php artisan migrate’
123teddy@teddy-K43SJ:~/Documents/works/laravel/latihan-crud$ php artisan migrateMigrated: 2014_10_12_000000_create_users_tableMigrated: 2014_10_12_100000_create_password_resets_tableMigrated: 2016_10_22_081014_create_posts_table
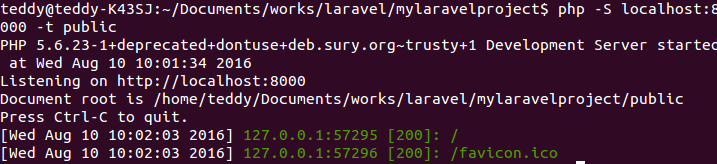
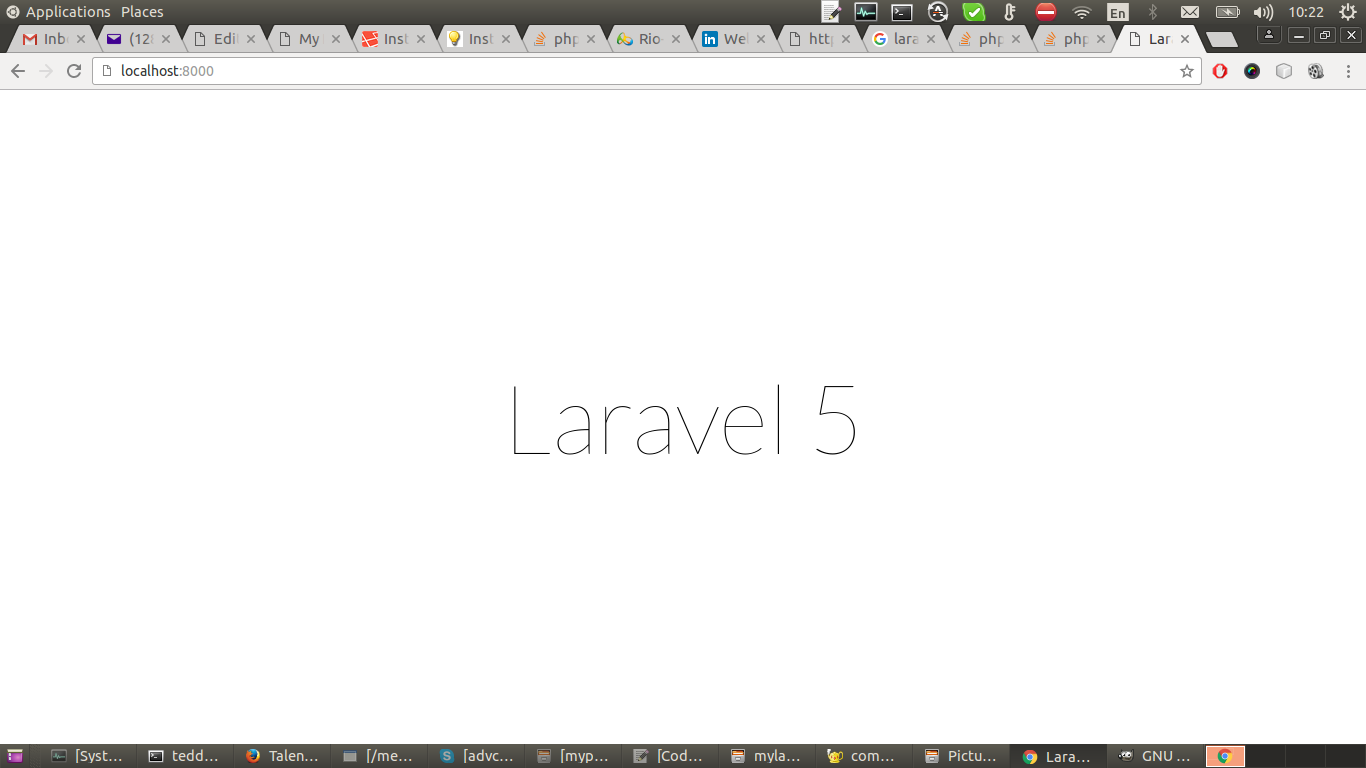
Check our database to make sure the new table ‘posts’ is already created! SOMEHOW THE OTHERS TABLES ‘migrations’, ‘users’ AND ‘password_resets’ ARE CREATED ALSO! - Test on the browser. Start the server: ‘php artisan serve’ then open on our browser : http://localhost:8000/ –> It shows the laravel welcome page!
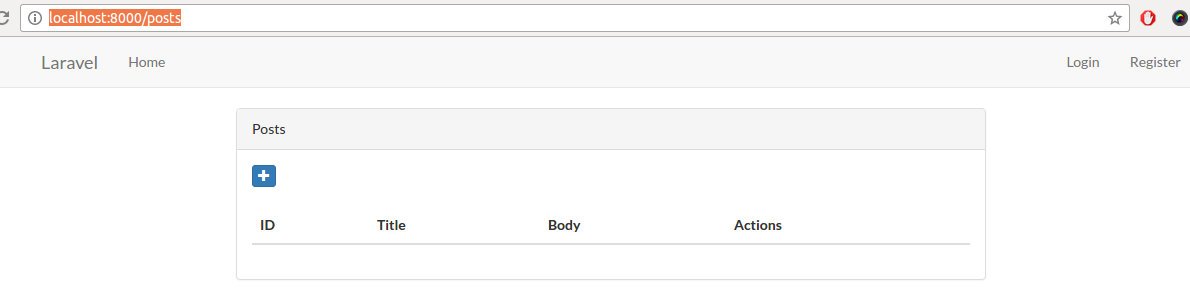
Remember, A new route ‘posts’ is already created automatically from previous step, so to see the CRUD in action, pls go to http://localhost:8000/posts
- Add new data.
Click the ‘+’ blue icon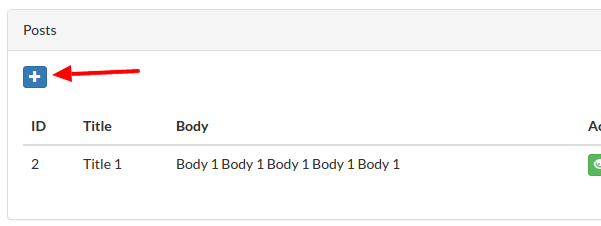 then fill the form with the fields ‘Title’ and ‘Body’. Then press ‘Create’ Button
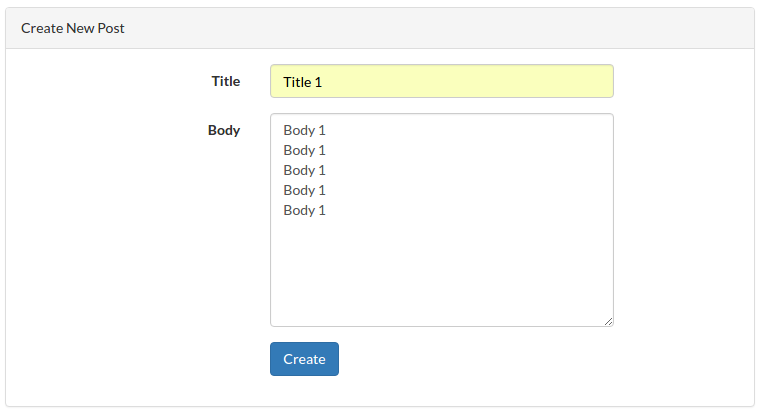 But I got this error:
1SQLSTATE[HY000]: General error: 1364 Field 'body' doesn't have a default value (SQL: insert into `posts` (`title`, `updated_at`, `created_at`) values (Title 1, 2016-10-22 09:27:24, 2016-10-22 09:27:24))
I found the solution! In ‘Post’ class in /app/Post.php, at ‘$fillable’ variable, It’s only has ‘title’ field But there is no ‘body’ field!
12345678910111213class Post extends Model{.../*** Attributes that should be mass-assignable.** @var array*/protected $fillable = ['title'];}
So add ‘body’ field like this:
123456789101112class Post extends Model{.../*** Attributes that should be mass-assignable.** @var array*/protected $fillable = ['title','body'];}
Then repeat the creation of new data! Here is the expected result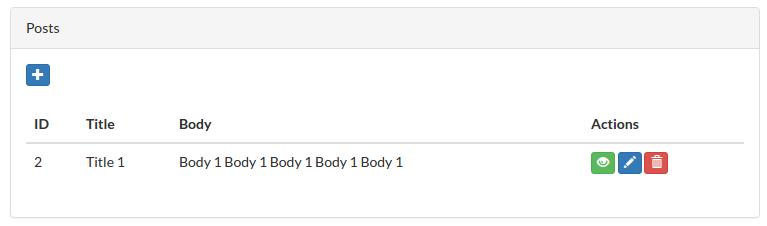 Membuat Login Laravel 5 2 dengan username dan Hak akses
 - At the right top of the page, there are two links ‘login’ and ‘register’ but none of them are working. To make them work, we need to create the authentication to create users like this: php artisan make:auth
12teddy@teddy-K43SJ:~/Documents/works/laravel/latihan-crud$ php artisan make:authAuthentication scaffolding generated successfully.
Dont forget to stop the server first by clicking CTRL+C!
The above command would create some views for login, register, password, etc. Please check them in /resources/views/auth/ directory!
This also create automatically a few new routes in /routes/web.php
1234...Auth::routes();Route::get('/home', 'HomeController@index'); - Now we can try them on our browser
Remember, we dont need to create/migrate the user table because we already did this at the previous step (#11) when we did the first migration!
Now the links ‘login’ and ‘register’ are working!
Here is the register page: http://localhost:8000/register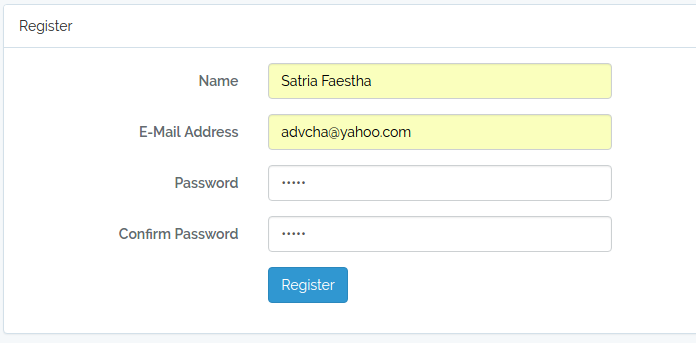 I use password: satria. Successful registration would be redirected to http://localhost:8000/home
 The links ‘login’ and ‘register’ also be showed up on the initial page http://localhost:8000/
 - Change/set default route ‘/’
In /routes/web.php, the default route for http://localhost:8000/ would go to the welcome page in /resources/views/welcome.blade.php. Here is the default route
123Route::get('/', function () {return view('welcome');});
We want to change it to go to our login page! We have the login page in /resources/views/auth/login.blade.php. So here is the modified route
12345Route::get('/', function () {//return view('welcome');return view('auth/login');//return redirect()->route('posts');});
Now each our homepage http://localhost:8000/ is opened, it’d open the login page!
If we want to set the default route to the post page, please modify /routes/web.php like this:
1Route::get('/', 'PostsController@index');
Now, if we open http://localhost:8000/, it’d show the list of the post page!
LEARN ALSO THIS:
Laravel Admin Panel
An admin panel for managing users, roles, permissions & crud.