Fotista Auction

Source: https://github.com/fotistas/fotista (Laravel 4.2)

Installation:

  1. Clone from https://github.com/fotistas/fotista


    Then go to ‘fotista’ directory
  2. Install required components:
  3. Create a database ‘auction’ via phpmyadmin
  4. Import the sql script ‘auction-20140823-0211.sql’ in ‘/sql archive/’ dir (extract the zip first).
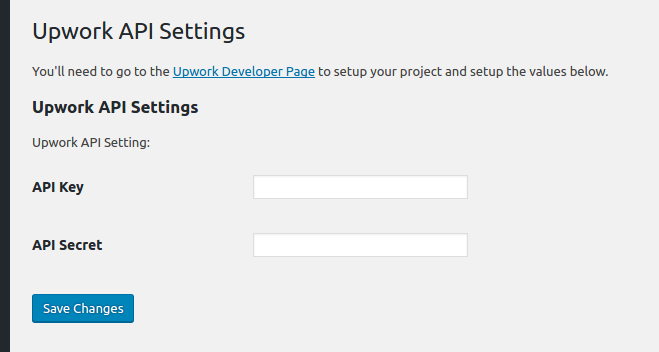
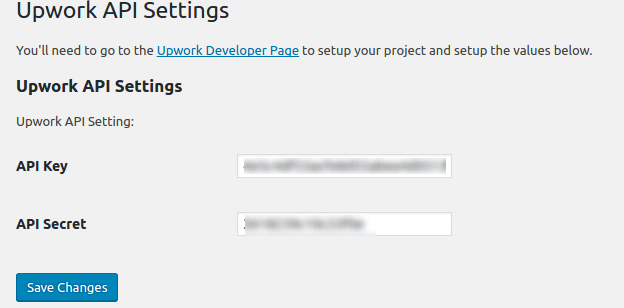
  5. Set a few configuration settings in /app/config/app.php like

    and the database (Laravel 4 dont use .env file to store the database setting) in /app/config/database.php

     
  6. generate the new key

     
  7. set file permission to 777 for /app/storage

     
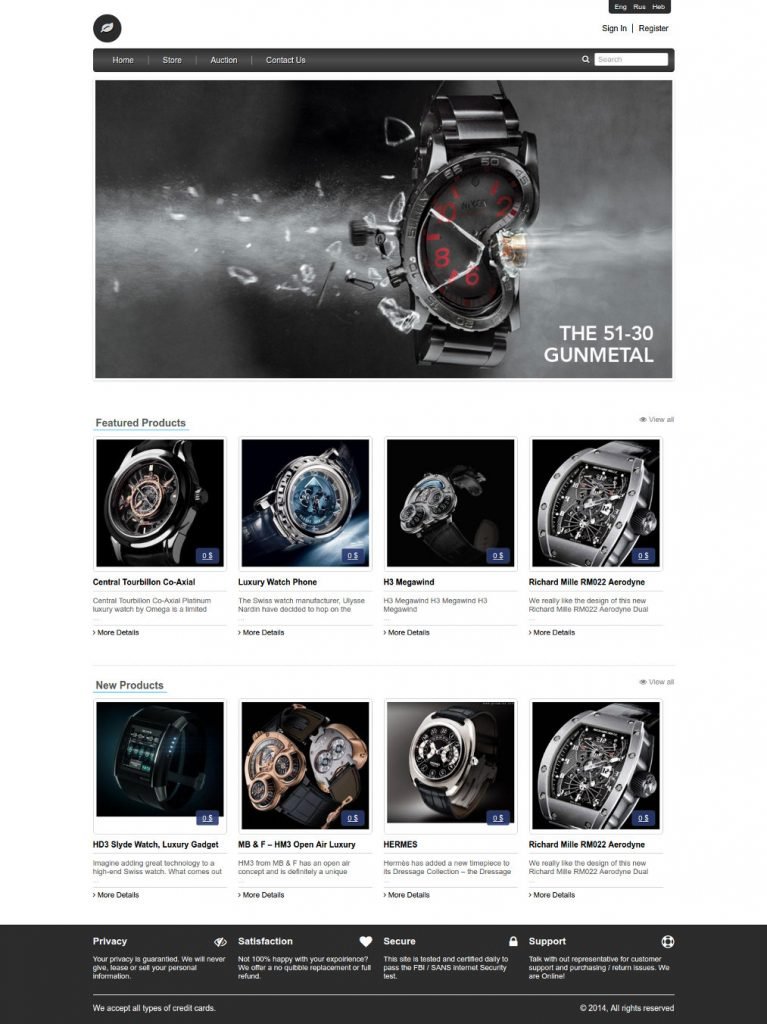
  8. Make some update on the database, especially for table ‘images’, I need to remove and replace ‘http:\\/\\/localhost\\/auction\\/public\\/uploads\\/’ in ‘images’ field because I just need the image name. No need the url. With this I can show the product image and the thumbnails. I did the replace in my text editor geany instead of on phpmyadmin because it’s easier to do it in geany. Also modified a few files to display the images and the thumbnails properly:
    in /app/views/home.blade.php, replace  ‘$product -> thumbnail’ to ‘{{ URL::to( ‘uploads/’ .  $product -> thumbnail) }}’ (TWICE) like this

    Also the same for /app/views/store.blade.php and /app/views/auction.blade.php. Same also for /app/views/product.blade.php BUT at ‘$product -> large’ like this:

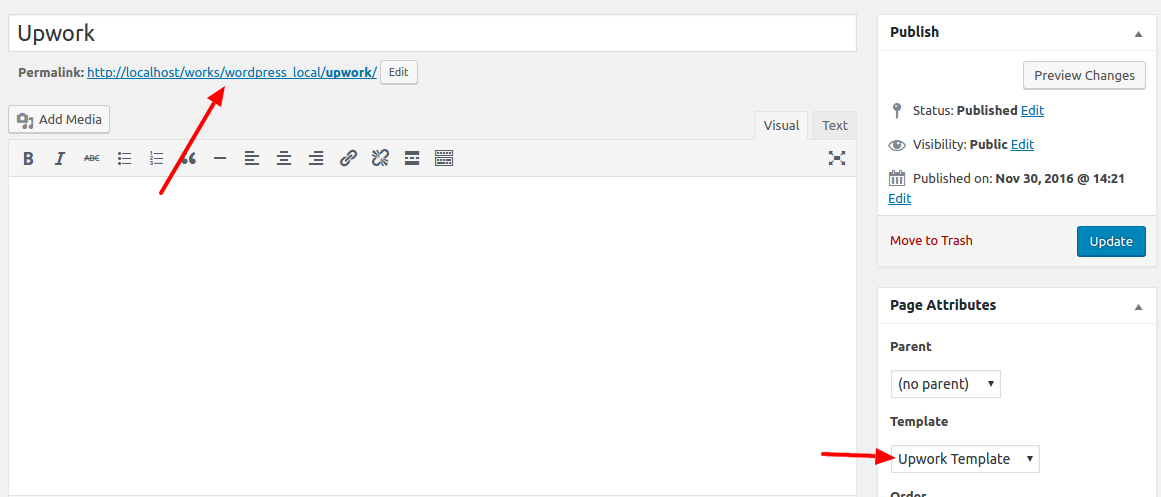
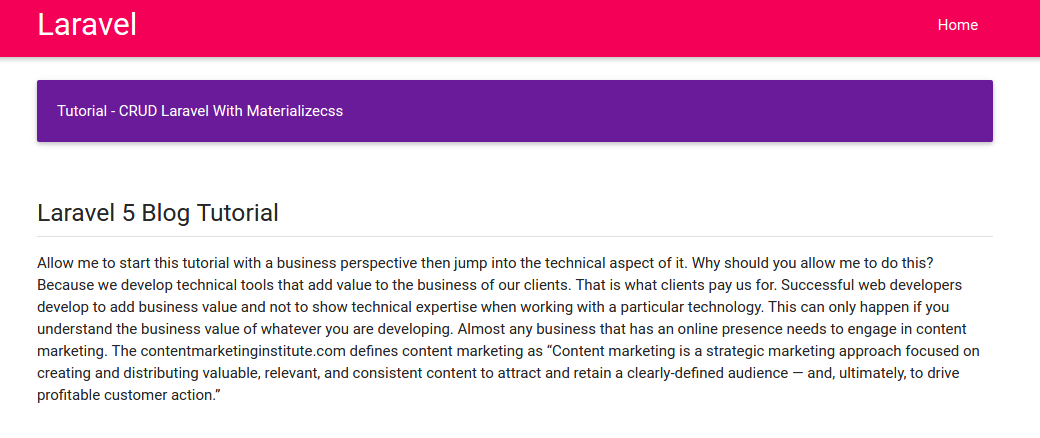
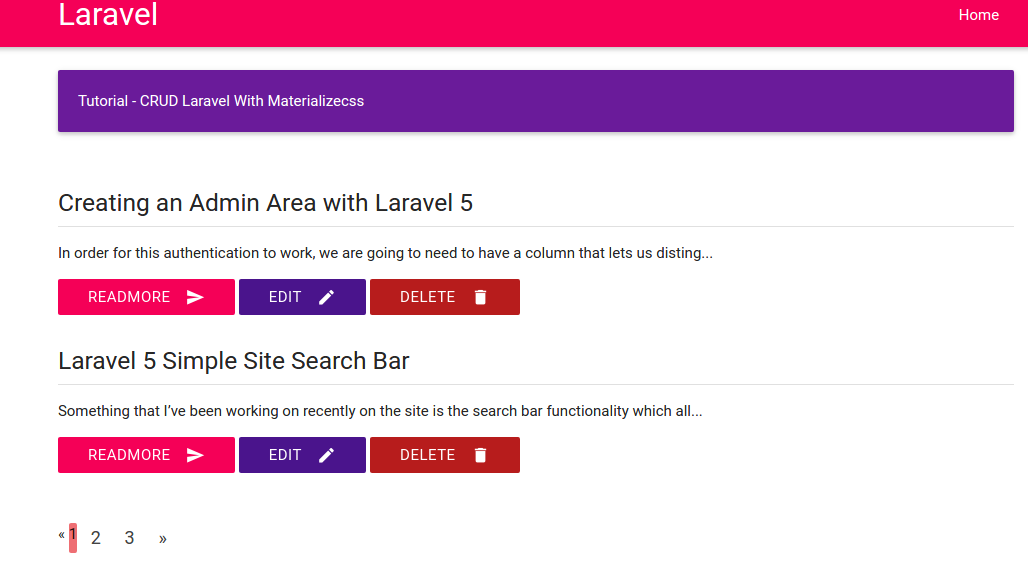
    Also the same for ‘admin’ page: /app/views/admin/products.blade.php, /app/views/admin/product.blade.php, /app/views/admin/auction.blade.php.
  9. Open it http://localhost/works/laravel/fotista/public/fotista-frontThe admin page http://localhost/works/laravel/fotista/public/admin/
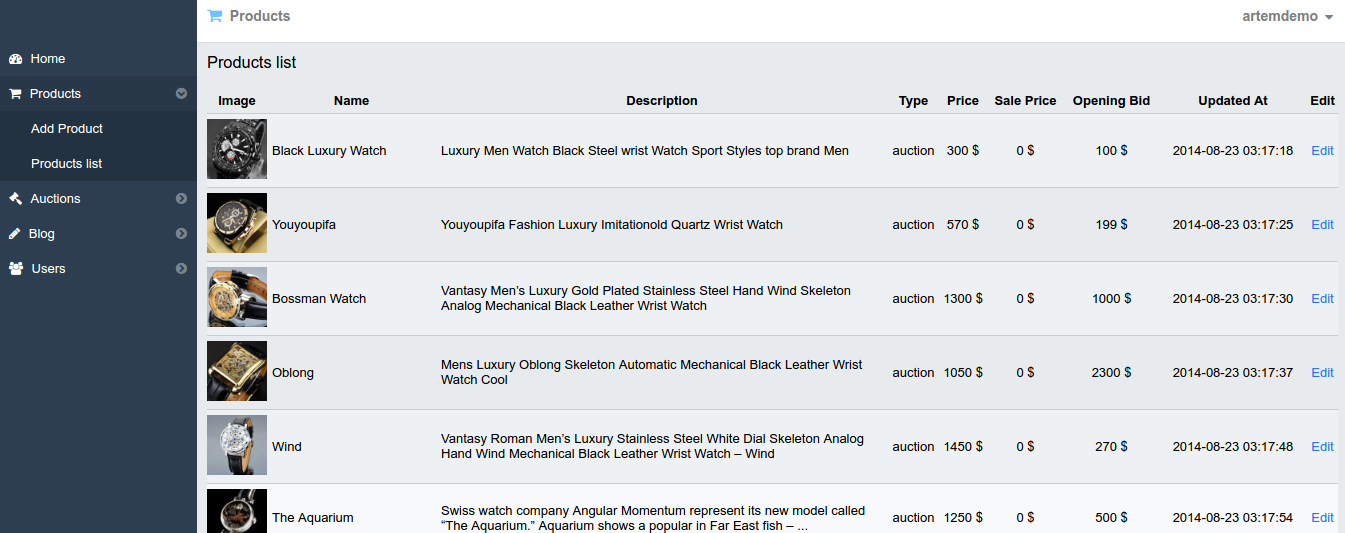
    http://localhost/works/laravel/fotista/public/admin/productsfotista-admin-productlist
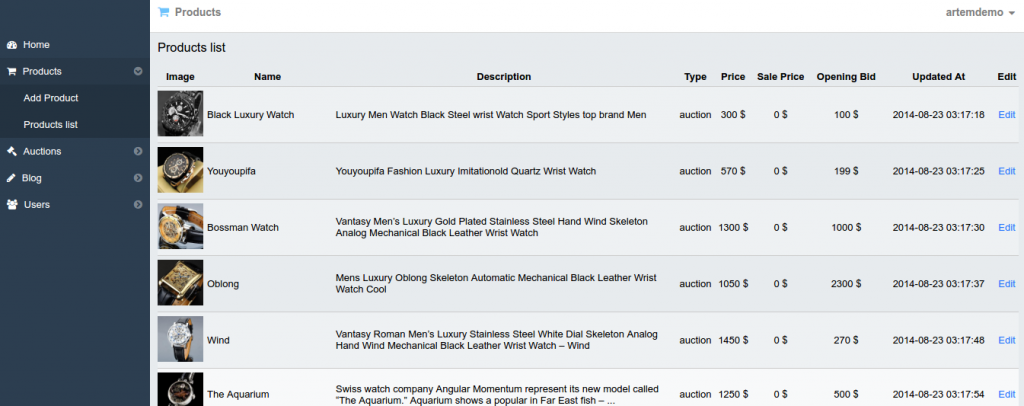
  10. SOME ERRORS & SOLUTION:
    The first time, I got this error:

    SOLUTION: It because I forgot to set the file permission at #7 (ref:http://stackoverflow.com/questions/24982598/laravel-error-in-exception-handler)
    NOTE: To get better debug environment, I need to set ‘debug’ to ‘true’ in /app/config/app.php!

    After that I got another error:

    SOLUTION: That because I forgot to set a new key like at #6 (ref:http://laravel.io/forum/04-22-2014-whoops-looks-like-something-went-wrong-with-new-installation)
    NOTE: For laravel 4, No need to create .env file like laravel 5
    Then I got another error:

    SOLUTION: I forgot to set the database setting in /app/config/database.php like at #5 (ref: http://laravel.io/forum/07-02-2014-sqlstatehy000-1044-access-denied-for-user-localhost-to-database-forge?page=1)

UNSOLVED ERROR:
When I tried to click ‘Auction started click here to open it’. It didn’t work. It did open a new page but do nothing. Just printed ‘Loading…’. From the console, it’s looking for a file in http://localhost/works/laravel/fotista/public/api/auction BUT THERE IS NO /public/api/auction DIR AVAILABLE!
The controller responsible for this is /app/controller/AuctionController.php, The view is /app/views/auction-app.blade.php and the javascript file in /public/js/auction-app.js
HOW TO MAKE THE AUCTION FULLY WORKS???? ESPECIALLY THE ANGULAR JS ‘auction-app.js’???
PLS TRY THIS GITHUB: https://github.com/yervand951/angular-auction
CONVERT TO LARAVEL 5 ???? ref: https://mattstauffer.co/blog/upgrading-from-laravel-4-to-laravel-5 and https://laravel.com/docs/5.0/upgrade.

Laravel Quiz

source: https://github.com/SAIBA0011/laravel-quiz

Description:

Laravel-Quiz functionality

Create a new quiz
Create quiz questions — single & multi Select
show quiz questions
Create quiz question options — Pending..
To be implemented

Finish quiz question options.
Change question position.
Change question option position.
Randomize question order on display page.
Track user attempts per quiz.
Allow user to take quiz.
allow user to complete quiz.
show quiz results on complete.

Installation:

  1. Create a new laravel project:

     
  2. Download the app from https://github.com/SAIBA0011/laravel-quiz. It’s better to donwload in zip file then extract the content in /works/laravel/quiz/ directory. Overwrite the existing files and directories.
  3. Install the laravel component required:

     
  4. Create a new database ‘laravel_quiz’ by phpmyadmin
  5. Use ‘php artisan migrate’ to create the tables.
    NOTE: I got this error when trying to do ‘migrate’
    “teddy@teddy-K43SJ:~/Documents/works/laravel/laravel-quiz$ php artisan migrate
    Migration table created successfully.[Illuminate\Database\QueryException]
    SQLSTATE[42000]: Syntax error or access violation: 1064 You have an error i
    n your SQL syntax; check the manual that corresponds to your MySQL server v
    ersion for the right syntax to use near ‘) on delete cascade’ at line 1 (SQ
    L: alter table quiz_results add constraint quiz_results_user_id_foreign
    foreign key (user_id) references users () on delete cascade)
    [PDOException]
    SQLSTATE[42000]: Syntax error or access violation: 1064 You have an error i
    n your SQL syntax; check the manual that corresponds to your MySQL server v
    ersion for the right syntax to use near ‘) on delete cascade’ at line 1 ”
    SOLUTION: At first, I did like in the articles http://stackoverflow.com/questions/26820788/add-on-delete-cascade-to-existing-column-in-laravel and http://stackoverflow.com/questions/28167329/laravel-migration-remove-ondeletecascade-from-existing-foreign-key on ‘2016_10_24_101046_create_quiz_results_table.php’ in /database/migrations/ directory BUT SOMEHOW IT DIDN’T WORK

    SO I JUST COMMENT THE ‘onDelete’ COMMAND

    THEN THE MIGRATIONS RUN WELL.
  6. generate the new key
  7. Install npm modules and gulp

    BUT SOMEHOW I GOT THIS ERROR ON ‘gulp’

    NO SOLUTION YET:
    I’VE TRIED FROM https://laracasts.com/discuss/channels/elixir/laravel-53-error-on-gulp-execution?page=1

    BUT FAILED AND GOT THIS ERROR

    I ALSO TRIED (DONT DO THIS BECAUSE I BROKE THE ENVIRONMENT BINDING!)

    BECAUSE OF THIS I GOT A HARDTIME AND SPENT MANY ERRORS TO FIX IT (http://stackoverflow.com/questions/37324519/node-sass-does-not-yet-support-your-current-environment-linux-64-bit-with-false) THROUGH THIS:

    BUT THE ERROR STILL PERSIST (ON GULP)! DONT KNOW HOW TO FIX IT!!!
    I READ gulpfile.js IN ‘laravel-quiz’ PROJECT DIFFERENT WITH IN ‘quiz’ PROJECT. THEREFORE ‘laravel-quiz’ PROJECT USE VUE!!!
  8. Test it live (http://localhost:8000)laravel-quiz-homeIT RUN WELL
  9. Errors & Solutions:
    When I want to see the quiz result by submitting the answer (http://localhost:8000/second-quiz/submit), I got this error:
    “ErrorException in QuizResultsController.php line 25:
    Trying to get property of non-object”
    SOLUTION: This is because I didn’t login first. Use http://localhost:8000/home to login/register (I’ve registered with email: ‘advcha@yahoo.com’ and password: ‘satria’) then take the quiz again and answer the above question. Then the result would be showed up like this:laravel-quiz-result
  10. Others samples for online quiz:
    http://practice.cappassessments.com/Nrt/NrtPage.html (Shows time to answer question, can drag up or down the answer options, not only can pick the answer, but also can type the answer). There is a job application in upwork for this kind of online quiz: https://www.upwork.com/jobs/_~01d2316bc1f3c2cb84/.

Quiz

source: https://github.com/sms516/quiz
online: http://dojang.nz/

Installation:

  1. Create a new laravel project:

     
  2. Download the app from https://github.com/sms516/quiz. It’s better to donwload in zip file then extract the content in /works/laravel/quiz/ directory. Overwrite the existing files and directories.
  3. Install the laravel component required:

     
  4. Import the database file (DB_SETUP.sql) along with the github.
    NOTE: ‘quiz_details’ table can’t be created because the field type ‘datetime CURRENT_TIMESTAMP ON UPDATE CURRENT_TIMESTAMP’ for ‘updated_at’ can’t be used. So replace ‘datetime’ with ‘timestamp’
  5. Set the file/folder permission for ‘storage’
  6. Test it live (http://localhost:8000/admin)

    WORKING!!!quiz-frontCAN’T SHOW http://localhost:8000/admin BUT CAN SHOW http://localhost:8000/admin/quiz/questionsquiz-admin-questionNOTE: Check the routes in /app/Http/routes.php. The routes are very limited! NO ROUTE FOR ADMIN???
  7. I found gulpfile.js in the root of the website, so I think I need to use npm and gulp to compile the saas:
    Use ‘npm install’ to install required modules

    Use ‘gulp’ to compile saas

    I DONT KNOW HOW TO DO NEXT OR HOW THE NPM AND GULP AFFECT THE WEBSITE! NEED TO LEARN ABOUT THESE!!!
  8. On the homepage ‘http://localhost:8000’, I clicked ‘Start Quiz’ button but I got NOT FOUND error (ajax error) at the chrome console. I found it is triggered by ‘onclick=”startQuiz()”‘ in /resources/views/quiz/view.blade.php and the javascript command in /public/js/functions.js. I NEED TO MODIFY A FEW SETTING IN functions.js file! First replace the ‘base_dir’ variable like below:

    FROM NOW ON, I HAVE TO USE ‘http://localhost/works/laravel/quiz/public/’ INSTEAD OF ‘http://localhost:8000’! FOR HOMEPAGE AND ‘http://localhost/works/laravel/quiz/public/admin/quiz/questions’ FOR ADMIN PAGE!
    NOW THE AJAX IS WORKING!! ‘Start Quiz’ button IS WORKING!
    Another errors detected:

    Sometimes I got unknow error when trying to edit the question (http://localhost/works/laravel/quiz/public/admin/quiz/question/376).
    Solution: I need to put ‘ini_set(‘display_errors’,1);’ in /app/Http/routes.php to enable to debug the errors. It seems the ‘storage’ directory HAS NOT BEEN SET THE PERMISSION. So make sure the step #5 is executed first!
  9. Improvements:
    Many links in the admin page can’t be opened or don’t have the correct routes. Here I want to fix or develop the links.
    Club Admin (http://localhost/works/laravel/quiz/public/admin/club)
    Add a new route in /app/Http/routes.php

    Create a new controller ‘ClubController.php’ in /app/Http/Controllers/

    The ‘Club’ model is already exist in /app/models/ directory! Here we want to show all the club in our database!
    The data would be showed up by /resources/views/club/view.blade.php like this:quiz-view-clubsAdd/Save New Club (http://localhost/works/laravel/quiz/public/admin/club/add)
    Add two new routes in /app/Http/routes.php

    Modify a controller ‘ClubController.php’ in /app/Http/Controllers/

    Add/modify a model ‘Club.php’ in /app/models/ directory:

    Add new model ‘MartialArt.php’ in /app/models/ directory:

    Add a new blade template ‘add.blade.php’ in /resources/views/club/ directory

    OK. then make a test at http://localhost/works/laravel/quiz/public/admin/club/add.quiz-add-clubI got this club sample from Kumgang Tae Kwon Do website. Then save the data by clicking ‘Add Club’. Here is the working result:quiz-club-savedEdit/Save Club (http://localhost/works/laravel/quiz/public/admin/club/edit/4)
    First I need to put ‘Edit’ link on the club admin page (http://localhost/works/laravel/quiz/public/admin/club). Modify ‘view.blade.php’ in /resources/views/club/ directory. Modify the header table to show/hide the needed field (add class ‘all’ to show and ‘none’ to hide)

    Then arrange the field width by defining the columns (‘columnDefs’) like this:

    So here is the new looksquiz-club-view-editTo make the ‘Edit’ links work, add two new routes in /app/Http/routes.php

    Then Modify ‘ClubController.php’ in /app/Http/Controllers/ dir:

    Add/Modify ‘edit.blade.php’ in /resources/views/club/ directory:

    OK. Now the Club admin can be used properly.
    NOTES: When I save the new club or the edited club, I don’t find the flash status to show the data is saved/updated successfully!
    HOW TO DELETE CLUB???

Sistem Informasi Sekolah (SIS)

Source: https://github.com/balitax/SI-Sekolah-L5

Installation: (the most steps is pretty same with Laravel Blog)

  1. Create a new laravel project:

     
  2. Download the app from https://github.com/balitax/SI-Sekolah-L5. It’s better to donwload in zip file then extract the content in /works/laravel/sis/ directory. Overwrite the existing files and directories.
  3. Install the laravel component required:

     
  4. edit .env file and fill the database account (DB name is sis)
  5. Import the database file (database_sekolah.sql) along with the github.
    Note: authentication scaffolding NOT RUN HERE! ERROR BUT NO PROBLEM
  6. Use ‘migration’ to add some new tables into the new database

     
  7. Dont forget to set the file permission in /public/ directory if we want to upload an image into it

     
  8. I found some errors when tried it for the first time. http://localhost:8000/login IS WORKING but CAN’T LOGIN. THE USER TABLE IN ‘tbl_kepegawaian’. BECAUSE I DONT KNOW THE ‘admin’ PASSWORD, I NEED TO UPDATE ‘password’ FIELD WITH ‘$2y$10$eWW.aZOeruiS1VEO0ghKHu7A7UoQcj2tVmLIcnw6JnrcsiljuOmYK’ –> ‘satria’. SO the ‘admin’ password is ‘satria’. NOW I CAN GO INTO THE ADMIN PAGE (dashboard, data sekolah, data siswa, galeri foto, absensi siswa, data pegawai, etc).
    THERE ARE SO MANY ERRORS (I CAN’T GO INTO THE WEBSITE ROOT OR http://localhost:8000/ BUT ONLY CAN GO TO http://localhost:8000/admin). ANYWAY IT’S GOOD AND I CAN SEE THE SCREEN!
    NOTES: pls study the routes in /app/Http/routes.php !

SOMETHING IS NEEDED TO FIX SOME ERRORS:

  1. Error when I want to acces the root http://localhost:8000/
    “FatalErrorException in Handler.php line 25:
    Uncaught TypeError: Argument 1 passed to App\Exceptions\Handler::report() must be an instance of Exception, instance of Error given, called in /home/teddy/Documents/works/laravel/sis/vendor/laravel/framework/src/Illuminate/Foundation/Bootstrap/HandleExceptions.php on line 73 and defined in /home/teddy/Documents/works/laravel/sis/app/Exceptions/Handler.php:25
    Stack trace:
    #0 /home/teddy/Documents/works/laravel/sis/vendor/laravel/framework/src/Illuminate/Foundation/Bootstrap/HandleExceptions.php(73): App\Exceptions\Handler->report(Object(Error))
    #1 [internal function]: Illuminate\Foundation\Bootstrap\HandleExceptions->handleException(Object(Error))
    #2 {main}
    thrown”
    SOLUTION: The error because I use PHP 7 (CLI) when I started the server (‘php artisan serve’). ref: http://stackoverflow.com/questions/36983734/laravel-fatalerrorexception-in-handler-php-line-25. So use php 5.6 instead when starting the server like this:
  2. Another error when accessing the root website:
    “FatalErrorException in FrontController.php line 42:
    Class ‘App\Models\Banner’ not found”
    SOLUTION: In /app/Http/Controllers/FrontController.php, comment a few lines:

    Because there is models available for them.
    Also in ‘index’ function, replace ‘bappeda’ with ‘web’

     
  3. Now, the root/front website can be displayed but the website can’t be loaded. User need to upload the logo manually from the admin page -> Setting (http://localhost:8000/admin/setting). But when I saved the input, This error is appeared:
    “QueryException in Connection.php line 624:
    SQLSTATE[42S22]: Column not found: 1054 Unknown column ‘peta_latitude’ in ‘field list’ (SQL: update tbl_setting set title_web = Sekolah Ku, desc_web = Sekolah Ku, key_web = sekolah, logo = lapVa94436orMdu892YPf3uSj931XM.png, facebook = , twitter = , gplus = , peta_latitude = , peta_longitude = , alamat = , no_telp = , no_fax = , email = where id_setting = 1)”
    SOLUTION: Modify tbl_setting in the database, then add these new fields: peta_latitude varchar(25), peta_longitude varchar(25), alamat text, no_telp varchar(25), no_fax varchar(25) and email varchar(25).
    Now the website logo can be displayedsis
  4. When I clicked one of the news (berita) like http://localhost:8000/baca/berita/2011-lembaga-pemerintah-sudah-harus-cicipi-open-source, I got this error:
    “InvalidArgumentException in FileViewFinder.php line 140:
    View [bappeda.berita_detail] not found.”
    SOLUTION: in /app/Http/Controllers/FrontController.php, Modify ‘berita’ function and replace ‘bappeda’ with ‘web’ and ‘berita_detail’ with ‘beritadetail’

     
  5. When I clicked one of the ‘Profil Sekolah’ links like http://localhost:8000/page/profil-sekolah, I got this error:
    “InvalidArgumentException in FileViewFinder.php line 140:
    View [bappeda.halaman] not found.”
    SOLUTION: SAME WITH ABOVE, Modify ‘halaman’ function in FrontController.php and replace ‘bappeda’ with ‘web’:
  6. Some links still shows error like for ‘pengumuman’ (http://localhost:8000/baca/pengumuman/pembagian-raport-semester-ganjil-tahun-ajaran-2010-2011) –> check the route and make sure the model is exist
    SOLUTION: There is no ‘pengumuman’ route, so add them (also for pengumuman index and detail) in /app/Http/routes.php like this:

    Then in FrontController.php, like above replace ‘bappeda’ with ‘web’ for ‘pengumumanlist’ and ‘pengumuman’ functions:

     
  7. For Galleri menu, do this:

     
  8. Some pages in the admin (http://localhost:8000/admin) still can’t be showed up properly (some weirds characters appeared!)

Laravel Blog

  1. Create a new laravel project:


  2. Download the ready made laravel blog app from https://github.com/jacurtis/laravel-blog-tutorial. It’s better to donwload in zip file then extract the content in /works/laravel/laravel-blog-tutorial/ directory. Overwrite the existing files and directories.
  3. Install the laravel component required:


  4. edit .env file and fill the database account (DB name is laravel_blog)
  5. Create authentication scaffolding (login, register, forgot password, etc)
  6. Use ‘migration’ to add some new tables into the new database

    It should be ready to test the website.
  7. Dont forget to set the file permission in /public/ directory if we want to upload an image into it
  8. Test the website: http://localhost:8000/

    If i found an error like:

    Just stop the server then generate the new key:

    It’d create a new key in .env like

    ref: http://laravel.io/forum/08-25-2016-no-supported-encrypter-found-the-cipher-and-or-key-length-are-invalid-when-i-run-keygenerate.
    Then start the server back. If everything is okay, here is the screen look like:blog-tutorialSometimes you got an error about the file permission writeable or not like this

    Then you need to set the file permission in /public/ directory to 777

    Explore the Laravel Blog!!! (Add/edit users, add/edit posts, categories, tags, comments, send contact, login, register)
    If you have enough time to learn the nitty-gritty about laravel and how to create this blog step by step, then please watch this 47 youtube videos in How to Build a Blog with Laravel.
  9. NOTES about this app:
    The route file DONT lay in /routes/web.app BUT in /app/Http/routes.php. It used Route::group.

    The route for the root website (/) is pointing to ‘PagesController.php’ in /app/Http/Controllers/

    The ‘Post’ data is retrieved with a help from ‘Post’ model in /app/Post.php. The data then would be rendered by welcome.blade.php in /resources/views/pages/

Elance API on WordPress Without WP Plugin

Elance has gone now and merged with Odesk to establish a new company Upwork. Once I successfully used Elance API on my wordpress website without using wordpress plugin. I know it’s a bad practice but it’s work anyway. Here is how to do it:

  1. Make sure you already registered on elance (https://elance.com) and have any elance key. If not go to https://developers.elance.com and get the keys (API Key, API secret, redirect URL, etc). Here is the keys:
    SORRY, ONLY ADMIN CAN SHOW THIS!
  2. I created a new wordpress template page with name ‘My Elance Jobs’ in a new file ‘my_elance_page.php’ in the active wordpress theme (currently the active theme is Sorbet). Based on some PHP example to use Elance API, Here is the complete content:

    Just read the code. Try to comprehend it by yourself :). I also need to add a new file ‘elance-auth-lib.php’ for the elance API PHP wrapper in the same directory. The class ‘ElanceAuthentication’ in the file would authenticate the access to the API.

     
  3. On the wordpress admin, create a new page (not post) with title ‘Elance’ then use template ‘My Elance Jobs’ then Save! It would create a new url: http://www.advchaweb.com/elance/. The url is must be same with our redirect url above!elance-api
  4. OK. Now we can use the API from our wordpress page.wp-elanceJust click the link ‘Elance’ or http://www.advchaweb.com/elance
  5. First, It’d redirect us to elance page and please log in!elance-loginSORRY, ONLY ADMIN CAN SHOW THIS!
  6. After successful login, I supposed to get the authorization page but because it is already closed, I got this page instead 🙁elance-closedSOMEHOW when I click the ‘Continue to Elance’ button, I still get the authorization page!!!
    SORRY, ONLY ADMIN CAN SHOW THIS!elance-authOK. Click ‘Allow’ button
  7. It would be redirected back to my wordpress page. Because there is no job anymore on elance, I got no data!elance-redirectSORRY, ONLY ADMIN CAN SHOW THIS!


WordPress Plugin to Connect to Upwork API

Ref: APIS, WORDPRESS TIPS AND TRICKS, USING OAUTH IN WORDPRESS PLUGINS, PART 1: THE BASICS
       How to write a WordPress plugin

  1. Make sure you already registered on Upwork (https://upwork.com) and have any Upwork key. If not go to https://developers.upwork.com and get the keys (API Key, API secret, redirect URL, etc). Apply for the API on https://www.upwork.com/services/api/apply
  2. Go into the plugin directory (/wp-content/plugins/) then create a new directory ‘upwork’. then in the new directory, create a new file ‘upwork.php’
  3. Here is our first content in upwork.php file

    From here, we can see the plugin ‘Upwork’ in the wordpress admin -> plugin Then please ‘Activate’ it.wp-plugin-upwork
  4. Create a class ‘WP_Upwork’ and instantiate it in upwork.php file
  5. Add the setting page
    To add the setting page, we need to add actions and callback in constructor of WP_Upwork class.

    First we set and register the Upwork setting (API Key and Secret) in WP_Upwork class:

    Then we add the menu ‘WP Upwork Setting’ in the Settings menu. Let’s add some code in WP_Upwork class:

    Okay. Here is the menuwp-plugin-upwork-menuAnd here is the ‘Upwork API Settings’ page (http://localhost/works/wordpress_local/wp-admin/options-general.php?page=wp_upwork)wp-plugin-upwork-admin-page
  6. Save the settings
    Fill the API Key and API Secret data above given by upwork then click ‘Save Changes’wp-plugin-upwork-settingsThe above values would be saved in the database at ‘wp_options’ table. You can see them in the table like this:wp-plugin-upwork-settings-dbHere is my Upwork API Settings:SORRY, ONLY ADMIN CAN SHOW THIS!
  7. Add Setting link next to activate/deactivate link in the plugin management list.
    In the WP_Upwork class constructor, add filter ‘plugin_action_links’ like this line:

    Then define the function ‘add_settings_link’ in the WP_Upwork class:

    Here is the result looks like:wp-plugin-upwork-settings-link
  8. Refactor our plugin structure a bit. Create a new directory ‘includes’ and add a new file in it ‘settings.php’. I want to move the settings in to the file to make the plugin structure better (Please learn WordPress plugin boilerplate and read How to Build a WordPress Plugin (part 1)).
    Here is the content of /includes/settings.php:

    And here is our main plugin file ‘upwork.php’ content:

    Somehow I can’t put the filter ‘plugin_action_links_’ . plugin_basename(__FILE__)’ in ‘WP_Upwork_Settings’ class! The setting link can’t be displayed in the plugin main list!
  9. Now I want to connect to Upwork API with My API key and API Secret provided by Upwork. When the connection is success, I would get the access token! I need to store the token to get more access from Upwork like searching the jobs and many more.
    NOTE: I MADE A WRONG THING HERE! WHAT I THOUGHT AS ACCESS TOKEN ACTUALLY IS A REQUEST TOKEN! AND FINALLY IT’S NOT WORKING FROM HERE #9 UNTIL #13
    Modify /includes/settings.php to show the token below the API Key and Secret (The token must be from Upwork so I dont have to type it manually). The screnario is every ‘Save’ button is pressed, beside the keys, the token would be updated as well. So in ‘WP_Upwork_Settings’ class constructor, add this:

    Then show the label for the access token in ‘admin_init’ and ‘settings_field_label’ function:

    Modify ‘plugin_settings_page’ function to add a new hidden value ‘wp_nonce_field’ and change the button title to ‘Save and Get Access Token’.

    The hidden value would be submitted and be caught to inspect the keys and get the access token in ‘get_access_token’ function.

    There is an important setting to pass the configuration beside ‘consumer key’ and ‘consumer secret’, it’s ‘authType’. I tried ‘OAuth1’ but it didn’t work. the work is ‘OAuthPHPLib’.
  10. Use composer to download the Upwork API for PHP (https://github.com/upwork/php-upwork). Create a new composer.json file in our main plugin directory. Here is the content:

    Now use terminal and download the API PHP library

    This would create a new directory ‘vendor’ in the main our plugin directory. The API would be there!
    Read how to use autoload and composer for developing wordpress plugin: Improving WordPress Development Workflow with Composer, Managing Your WordPress Site with Git and Composer Part 2 – Using Composer to Manage Themes and Plugins and How To Use Autoloading And A Plugin Container In WordPress Plugins.
  11. We need to add the autoload in upwork.php file so we can use the API library:

    With this only single line, we dont need to include/require the API library manually like this (/includes/settings.php at ‘admin_post’ function):
  12. Here is how it lookswp-plugin-upwork-tokenWhen the button is pressed,  if nothing wrong the access token and the access token secret would be revealed like this:SORRY, ONLY ADMIN CAN SHOW THIS!
  13. Now I want to store the tokens values in database so later we can get the values and use its for Upwork API functions.
    Modify ‘get_access_token’ function in /includes/settings.php file to get the tokens and save its. I use ‘update_option’ function to do its (https://codex.wordpress.org/Function_Reference/update_option)

    If everything right, here is how it would looks likewp-plugin-upwork-get-token2<OLD>
    You can also check the tokens values. Not only the value for access token (‘wp_upwork_access_token’) but also for access token secret’s value (‘wp_upwork_access_token_secret’). No reason to display the secret’s value here.
    </OLD>
    <NEW>
    Actually I GOT THE REQUEST TOKEN ABOVE NOT THE ACCESS TOKEN!! SO UPWORK GAVE REQUEST TOKEN FIRST THEN GIVE BACK THE ACCESS TOKEN IF SUCCESS!
    READ THIS FOR THE WORKFLOW: https://developers.upwork.com/?lang=php#authentication_oauth-10
    </NEW>
  14. I tried to get the access token (actually I just realized I got the request token not the access token)
    I MODIFY ‘get_access_token’ function

    LIKE I SAID ABOVE, IT DIDN’T WORK

    wp-plugin-upwork-authwp-plugin-upwork-auth-accesswp-plugin-upwork-auth-no-pagehttps://www.upwork.com/services/api/www.advchaweb.com/upwork?oauth_token=708638d60eee72f4c7c133a2617b15ef&oauth_verifier=b57428447a10ef831db125a1c9f6e648
    IT SHOULD BE LIKE:
    http://localhost/works/wordpress_local/wp-admin/options-general.php?page=wp_upwork&oauth_token=63c1ab57d81ef2a120dc122255f252fd&oauth_verifier=4601823dab3c049d2d71be0f76a48a7cUNTIL HERE, IT’S NOT WORKING AS EXPECTED. I NEED TO TRY THIS SAMPLE https://github.com/upwork/php-upwork/blob/master/example/web.php
    I MAKE THE SAMPLE LOCALLY: http://localhost/works/upwork_api/ AND IT’S WORKING FOR THE FIRST TIME (NOT WORKING AFTER THAT. MEANS NO DATA CAN I GET FROM UPWORK!!!)
    SORRY, ONLY ADMIN CAN SHOW THIS!
    After a few hours I tried again to call the Upwork API via http://localhost/works/upwork_api AND it’s working again. Actually to get the access token and call a function (like User), it takes four web call.
    SORRY, ONLY ADMIN CAN SHOW THIS!

  15. Because I failed to get the access token from ‘get_access_token’ function, I tried to use Custom Page Template (Please read Add Page Templates to WordPress with a Plugin) like I used to use it for Elance API. But it different here. I dont have to inject the php file in the active theme. I can use it from my plugin!
    Okay. I need to clean my code and remove the previous changes above (from #9 and #14) about the tokens field and the ‘get_access_token’ function.
    SORRY, ONLY ADMIN CAN SHOW THIS!
    SO I BACK TO THE PREVIOUS CODE WHERE THE WP_Upwork plugin in the admin page only to store API Key and API Secret!
    Back to our custom page template, create a new file ‘template.php’ in /includes/ directory. this file would consist of a class ‘WP_Upwork_Template’. This class would get the template file, show it on the page/post page dropdown template and render/view it.

    The template name is in a file ‘upwork-template.php’ in the same directory (/includes/). this file is the main page to connect to Upwork API (authenticate, authorize/get access token and call the Upwork API functions). This content looks like same with https://github.com/upwork/php-upwork/blob/master/example/web.php. Only API key and API secret I got from database. For a test only and to prove it can work as expected, here is the file content:

    The template name is ‘Upwork Template’
  16. Then create a new page ‘Upwork’ and select the template ‘Upwork Template’wp-plugin-upwork-templateOkay. One more thing. It’s better to change the permalink of our page url to http://localhost/works/wordpress_local/upwork/ instead of http://localhost/works/wordpress_local/?p=123. To do this, please go to Settings -> Permalinks -> Select ‘Post name’ Then Click ‘Save Changes’. It’d change the page url like above. BUT if you open the link and show 404 error, it means something wrong on your .htaccess or the permission or the apache2 setting. I tried many thing from

    or

    BUT NOTHING IS WORKING. IT’S FINALLY WORKING IS FROM http://askubuntu.com/questions/48362/how-to-enable-mod-rewrite-in-apache. I need to put ‘AllowOverride All’ in the default apache2 configuration file:

    Then add these lines:

    Then restart apache2 server.
    Okay. It’s working now. It can open http://localhost/works/wordpress_local/upwork correctly. ALSO DON’T FORGET TO CHANGE AND SAVE Callback URL IN UPWORK API PAGE (https://www.upwork.com/services/api/keys).
    SORRY, ONLY ADMIN CAN SHOW THIS!
  17. Modify ‘upwork-template.php’ so we can save the access token and no need to get new token each API call. I tried like this:

    THE RESULT CAN’T BE EXPECTED BECAUSE UPWORK SERVER IS NOT RELIABLE ENOUGH!!!!. THIS SUPPOSED TO WORK BUT I GOT THIS ERROR

    IT’S REALLY EMBARRASSING. I NEED TO WAIT A FEW HOURS TO TRY IT AGAIN!
    OKAY. IT’S WORKING NOW. I MODIFIED ‘upwork-template.php’ file like this:

    With this changes, I can store the access token in database when it haven’t it yet and use the tokens from repeat Upwork API call without having to get the new token. From https://developers.upwork.com/?lang=php#authentication_get-access-token, IT SAID “Once created, the Access token never expires.”.
    NOTE: the ‘config’ parameters is different when we already have the tokens. it no need the ‘request token’ anymore (see above code at if($access_token && $access_token_secret){) .
    NOTE: I also need to clear the sessions if there is any error related with the Upwork API occured. I think it’d be better to put a new button ‘Reset Access Token’ on the WP Upwork admin settings. The button would empty the tokens values in the database. This would give a chance to get the new token and fix the errors. The button would also be responsible to clear the sessions!
    This is a screenshots of the Upwork API to display job listing by some criteria. wp-plugin-upwork-jobsNOTE: SOMEHOW I CAN’T MANAGE HOW TO GET THE RESULT MORE THAN 10 DATA
    NEXT: HOW TO CATCH ANY ERROR FROM THE UPWORK API???
    CREATE a new button ‘Reset Access Token’ on the WP Upwork admin settings.
  18. SOME ERROR HAS HAPPENED. HERE THEY ARE AND THE SOLUTIONS:

    SOLUTIONS: Clear the sessions and empty the tokens values in the database then refresh the page again!
  19. Now, I already put the source code in my github repository: https://github.com/advcha/upwork.

Laravel Socialite

Source: https://github.com/laravel/socialite

I want to practice ‘socialite’ app given by Laravel 5.3 documentation. Installation:

  1. Open hosts file and Add a new domain ‘socialite.app’ at the file

    Add this line in the file:
  2. Edit ‘Homestead.yaml’ file in ~/.homestead/ to add the new domain ‘socialite.app’ and set the mapping
  3. Start vagrant with ‘vagrant up’ or if it already started up, refresh it with ‘vagrant provision’ then go into the ssh with ‘vagrant ssh’
  4. Go into ‘Code’ directory then create a new laravel project ‘socialite’
  5. Test it at our browser with http://socialite.app/. If the laravel screen is showed up, we are on the right path.
  6. Go into the new project ‘socialite’ root directory then add a dependency ‘laravel/socialite’

     
  7. Configuration
    After installing the Socialite library, register the Laravel\Socialite\SocialiteServiceProvider in your config/app.php configuration file:

    Also, add the Socialite facade to the aliases array in your app configuration file:

     
  8. You will also need to add credentials for the OAuth services your application utilizes. These credentials should be placed in your config/services.php configuration file, and should use the key facebook, twitter, linkedin, google, github or bitbucket, depending on the providers your application requires. For example for facebook credentials:

    we will use env file (.env) to store facebook credentials.

    SORRY, ONLY ADMIN CAN SHOW THIS!
    REMEMBER ‘http://socialite.app/auth/facebook/callback’ IS CALLBACK URL (AFTER THE SUCCESSFUL LOGIN ON FACEBOOK). ALSO IT MUST MATCH WITH ROUTE ‘auth/facebook/callback’ IN /routes/web.php LATER!
  9. Basic Usage
    Next, you are ready to authenticate users! You will need two routes: one for redirecting the user to the OAuth provider, and another for receiving the callback from the provider after authentication. We will access Socialite using the Socialite facade. Please create a new controller file ‘AuthController.php’ in /app/Http/Controllers/Auth/ to work with facebook login:

    NOTE: DONT FORGET TO ADD ‘use App\Http\Controllers\Controller;’ BEFORE ‘use Socialite;’ BECAUSE I GOT AN ERROR ABOUT IT!
  10. Creating Views. Create two new blade files. They are /resources/views/home.blade.php and /resources/views/master.blade.php:
    master.blade.php:

    home.blade.php:

    url(‘/auth/facebook’) would redirect the page to facebookpage!
  11. Set the routes. Edit /routes/web.php like this:

    We set the root (‘/’) url would open the home page (home.blade.php)
  12. Test it! http://socialite.app/
    Here is the screensocialite-homeIf we click ‘Facebook’ link, it would redirect us to facebook page. The url would be like this: https://www.facebook.com/v2.8/dialog/oauth?client_id=166568033366882&redirect_uri=http%3A%2F%2Fsocialite.app&scope=email&response_type=code&state=es6ub834Woh7xDxTvdqru84U7kwiRJkftD83HFz7
    If I get this pagesocialite-fb-page Then I need to modify my facebook app to add this domain (http://socialite.app/) at ‘Site URL’ box. To do it, Open your app from https://developers.facebook.com/apps, then Click your app. Then at Settings->Basic->at Site Url fill with this domain name: http://socialite.app/. Then Save and fix any error.
    SORRY, ONLY ADMIN CAN SHOW THIS!
    Here is the oauth2 output from facebook for successful login:
    SORRY, ONLY ADMIN CAN SHOW THIS!
    Here is the callback result the successful facebook loginsocialite-fb-callback
  13. How to add the others social links (twitter, github, google plus and linkedin)?
    Please read Complete Laravel 5 Socialite tutorial to find out how to do it.
    You need to setup your apps for the above social app to get the credentials like Client ID and Client Secret and the redirect URL.
    To setup Google+ app, please read Google APIs
    To setup twitter app, please read Twitter Socialite App
    To setup github app, please read Github App
    To setup linkedin app, please read Linkedin Oauth2 App
    Then modify .env file to include above credentials:
    SORRY, ONLY ADMIN CAN SHOW THIS!
  14. Here I want to make the redirect URL to be uniform like this:

    So modify our social routes in /routes/web.app like this:

     
  15. Modify /config/services.php to get all the credentials from .env file

     
  16. Modify /resources/views/home.blade.php to include all the social app
  17. Modify /app/Http/Controllers/Auth/AuthController.php to add a parameter $provider
  18. Run on your browsersocialite-home-mutiLogin via Facebook RUN WELL LIKE BEFORE!
    Login via Twitter, For the first time we are needed to authorize the applicationsocialite-twitter-autorizeClick ‘Authorize app’. If nothing wrong, here is the callback resultsocialite-twitter-callbackSORRY, ONLY ADMIN CAN SHOW THIS!
    Login via Google, For the first time we are needed to authorize the applicationsocialite-google-autorizeClick ‘Izinkan’. If nothing wrong, here is the callback resultsocialite-google-callback SORRY, ONLY ADMIN CAN SHOW THIS!
    Login via Github, For the first time we are needed to authorize the applicationsocialite-github-autorizeClick ‘Authorize application’. If nothing wrong, here is the callback resultsocialite-github-callbackSORRY, ONLY ADMIN CAN SHOW THIS!
    Login via Linkedin, For the first time we are needed to authorize the applicationsocialite-linkedin-autorizeClick ‘Allow’. If nothing wrong, here is the callback resultsocialite-linkedin-callbackSORRY, ONLY ADMIN CAN SHOW THIS!
  19. OKAY! EVERYTHING RUN WELL. THE NEXT STEP IS TO USE DATABASE/SESSION TO SAVE THE LOGIN INFORMATION!
    For this, please read : Laravel 5.2 Socialite Facebook Login and Using Github authentication for login with Laravel Socialite.

Laravel Homestead VirtualBox Vagrant

Url: https://laravel.com/docs/5.3/homestead
       Quick Tip: Get a Homestead Vagrant VM Up and Running
       Getting Started with Laravel Homestead

Introduction
Laravel strives to make the entire PHP development experience delightful, including your local development environment. Vagrant provides a simple, elegant way to manage and provision Virtual Machines.

Laravel Homestead is an official, pre-packaged Vagrant box that provides you a wonderful development environment without requiring you to install PHP, a web server, and any other server software on your local machine. No more worrying about messing up your operating system! Vagrant boxes are completely disposable. If something goes wrong, you can destroy and re-create the box in minutes!

Homestead runs on any Windows, Mac, or Linux system, and includes the Nginx web server, PHP 7.0, MySQL, Postgres, Redis, Memcached, Node, and all of the other goodies you need to develop amazing Laravel applications.

Installation:

  1. Install VirtualBox (https://www.virtualbox.org/wiki/Linux_Downloads)
  2. Install Vagrant (https://www.vagrantup.com/downloads.html)
  3. Installing The Homestead Vagrant Box

     
  4. Installing Homestead

    Please check ‘Homestead’ directory at Home (/home/teddy)
  5. Once you have cloned the Homestead repository, run the bash init.sh command from the Homestead directory to create the Homestead.yaml configuration file. The Homestead.yaml file will be placed in the ~/.homestead hidden directory:


  6. Configuring Homestead. Setting Your Provider
    The provider key in your ~/.homestead/Homestead.yaml file indicates which Vagrant provider should be used: virtualbox, vmware_fusion, or vmware_workstation. You may set this to the provider you prefer:

    Here is the file content looks like:

     
  7. Configuring Shared Folders
    I prefer to let it as is (please see ‘folders’ in ~.homestead/Homestead.yaml file above) –> DON’T DO THIS, IF ‘map’ VALUE STILL ‘~/Code’, PLEASE MODIFY IT (CHECK YOUR WEB DIRECTORY IS BETTER) BECAUSE I GOT THIS ERROR:

    MODIFY IT TO ‘~/Documents/works/laravel’ LIKE THIS:
  8. Configuring Nginx Sites
    I prefer to let it as is (please see ‘sites’ in ~.homestead/Homestead.yaml file above)
    If you change the sites property after provisioning the Homestead box, you should re-run vagrant reload –provision to update the Nginx configuration on the virtual machine.
  9. Configure SSH Key (IF NOT EXIST IN /home/teddy/.ssh/)
  10. The Hosts File
    You must add the “domains” for your Nginx sites to the hosts file on your machine. The hosts file will redirect requests for your Homestead sites into your Homestead machine. On Mac and Linux, this file is located at /etc/hosts.

    Add this line in the file:

    Make sure the IP address listed is the one set in your ~/.homestead/Homestead.yaml file. Once you have added the domain to your hosts file and launched the Vagrant box you will be able to access the site via your web browser:
  11. Launching The Vagrant Box
    Once you have edited the Homestead.yaml to your liking, run the vagrant up command from your Homestead directory. Vagrant will boot the virtual machine and automatically configure your shared folders and Nginx sites.

    BUT I GOT THIS ERROR:

    SOLUTION: (ref: Problem launching vagrant on Homestead)
    From this error

    I didn’t find ‘id_rsa’ file in /home/teddy/.ssh/ directory. I need to configure my SSH location like this:

    SEE MY MODIFICATION AT #9.
    Then I run ‘vagrant up’ again. BUT GOT ANOTHER ERROR:

    SOLUTION: (ref: Vagrant: The host path of the shared folder is missing)
    SEE MY MODIFICATION AT #7 ABOVE!
    RUN ‘vagrant up’ again! SUCCESS:

    WE CAN SEE VAGRANT INSTALLED ALSO PHP, NGINX, MYSQL, POSTGRESQL,ETC.
    Or you can see it from VirtualBox (Open Applications -> System Tools -> Oracle VM VirtualBox)vagrant-vmTHIS GUI MORE CONVENIENT. I CAN ‘START’, ‘PAUSE’ OR ‘CLOSE->POWER OFF’ THE VIRTUAL MACHINE!
    NOTE: START MUST BE FROM TERMINAL BY TYPING ‘vagrant up’. I CAN USE GUI TO START IT UP BECAUSE IT’S ALWAYS ASK FOR LOGIN AND PASSWORD THAT I DONT KNOW!
    USE ‘vagrant provision’ TO RELOAD/REFRESH VM!
    TO SHUTDOWN THE VM (NO! USE SUSPEND INSTEAD. SEE BELOW), PLEASE TYPE ‘vagrant destroy –force’
    READ (https://www.vagrantup.com/docs/cli/destroy.html): “The destroy command does not remove a box that may have been installed on your computer during vagrant up. Thus, even if you run vagrant destroy, the box installed in the system will still be present on the hard drive. To return your computer to the state as it was before vagrant up command, you need to use vagrant box remove.”
    USE SUSPEND INSTEAD OF SHUTDOWN (ref:https://scotch.io/tutorials/getting-started-with-laravel-homestead)

    SOMETIMES I FORGOT TO SUSPEND THE VM BEFORE HIBERNATING MY LAPTOP. IT’D MAKE MY LAPTOP VERY SLOW. THE TERMINAL WOULD NOT RESPOND ANYMORE FOR ANYKEY BUT I CAN OPEN THE NEW ONE OR NEW TAB. USUALLY THE VM STATUS IS PAUSED.

    I HAVE TO OPEN THE VirtualBox GUI AND DO Close -> Save State MANUALLY TO STOP THE CURRENT PROCESS!

     
  12. Use SSH to get into the VM (ref: https://www.sitepoint.com/quick-tip-get-homestead-vagrant-vm-running/)

    It seems vagrant INSTALLED ubuntu 16.04 AS VM!
    I can check the PHP version like this:

    I can browse the files and directories in it:
  13. Run http://homestead.app
    But before we do this, WE NEED TO ADD A FEW DIRECTORIES AND FILE. BECAUSE WE KNOW THE WEB ROOT FOR OUR VM IS ‘/home/vagrant/Code’ IS MAPPED TO ‘~/Documents/works/laravel’ (SEE ~/.homestead/Homestead.yaml). FOR ‘homestead.app’ (IS MAPPED TO ‘/home/vagrant/Code/Laravel/public’), ADD A NEW DIRECTORY ‘Laravel’ in /Documents/works/laravel/, THEN ADD ‘public’ DIRECTORY IN IT. THEN ADD A NEW FILE ‘index.php’ IN IT. SO THE FULL PATH IS ‘/Documents/works/laravel/Laravel/public/index.php’. In the PHP file, just add a line of code:

    THEN RUN http://homestead.app/ IN OUR BROWSER!vagrant-phpinfoI can see I’m using NGINX as a webserver instead of Apache
    vagrant-nginx
    HOW TO RUN MYSQL DATABASE???
    SOLUTION:
    REMEMBER: VAGRANT MUST BE IN ‘UP’ MODE FOR THIS SITUATION!
    Login to ssh (‘vagrant ssh’) then check the mysql location with ‘which mysql’

    From ~/.homestead/Homestead.yaml, here is the databases:

    To connect to mysql server at VM, use default user:


    So MYSQL Server version is 5.7.16
    For better for myself to connect to the mysql server, I tried to install the latest mysql client ‘MySQL Workbench’ from https://dev.mysql.com/downloads/workbench/.
    <OLD>
    Currently the version is 6.3.8. But when I installed it, I got dependenci error “Dependency is not satisfiable: libatkmm-1.6-1v5 (>=2.24.0)”. I checked again the downloaded file (mysql-workbench-community-6.3.8-1ubu1604-amd64.deb), IT’S APPARENTLY FOR UBUNTU 16.04!
    </OLD>
    <NEW>
    Ref: http://elementaryos.stackexchange.com/questions/6779/cant-install-mysql-workbench-dependency-is-not-satisfiable
    Download MySQL Workbench for Ubuntu 14.04 here http://cdn.mysql.com//archives/mysql-workbench/mysql-workbench-community-6.3.6-1ubu1404-amd64.deb THEN INSTALL. SUCCESS!
    </NEW>
    CONFIGURE MySQL Worbench TO CONNECT MySQL Server AT VM:

    vagrant-mysql-connectionvagrant-mysql-openNow I can see the database ‘homestead’. I also can create any table!

    WHERE IS NGINX CONFIGURATION FILE???
    SOLUTION:
    Use ‘vagrant ssh’ TO GET INTO THE HOME DIRECTORY OF VM. THEN GO TO THE ROOT DIRECTORY


    THE NGINX CONF FILE IN /etc/nginx/nginx.conf

    USE ‘nano’ TO OPEN/EDIT THE FILE

    Here is the file content:

    TIPS FOR USING NANO:
    TO ‘COPY’ THE TEXT AT THE TERMINAL, JUST USE MOUSE & DRAG THEN Edit->Copy
    TO ‘EXIT’  THE TERMINAL, PRESS ‘Ctrl+X’
    use CTRL-O to Save/overwrite the changes then ENTER
  14.  HOW TO CREATE NEW PROJECT ON VAGRANT???
    OK!. Make sure to run the VM (‘vagrant up’) and go to the ssh (‘vagrant ssh’). I want to clone the laravel 5 project here (Please read Install Laravel 5 On Ubuntu 14.04) For the first time, check our git and composer:

    GO TO ‘/Code’ DIRECTORY FIRST!

    NOTE: THIS IS A REMAINDER! I MADE A MISTAKE FOR THE FIRST TIME SO I HAVE TO MOVE THE LARAVEL PROJECT INTO ‘/Code’ DIRECTORY!

    OK. Create the Laravel project with name ‘laravelvagrant’

    CHECK THE NEW PROJECT ‘laravelvagrant’!

    We want to run this new project, BUT we need to modify ‘Homestead.yaml’ file first to map ‘homestead.app’ to our new project ‘laravelvagrant’. Here is the modification:

    We changed from ‘/home/vagrant/Code/Laravel/public’ to ‘/home/vagrant/Code/laravelvagrant/public’
    THEN WE NEED TO REFRESH OUR VM WITH ‘vagrant provision’! (exit from ssh first!). Then IT’S READY TO RUN homestead.app (http://homestead.app/) ON OUR BROWSER! HERE IS THE WELCOME SCREENvagrant-laravel
  15. I have a test from interviewed.com (https://upwork.interviewed.com/candidate/interviews/905600) from upwork.com about my understanding for PHP things to go into the enterprise level!. Here is the description:
    “This project assumes your computer is already set up with minimal development tools including Git, Vagrant, Composer, etc. If you don’t already have these installed, you may want to switch to the computer that you normally develop on or follow these instructions.This project uses Laravel 5.3, PHP 7.0, and SQLite (so that database is portable without seeds).Download the project and start your server:
    https://github.com/prehire/php-23093023909ad09a09
    View the project in your browser and click around: http://homestead.appMost people allocate about 1 hour to this project, but you can invest up to 4 hours if you want to. Because the project has a time limit, you can’t pause once you’ve started.”
    OK! I already setup vagrant and virtualbox
    Run the VM and go into the ssh
    Then clone the project ‘https://github.com/prehire/php-23093023909ad09a09.git’

    Go into the project ‘php-23093023909ad09a09’ then install the dependencies via composer

    Now we want to test it on our browser BUT REMEMBER TO MODIFY ‘Homestead.yaml’ FIRST!

    THEN EXIT FROM SSH & REFRESH OUR VM WITH ‘vagrant provision’!
    REFRESH OUR BROWSER (http://homestead.app/). HERE IS THE HOMEPAGE SCREEN!vagrant-project-testThe App with 4 top menu: Homework (http://homestead.app/booking OR http://homestead.app/ –> HOMEPAGE), Booking (http://homestead.app/booking), Customer (http://homestead.app/customer) and Cleaner (http://homestead.app/cleaner). Here are the screens for each of them:
    Bookingproject-test-bookingCustomerproject-test-customerCleanerproject-test-cleanerOK. THE SETUP IS OKAY. WHAT IS THE TASK FOR THIS PROJECT???
    USE PDO INSTEAD OF MYSQL!!! SETUP IT FIRST OR TRY THE AVAILABLE PROJECT IN http://myprojects.advchaweb.com/index.php/2017/01/11/cleaner-booking/ TO MAKE SURE PDO WORK IN HOMESTEAD!

Laravel CRUD With MaterializeCSS

Source: Tutorial CRUD Sederhana Laravel 5.2 dengan Materializecss Part I
& Tutorial CRUD Sederhana Laravel 5.2 dengan Materializecss Part II
MaterializeCSS source: http://materializecss.com/getting-started.html (I don’t use sass, so download the newest version http://materializecss.com/bin/materialize-v0.97.7.zip)

  1. Create a new laravel project named ‘crud-materialize’

     
  2. Download materialize from the above link if haven’t downloaded it. Then extract the file. Here is how the folders and files look after extractingmaterializeOnly 3 folders (css, fonts and js) and 2 files.
    Then copy/cut the above folders and file into ‘public’ in our laravel project directory (/crud-materialize/public/). It’ll merge the css and js folders.
  3. Go into the project directory ‘crud-materialize’ then create a controller with name ‘CrudController’

    We can look up the new file CrudController.php in /app/Http/Controllers/ directory.
  4. Modify CrudController.php then edit ‘index’ function to call our view. It’d be like this:

     
  5. Modify /routes/web.php to change the default route (welcome) to call index function in CrudController:
  6. It’s time to mess with the views. Create a new directory ‘layouts’ in /resources/views/. Then in it (layouts), create two blades files: index.blade.php and header.blade.php. Also create a new blade file show.blade.php in /resources/views/:
    /resources/views/layouts/index.blade.php:

    /resources/views/layouts/header.blade.php:

    /resources/views/show.blade.php:

     
  7. Turn on the server (‘php artisan serve’) and see the look (http://localhost:8000/)crud-laravel-materializecss
  8. Setting database! Modify .env file in /crud-materialize/ directory to set the database setting:

    Now we’re not going to use phpmyadmin to create the database. We’ll do it by ‘php artisan migrate’ command I dont know how to do it and it seems more complicated than I expected so I create the database ‘crud-materialize’ (collation: utf8-general-ci) through phpmyadmin.
  9. Create a new table ‘crud’

    Check /database/migrations/ directory for the script to create ‘crud’ table (2016_10_29_030815_create_crud_table.php). It’d also create two more scripts to create ‘users’ (2014_10_12_000000_create_users_table.php) and ‘password_reset’ table (2014_10_12_100000_create_password_resets_table.php) automatically (if they are not existed yet!). It’s safe to remove its or leave its because we only focus on the ‘crud’ table.
  10. Edit 2016_10_29_030815_create_crud_table.php to add two more fields (‘title’ and ‘content’).
    Defaultly, there are two fields available in the file, they are ‘id’ and timestamps. Just insert the above two more fields between them
  11. Migrate (push) the tables to our database

    Check those tables in ‘crud-materialize’ database.
  12. Create a new model ‘Crud’

    Check a new file ‘Crud.php’ in /app/ directory!
  13. Modify Crud.php like this:

    Then create a new data in ‘crud’ table via phpmyadmin:
    ‘title’: ‘Title 1’
    ‘content’: ‘Content 1 Content 1 Content 1 Content 1 Content 1’
  14. Retrieve the new data through CrudController

    We’ll throw the ‘data’ into our view ‘show’.
  15. Modify show.blade.php in /resources/views/ to get and show the data from CrudController above

    We use ‘foreach’ loop, so just use one ‘row’ class and remove the others two.
  16. Test!crud-materializecss-show
  17. Now we want to make the Add, Edit and Delete buttons can be functioned properly. For the Add function, modify /app/Http/Controllers/CrudController.php at ‘create’ function to view ‘add’:

    Then create a new route for this in /routes/web.app:

    Create a new blade file ‘add.blade.php’ in /resources/views/ to show the form:

    In ‘show.blade.php’ we can add an url to ‘add’ route when anyone click the ‘add’ button:

    OK. Here is the add form when we click the add (+) button (http://localhost:8000/add)crud-materializecss-addNow we’re going to make ‘Submit’ button work. First, add a new route for ‘store’ in /routes/web.app. ATTENTION! Here we use POST (Route::post) NOT GET (Route::get):

    Then modify ‘store’ function in /app/Http/Controllers/CrudController.php to validate and store the form:

    OK. Try to add a new data (http://localhost:8000/add)crud-materializecss-add-dataHere is the resultcrud-materializecss-show-data
  18. Show individual data. We want to show the data if anyone click ‘Readmore’ button.
    Add a new route ‘read’ that need ‘id’ parameter in /routes/web.app:

    Apply the route at ‘Readmore’ link in /resources/views/show.blade.php:

    Modify ‘show’ function in /app/Http/Controllers/CrudController.php to get the data based on id and show the data by throwing it to our new view ‘showdata’:

    Create a new blade file ‘showdata.blade.php’ in /resources/views/ like this:

    OK. Test it by clicking ‘Readmore’ or directly by url like http://localhost:8000/read/2crud-materializecss-show-data-idI added a new ‘Back’ button. please see the complete materialize icon. Click ‘Back’ button to redirect back to the homepage.
  19. Pagination. To show the pagination,  we need to add more data. Just use ‘add’ button. Now we want to show just two data per page. So modify ‘index’ function in /app/Http/Controllers/CrudController.php like this:

    To show the pagination counter and the pages, modify /resources/views/show.blade.php to add ‘{{$data->render()}}’ just before @endsection:

    Here is the result (the url would be like http://localhost:8000/?page=1):crud-materializecss-pagination
  20. Edit data.
    Create two new routes in /routes/web.php. the first to edit the data and the last to update the changes:

    Modify ‘edit’ and ‘update’ function in /app/Http/Controllers/CrudController.php:

    Then create a new blade file ‘edit.blade.php’ in /resources/views/. this file basically same with ‘add.blade.php’ but the form url and the input values are different:

    Dont forget to modify ‘Edit’ button/link in ‘show.blade.php’ to add the ‘edit’ route:

     
  21. Delete data.
    Create a new route ‘delete’ in /routes/web.php:

    Then modify ‘destroy’ function in /app/Http/Controllers/CrudController.php to delete the data:

    Modify ‘Delete’ button/link in /resources/views/show.blade.php to apply the delete route and give javascript confirmation about the deletion:

    FINISH!
    NEXT: Add User authentication and comment section!
  22. User Authentication.
    Use default scaffolding ‘auth’

    Like I said before, it’ll create user authentication (login, register, password, etc) automatically. Please check the views in /resources/views/auth/ directory!
    Also check the routes in /routes/web.php. It’ll create two new routes:

    About this route ‘Auth::routes()’, from http://stackoverflow.com/questions/39196968/laravel-5-3-new-authroutes/39197278#39197278, it said

    More read https://laracasts.com/discuss/channels/laravel/laravel-53-routing-as-authroutes?page=1.
  23. Modify /resources/views/layouts/header.blade.php, to add new links ‘login’ and ‘register’:

    Here is the lookscrud-materializecss-authClick ‘Login’ link, it’d display the login page. But we can see the layout (header, color, etc) is different with our homepage.
  24. Edit /resources/views/auth/login.blade.php.
    Replace the first line ‘@extends(‘layouts.app’)’ with ‘@extends(‘layouts.index’)’. When we refresh our website, the header show the same layout with our homepage. But the others element are still different. ‘auth’ scaffolding create the views based on bootstrap css but we use materialize css for homepage.crud-materializecss-auth-loginModify login.blade.php to add some elements like validation, error,etc like this: NOTE: somehow {!! csrf_field() !!} DIDN’T WORK (verifycsrftoken error) SO I WRITE {{ csrf_field() }}

    The validations need jquery-validation library, so download and put the jquery files (jquery.validate.min.js and additional-methods.min.js) in /public/js/. Then link them in /resources/views/layouts/index.blade.php also write the jquery validation (here i changed the jquery to the newer version 1.11.2). Please read Forms Validation to learn more about the validation form for materialize css.

    We also need to create a new css file ‘style.css’ in /public/css/ to style the error messages:

    Don’t forget to link the css in /resources/views/layouts/index.blade.php

    Here is the result (http://localhost:8000/login)crud-materializecss-login-errorTo find out the materialize icons, see https://material.io/icons/.  Note: the naming for displaying the icon for materialize css is pretty tricky. For example to show icon for name/username like ‘account box’, we have to write it with underscore (_). so it should be ‘account_box’:

     
  25. Do the same for ‘Register’ link.
    Here is the modification for /resources/views/auth/register.blade.php

    Here is the lookscrud-materializecss-auth-regWe need to modify a few things like the page redirection after the log in and the register. I also notice the dropdown menu to show the logged in user still not correct. For modifying the redirection page, it’s simple. Modify the controllers (LoginController.php and RegisterController.php) in /app/Http/Controllers/Auth/ directory. Set $redirectTo variable to the homepage (‘/’) instead of ‘/home’ like this:

    Then for the dropdown menu, we need to modify /resources/views/layouts/header.blade.php like this:

    To find out the complete dropdown function for materialized css, please see http://materializecss.com/dropdown.html and http://demo.geekslabs.com/materialize/v3.1/ui-navbar.html.
    I also need to make a slightly modification in /public/css/style.css to make the dropdown display the correct font color:

    Here is the looks:crud-materializecss-dropdown
  26. Now, we want to restrict some functions like ‘Add’, ‘Edit’ and ‘Delete’ can only be proceeded when the user is logged in. So we’re going to check the logged in user (‘Auth::check()’) in /app/Http/Controllers/CrudController.php for some functions ‘create’, ‘edit’ and ‘destroy’ like this: (ref: Authentication and Check if user is logged in):

    OK. When we click the Add, edit and delete icon/buttons, it’d redirect us to the login page if we haven’t logged in!
    NEXT: User access/level, go to / proceed to the aim page after logging in, admin panel and comments!