Configure Varnish, SSL, Nginx and Magento 2 On Ubuntu 16.04

Ref: https://blog.hauri.me/magento-2-with-varnish-and-nginx-as-ssl-termination.html
https://www.absolute-design.co.uk/services/magento-ecommerce/using-nginx-for-ssl-termination-with-varnish-and-magento-2/
https://linuxize.com/post/configure-magento-2-to-use-varnish-on-centos-7/
https://www.digitalocean.com/community/tutorials/how-to-configure-nginx-with-ssl-as-a-reverse-proxy-for-jenkins

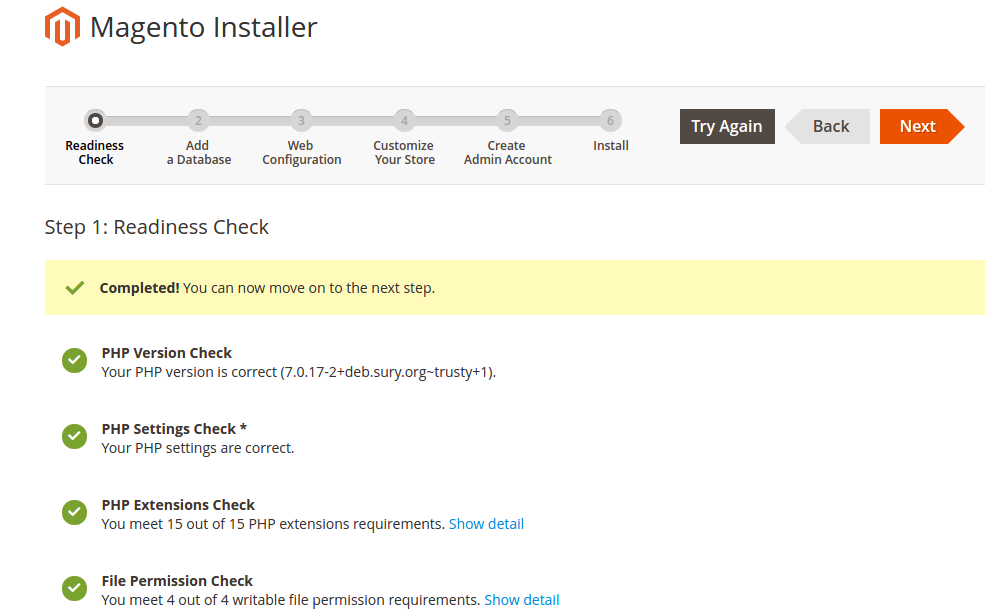
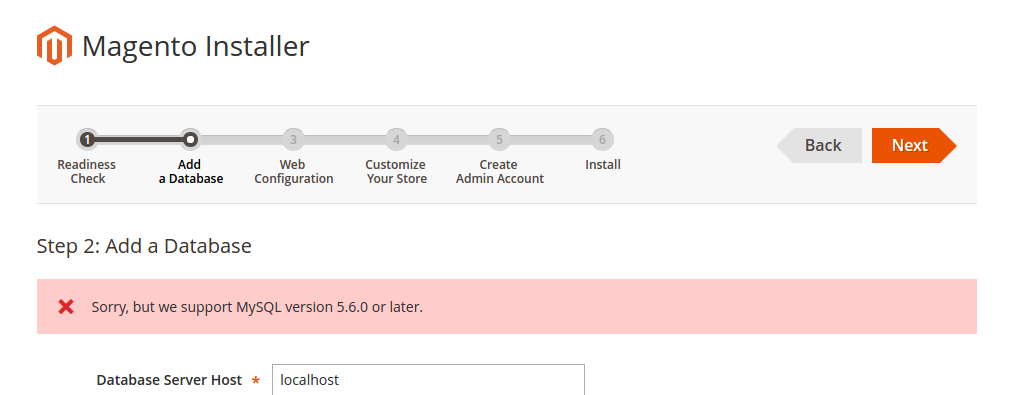
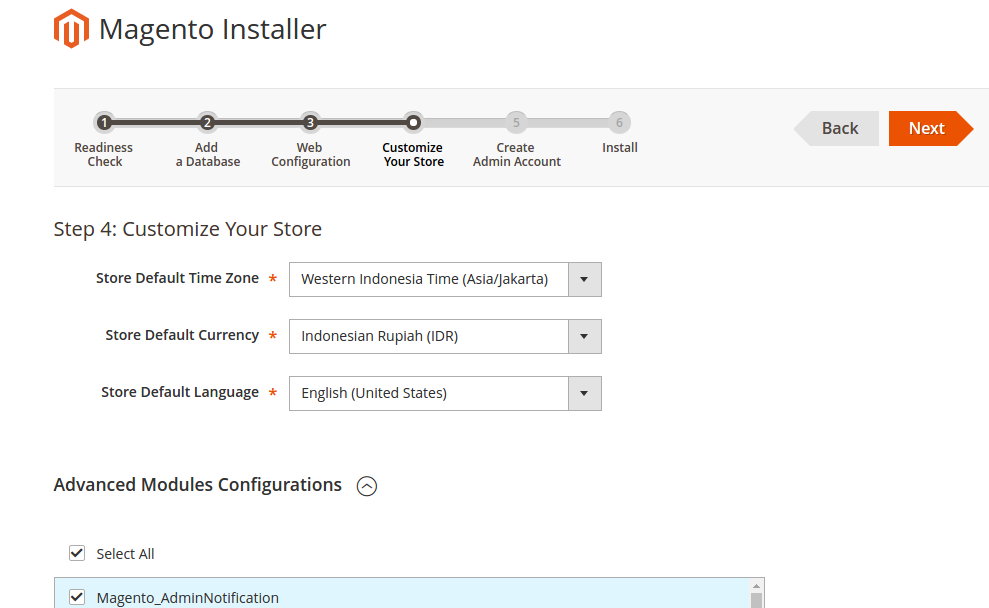
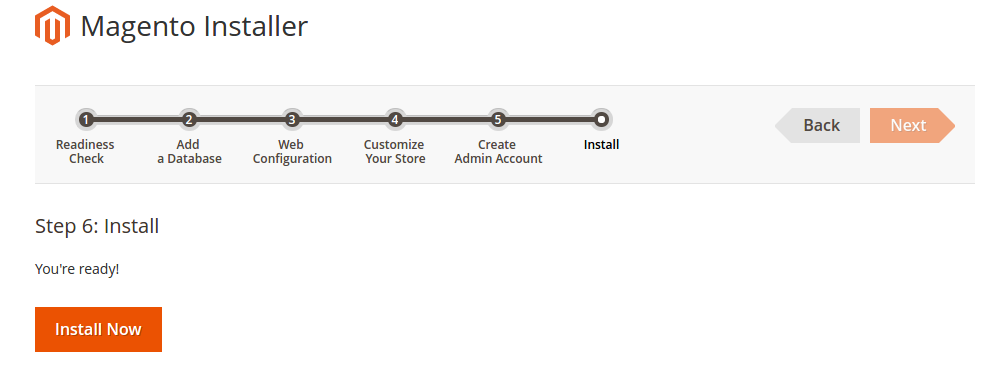
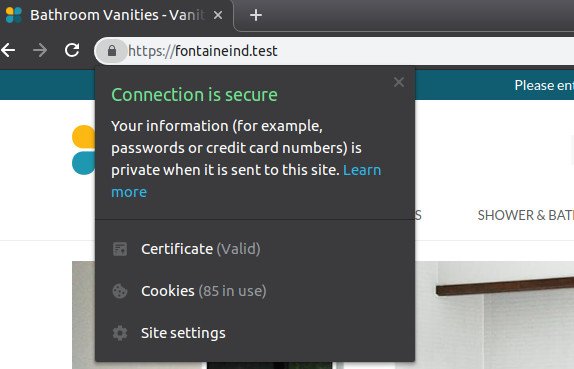
On a few last articles, I wrote about the Varnish and Nginx configuration also Self-signed certificate. Now I want to combine them all on my local magento 2 website https://fontaineind.test/. When I run the site, the varnish is not working. I need to configure it (and Nginx) to make it working again.

From many articles I found Varnish can’t work with SSL. Varnish does not support SSL, so we need to use another service as an SSL Termination Proxy, in our case that will be Nginx.

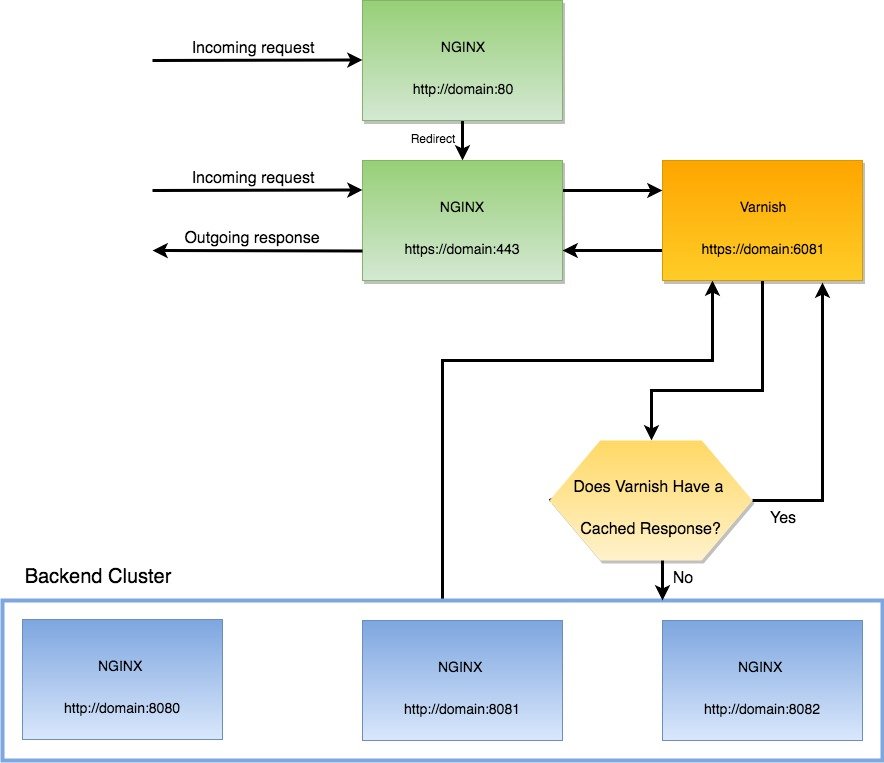
When a visitor opens your website over HTTPS on port 443 the request will be handled by Nginx which works as a proxy and passes the request to Varnish (on port 6081). Varnish checks if the request is cached or not. If it is cached, Varnish will return the cached data to Nginx without a request to the Magento application. If the request is not cached Varnish will pass the request to Nginx on port 8080 which will pull data from Magento and Varnish will cache the response.
If a visitor opens your website without SSL on port 80 then he will be redirected to the HTTPS on port 443 URL by Varnish. So here is the topology
I need to change the Varnish port back to 6081 because I need to redirect HTTP port 80 to HTTPS port 443. (This article said I can still use port 80 for varnish: https://medium.com/magebit/magento-2-full-ssl-with-varnish-d2cfed3d7df also https://www.getpagespeed.com/web-apps/magento/magento-2-nginx-config-ssl-termination-varnish) But I keep the nginx port to 8080. So modify /etc/default/varnish file like this:

Then also modify /etc/systemd/system/varnish.service file to change the varnish port back to 6081

Then modify /etc/varnish/default.vcl

I use host “fontaineind.test” here because I have many local websites. Usually it’s enough to use “localhost”. Port 8080 is the nginx port as the backend server. After saving the changes, I need to restart varnish server:

Don’t forget to verify the varnish port is 6081 now. Just see it by typing

Then I need to modify also the nginx setting for fontaineind.test.

Modify it like this:

So if the user use non-https (port 80) url like http://fontaineind.test/, It’d be redirected permanently (301) to https url like https://fontaineind.test/. Please see

Then if the user entering the https site (port 443), it’d use varnish proxy (port 6081)

If the page request is already exist in the varnish cache, it’d be returned immediately. But if not, it’d look it in the backend server (nginx port 8080).

This is very tricky. Because I use many local website, I have to use ‘listen fontaineind.test:8080;’ instead of just ‘listen 8080;’. It must same with the backend host in /etc/varnish/default.vcl.
NOTE: Somehow the other local websites would be redirected to fontaineind.test. So if I open for example phpmyadmin.test:8080. It’d be redirected to fontaineind.test. This is not expected. So If I want to open phpmyadmin, I need to stop varnish then change ‘listen fontaineind.test:8080;’ to ‘listen 8080;’. I still dont know how to solve this problem.

Don’t forget to modify env.php file in magento root (app/etc/env.php) like this:

So now varnish is working with SSL. Here is the response header on https://fontaineind.test/ (after first refresh)

You can see ‘Age’ and ‘x-varnish’ values.

Create Self-Signed Certificate With Nginx On Ubuntu 16.04

Ref: https://www.humankode.com/ssl/create-a-selfsigned-certificate-for-nginx-in-5-minutes
https://www.digitalocean.com/community/tutorials/how-to-create-a-self-signed-ssl-certificate-for-nginx-in-ubuntu-16-04

In this tutorial, I’m going to show you how you can create a self-signed SSL/TLS certificate and use it on Nginx in 5 minutes or less. I’m using Ubuntu for this tutorial, but if you’re on Mac OSX you can follow along as the syntax and commands are nearly identical.

Why Create a Self-Signed Certificate?
Self-signed certificates are useful for local development where you want to simulate an HTTPS environment. Take note that self-signed certificates are not meant for production, but they are ideal for localhost development.

An Overview of Creating a Self-Signed Certificate
Before continuing, let’s take a step back and look at the steps involved in generating a self-signed certificate for Nginx:

Generate a self-signed certificate using OpenSSL
Copy the certificate to the certificates folder on Ubuntu
Update the Nginx configuration file to load the certificate
Copy the certificate’s public key to the CA trusted root database to prevent Google Chrome from showing the site as insecure

Step 1: Generate a Self-Signed Certificate using OpenSSL
I’ll use OpenSSL to generate the certificate on Ubuntu. OpenSSL is installed on Mac OSX by default and the commands are exactly the same.

OpenSSL will generate 2 files which consist of a private key and a public key. Even though most people refer to an SSL/TLS certificate in the singular sense, it is the combination of the private key and the public key that makes a certificate.

Before running the OpenSSL command to generate a self-signed certificate, I’m going to create a certificate configuration file that will specify the certificate bits and the Subject Alternative Names. The Subject Alt Names are required in Google Chrome 58 and later, and is used to match the domain name and the certificate. If the domain name is not listed in the certificate’s Subject Alternative Names list, you’ll get a NET::ERR_CERT_COMMON_NAME_INVALID error message.

Create the Certificate Configuration File

I want to make a self-signed certificate for my local magento 2 site. The site is fontaineind.test
Here is the content of fontaineind.test.conf file:

Create the Certificate using OpenSSL

Here is the terminal output. For the inputs on the terminal asking like country name, etc, just click enter key to accept the default values:

It’ll create two new files. There are fontaineind.test.crt and fontaineind.test.key:

Step 2: Copy the Certificate Key Pair to the Certificates folder on Ubuntu
Copy the public key to the /etc/ssl/certs directory

Copy the private key to the /etc/ssl/private directory

Step 3: Update the Nginx Configuration File to Load the Certificate Key Pair

Change it like this:

Reload the Nginx configuration changes

Then don’t forget to change the secure url on the database. Just find it :

Change ‘http’ to ‘https’ for ‘web/secure/base_url’ and ‘web/secure/base_link_url’

NOTE: It’d be better to change to https also for ‘unsecure’ url
Open up the Google Chrome to Verify that Nginx Loads the Site Over HTTP and HTTPS
Since I haven’t added the self-signed certificate to Chrome’s CA Root store, Chrome shows the site as insecure. Click proceed to fontaineind.test to verify that Nginx is correctly configured
open: https://fontaineind.test/Step 4: Configure Chrome to Trust the Certificate and to Show the Site as Secure
Add the certificate to the trusted CA root store but need to check if ‘certutil’ if exist. If not install it with sudo apt install libnss3-tools:

Then run this on the terminal:

Close all the Google Chrome windows and reopen. Chrome is now showing the site as secure.Now I want to redirect all connection from http to https.
Make sure you changed the ‘unsecure’ url on the database to use https instead. Then modify the nginx setting for fontaineind.test

Then change like this:

Reload the nginx server. But if you check the nginx config setting, it’d show error like this:

It shows error about the certificate. Probably because it’s a self-signed certificate. Anyway we can ignore it on the development stage. If you open http://fontaineind.test:8080, it’d be redirected to https://fontaineind.test
So all good.

Install and Configure Varnish for Nginx and Magento 2 on Ubuntu 16.04

Ref:https://blog.pusher.com/speeding-up-your-website-using-varnish/
https://www.cyberciti.biz/faq/how-to-install-and-configure-varnish-cache-on-ubuntu-linux-16-04-lts/
https://www.howtoforge.com/tutorial/ubuntu-nginx-varnish/
https://amasty.com/blog/use-varnish-with-magento-2-for-better-end-user-experience/

Install Varnish:

Start/stop/restart the varnish service:

Check the varnish status (when active):

Varnish installed and it is a default configured to listen on port 6081 and 6082 for varnish admin:

When we open on the browser: http://localhost:6081/, we’d get a varnish error pageHowever http://localhost:6082/ will show page error.
We will be changing this so it listens on port 80 (fontaineind use the default port 6081 for varnish)  and Nginx listens on port 8080. To do this, edit your site’s Nginx configuration file. In our case, this file is /etc/nginx/sites-available/fontaineind.test.

modify

Save the file. Then restart nginx server:

When you open your website with the port 8080, http://fontaineind.test:8080, It’d show the website but the css seems missing! I think I need to clear the cache and rebuild the cache. but it show an expected error.

Another error when trying to show the magento 2 command:

Solution: THIS IS BECAUSE I USE PHP 7.2. CHANGE IT TO PHP 7.0

Then the magento 2 command is running well back.

also probably I need to change the base url to include the port 8080? –> NO NEED. we will take it later. Let’s continue.

Now that port 80 is free (NO. I NEED TO CHECK IT VIA sudo netstat -plntu | grep ‘:80’), let’s configure Varnish to be the one that responds. Open the file /etc/default/varnish for editing. Here is the default content.

Look for the line below:

change ‘-a :6081’ to ‘-a :80’:

Save the file.
NOTE: I also can change the malloc. malloc is RAM usage for Varnish. Default is 256m. I can change it to (for example) 1024m (1G)

Next, open the file /etc/varnish/default.vcl and check that the default backend is set to port 8080, because this is where Nginx serves from now. Look for the line below and make sure the .port is 8080. Here is the default content:

NOTE: For the explanation of vcl_recv, vcl_backend_response and vcl_deliver, pls read https://amasty.com/blog/use-varnish-with-magento-2-for-better-end-user-experience/
make sure the backend port is 8080

Once you have confirmed this, the next thing will be to copy the varnish.service file to our systemd directory. This will enable systemd to start varnish on port 80. Run the command below:

This will copy the varnish service file, and then open an editor with the contents.

Look for the ExecStart line:

Now change the -F -a :6081 to -F -a :80. Leave the localhost:6082 on the same line as it is. Now save and exit the file. Run the commands below to reload everything you have just configured:

The commands above will reload the system daemon, reload varnish, restart the varnish service, and restart Nginx.
NOTE: I need to check the varnish status as well. Varnish can’t start because port 80 already is use:

Check who is using port 80:

it seems nginx with pid 19110 is using both port 80 and 8080. or here is the complete list:

Solution: nginx use both ports 80 and 8080 because in sites-enabled directory there are many nginx setting for different websites that it still use port 80.

SO. REPLACE THE PORT 80 TO 8080 FOR ALL WEBSITE IN SITES-ENABLES DIRECTORY!!!
AFTER I CHANGED THE PORT IN ALL THE WEBSITE, NO MORE APPLICATION USE PORT 80 ANYMORE

OR

Nginx is using port 8080 now. I can start varnish and check the status:

NOTE: TO RUN THE OTHERS RUNNING WEBSITE (WITHOUT VARNISH RUINNING) THAT IT HAD BEEN WORKING PREVIOUSLY, I NEED TO ADD THE PORT 8080 AT THE END OF THE URL. FOR EXAMPLE:
http://localhost:8080/phpinfo.php
http://notarisfemira.test:8080/
http://phpmyadmin.test:8080

Now visit the IP of your web page and you should see nothing has changed. However, when you run it through the HTTP checker we used before, you should see that the headers have changed.
http://fontaineind.test/ –> First time run about 20 seconds

The second run (refresh) about 9 seconds

NOTE: I can see some variables like X-Varnish and Age. But why Age still 0 on the refresh page? It means it miss the cache.
In magento, I already enabled Page Cache and Block HTML cache.

Configure Magento to use Varnish
To configure Magento to use Varnish:

Log in to the Magento Admin as an administrator.
Click STORES > Configuration > ADVANCED > System > Full Page Cache.
From the Caching Application list, click Varnish Cache (recommended).
Enter a value in the TTL for public content field.
Expand Varnish Configuration and enter the following information:
Access list: localhost   –> 172.31.31.224 for fontaineind.com.au
Backend host: localhost   –> 172.31.31.224 for fontaineind.com.au
Backend port: 8080
Then click a button ‘Export VCL for Varnish 4’ -> It’d create a file ‘varnish.vcl’ and download it.
Here is the file content:

SO I need to modify the content of /etc/varnish/default.vcl according to this varnish.vcl.

Just copy and paste all content of varnish.vcl to all content in /etc/varnish/default.vcl. Then restart varnish: sudo service varnish restart
NOTE: IN THE DEV SERVER, I PREFER TO DISPLAY THE X-VARNISH AND AGE VARIABLES. SO I MODIFIED /etc/varnish/default.vcl LIKE THIS:

I also modified /home/teddy/Documents/works/fontaineind/app/etc/env.php to include the varnish setting:

clear and flush the cache. BUT Age still 0 !!!! EVEN WEIRDS, WHEN I CHANGED IN THE MAGENTO ADMIN THAT CACHE APPLICATION IS VARNISH THEN REFRESH THE WEBSITE (ALSO RESTART VARNISH), I GOT THE PAGE LOAD SLOWER!!! WHY?? –> SOLUTION: I NEED TO EXPORT VCL FILE LIKE ABOVE AND COPY THE CONTENT INTO /etc/varnish/default.vcl

NOW THE VARNISH IS WORKING!!!
THE SECOND AND MORE REFRESH WOULD MAKE THE PAGE LOAD FASTER. HERE IS THE RESPONSE:

SEE THE AGE = 42 AND X-Varnish: 131131 3

Symfony 4 Blog

Ref: http://tutorials.mustangx.org/tutorials/create-advanced-blog-symfony-4-p1-2/

Getting Started with Symfony 4.x
There has been a lot of changes made for Symfony 4, seems to be ok though. I was quite confused, mainly the file structure of Symfony 3 is what I was used to. Then I discovered a nice and quick tutorial with the title Beginners Symfony 4 Tutorial.

The file structure has change if you are developing a web application. There are many, many changes that I may not catch as we move through this.

Step 1 – Symfony Website Skeleton
I am not going to detail this part, if you need that go to the link above.

Step 2 – Change into your new directory:

Step 3 – Install the Symfony Web Server Bundle: (NO NEED)

Step 4 – Now let’s fire up the web server

OR CAN USE PHP SERVER CLI : php bin/console server:run

That command will start the server and this one will stop it.

Note: You do not need to have any other server running. It may cause problems.

Create an .htaccess file (FOR APACHE WEBSERVER)
Mein is like this. Test it out and see if it works for you.

Now COPY & PASTE the following:

Setup the DB (MySql)
Inside the .env file (probably hidden) find this line

replace ‘db_user’, ‘db_password’ and ‘db_name’ according to  your database credential.
SORRY, ONLY ADMIN CAN SHOW THIS!
Once that’s done, we need to do this (make sure you have the correct db info added first):

If you already have the database, it’d show this error:

Auto Versioning setup
Get the auto versioning setup first.
NOTE: This has changed and is easier to install thanks to Flex.

The version is automatically updated with Composer and available in your application.

Console commands
There are two available console commands. The app:version:bump command is automatically called by Composer on every install and update.

Go ahead and test those two commands and see what it outputs.

Create an Advanced Blog with Symfony 4 – part3 (FrontController)
Last Updated On March 28, 2018
Introduction
This part of the tutorial will concentrate on getting a basic Homepage/Frontpage structure setup. I opted for a typical blog look.
We will remove files and folders as well add new ones. The Controller for the homepage will be created and the basic page should be viewable at the end.

Get Twitter Bootstrap Layout
I want to have a different look this time, so we will be using some premade templates from the Startbootstrap website. The one we want is released with an MIT license.

First create the PageController
It is easy to do with Symfony 4.

Let’s see what got created for us. We have a PageController.php file in our src/Controllers folder and inside of the templates folder we have a new folder and a new file, page/index.html.twig

Now that was all I discovered. Run the server: php bin/console s:r
then open the page on http://localhost:8000/page

Magento 1.9.3.2

  1. Download the installer from https://magento.com/tech-resources/download. At the time writing, the latest magento 1.x version is 1.9.3.2. I downloaded the zip version (magento-downloader-1.9.1.0-2015-02-09-10-17-59.zip). I tried to download the .gz and tar.bz2 but it didn’t work. Then download the sample data from the same page.
  2. Create a new database first (may be with phpmyadmin). I gave the database name ‘magento19’.
  3. Extract the sample data from phpmyadmin, then import the sql file (magento_sample_data_for_1.9.2.4.sql) in the extracted data.
  4. Extract the installer file magento-downloader-1.9.1.0-2015-02-09-10-17-59.zip. It only contain single file: downloader.php. Then put this file into your magento root in your webserver. I put it in ‘magento19’ directory
  5. Create a virtualhost for this site:

    Here is the content:

     
  6. Enable the site:
  7. Put it in /etc/hosts/

    add this line:

     
  8. Restart apache webserver:
  9. Begin installation of magento 1.9.3.2 by opening : http://magento19.dev/developer.php. Then follow the instruction. It’d download the magento files needed.
    SORRY, ONLY ADMIN CAN SHOW THIS!
    Note: The PHP version must be between 5.2 and 6.0. I can’t use php 7.0 so I use php 5.6.
  10. Copy and paste the directories ‘media’ and ‘skin’ in the extracted sample data into the magento19 web directory. Just override the current media and skin directories.
  11. Now you can run the site: http://magento19.dev/
    and the admin site: http://magento19.dev/admin

NOTE: At first I made a mistake with installing magento 1.9 without the sample data. To install the sample data, I need to drop the database then create it again. Then follow #3 step. After that, I need to run the installer again http://magento19.dev/developer.php but this time without downloading the magento files because the files already downloaded. Follow the instruction again then if nothing wrong, it’d run well.

UPDATED
20191010
Download and Install extension GLS Shipping from https://marketplace.magento.com/gls-official-gls-dispatch.html
I tried to install it via connect manager then find and upload the package zip file (gls-Official_GLS_Dispatch-1.2.4.tgz). But I got this error message:

OR (CASE FOR Indianic_Couponimpexport EXTENSION)

BECAUSE THE PHP VERSION IN package.xml (EXTRACT FROM THE ZIP FILE) FILE LIKE THIS:

CHANGE IT TO

THEN RE-ZIP (Indianic_Couponimpexport-1.0.0.1-php7.tar.gz) AND RE TRY TO UPLOAD IT AGAIN
BUT GOT ANOTHER ERROR

NOTE: TO RE-ZIP THE PACKAGE, IT NEED TO INCLUDE ONLY THE EXTENSION FILES. DON’T INCLUDE THE PACKAGE DIR NAME!!! SO IT’D BE BETTER TO ZIP IN THE DIR NOT OUT THE DIR

I TRIED TO BACK TO ADMIN PAGE BUT I GOT MAINTENANCE PAGE. I CAN RESOLVE IT WITH n98magerun TO DISABLE MAINTENANCE MODE:

I NEED TO ENABLE LOG (System -> Configuration -> Developer -> Log)
THEN CLEAR/CLEAN THE CACHE

THE LOG WILL BE IN /home/teddy/Documents/works/magento19/var/log.
DONT FORGET TO SET THE FILE PERMISSION

I TRIED TO REUPLOAD THE PACKAGE BUT GOT THIS PERMISSION ERROR:

ALSO CHECK THE LOG IN /home/teddy/Documents/works/magento19/var/log/system.log

SOLUTION: SET THE FILE PERMISSION IN app/code/local/

RE RUN THE PACKAGE INSTALL AND SUCCESS!

FOR GLS SHIPPING, AFTER SET THE PHP VERSION AND NAME, I GOT THIS ERROR MESSAGE WHEN I TRIED TO INSTALL

THIS IS BECAUSE IN package.xml, THERE IS CHANNEL

SOLUTION: ADD THE CHANNEL (READ: https://stackoverflow.com/questions/29071430/connect-error-the-community-channel-is-not-installed-in-magento-site)

THEN RE INSTALL BUT GOT ANOTHER ERROR:

BUT IT INSTALLED SUCCESSFULLY. I NEED TO RUN n98 TO CLEAN THE CACHE.
TRIED TO UNINSTALL

ALSO DELETE THE FILES MANUALLY!
BUT I CONCERN ABOUT GLS MENU IN THE ADMIN PAGE SHOW 404 ERROR (http://magento19.test/index.php/admin/system_config/edit/section/gls/key/107260543ac135ee4fd87400f3e821c8/)

Installing MSP DevTools (Magento DevTools by MageSpecialist)

ref: http://www.magespecialist.it/blog/2016/08/11/magento-devtools-available-helping-magento-developers-all-around-the-world/
https://github.com/magespecialist/mage-chrome-toolbar#installing-on-magento-2

  1. Install the chrome extension here: https://chrome.google.com/webstore/detail/magespecialist-devtools-f/odbnbnenehdodpnebgldhhmicbnlmapj?authuser=3
  2. From your CLI run: composer require msp/devtools  –> IT TAKE A LONG TIME BUT I DON’T KNOW WHY
  3. Flush your cache.

     
  4. Turn OFF Full Page Cache (FPC) while you are using DevTools.
    System -> Cache Management -> Check ‘Page Cache’ -> Dropdown select ‘Disable’ -> Click ‘Submit’
    OR YOU CAN DO IT MANUALLY BY MODIFYING /app/etc/env.php IN ‘cache_types’ SECTION THEN SET ‘full_page’ TO 0:

     
  5. Enable MSP_Common and MSP_DevTools modules:
  6. Upgrade database data & schema:

     
  7. Open Magento backend and go to Stores > Settings > Configuration > MageSpecialist > DevTools -> Enable ‘Yes’, IP list: 0.0.0.0/0
  8.  Enabling profiler feature on Magento 2:If you wish to enable the profiler feature you need to set the MAGE_PROFILER server variable to MSP\DevTools\Profiler\Driver\Standard\Output\DevTools. You can do it in several ways:Editing index.php:Add the following line at the very beginning on index.php and pub/index.php file:


    Editing .htaccess file

    Add the following line to your .htaccess file (at the bottom is okay):


    THEN YOU CAN SEE THE profilers in the chrome developer tools -> magento tab -> profiler tab

  9. Enabling SQL Queries profiler:
    YOU CAN DO IT MANUALLY BY MODIFYING /app/etc/env.php IN ‘db’ -> ‘connection’ -> ‘default’ SECTION THEN ADD ‘profiler’ TO 1:


    THEN YOU CAN SEE THE SQL queries in the chrome developer tools -> magento tab -> queries tab.
    Here are some screens how this tool in action:
    General tabDesign tabObservers tabBlocks tabUI tabProfiler tabPlugins tabQueries tabInspect element and the magento element

Magento 2 Module Development

Ref: https://www.mageplaza.com/magento-2-module-development/

The module is a directory that contains blocks, controllers, models, helper, etc – that are related to a specific business feature. In Magento 2, modules will be live in app/code directory of a Magento installation, with this format: app/code/<Vendor>/<ModuleName>. I use Magento 2.1.5 CE. Here is the installation steps.

Create Hello World module for Magento 2

Step 1: Create a directory for the module like above format.
Here I use Advcha as a Vendor name and HelloWorld as a ModuleName.
So create a directory: app/code/Advcha/HelloWorld.

Step 2: Declare module by using configuration file module.xml
Create a new file module.xml in app/code/Advcha/HelloWorld/etc/ directory. Here is the full path: app/code/Advcha/HelloWorld/etc/module.xml
Here is the file content:

Here I register a module with name Advcha_HelloWorld and the version is 1.0.0.

Step 3: Register module by registration.php
Magento 2 module must be registered in the Magento system through the magento ComponentRegistrar class. This file will be placed in module root directory. Create a new file registration.php (beware the file name case-sensitive, it must be registration.php NOT Registration.php) in app/code/Advcha/HelloWorld/ directory. Here is the full path: app/code/Advcha/HelloWorld/registration.php
Here is the file content:

Step 4: Enable the module
Before enable the module, we must check to make sure Magento has recognize our module or not by enter the following at the command line: php bin/magento module:status

Run this command php bin/magento module:enable Advcha_HelloWorld to enable it:

Magento require to check and upgrade module database. We need to run this command php bin/magento setup:upgrade.

Now you can check under Stores -> Configuration -> Advanced -> Advanced that the module is present.Step 5: Create a Routers for the module.
A request URL has the following format:

NOTE: Here I replaced <router_name> to <router_id> after I read this article Magento 2: Advanced Routing.
“The id identifies the route node uniquely in the Magento system, and the frontName defines the first segment of your URL.”
At first I thought it was <router_name> before I found the article. But I confused because this tutorial is working even if I didn’t change the id from ‘advcha’ to ‘helloworld.??? So the url would be http://magentoce215.dev/helloworld/*
In this module, we need to create a route for frontend area. So we need to add this file: app/code/Advcha/HelloWorld/etc/frontend/routes.xml.
Here is the content:

After define the route, the URL path to our module will be: http://magentoce215.dev/helloworld/*
So our <router_name> is helloworld ???

Step 6: Create controller and action.
we will create controller and action to display ‘Hello World’. Our <controller_name> would be index and <action_name> would be display. We need to create a new php file: app/code/Advcha/HelloWorld/Controller/Index/Display.php
Here is the file content:

Now we can open the url to show ‘Hello World!’ from our module: http://magentoce215.dev/helloworld/index/display
Note: If there is no change, please flush the cache with this command: php bin/magento cache:flush.

Step 7: Add to github.
It’s a good way to store also our code in github. Here is how to  do it:
Exit from ‘www-data’ user then Go into /app/code/Advcha/HelloWorld/ directory:

Initialize with git init:

Go into your github account and create a new repository. I created a new repo ‘magento2-sample-module’ (https://github.com/advcha/magento2-sample-module). Then use git remote add origin https://github.com/advcha/magento2-sample-module.git and git push -u origin master to update the remote reposity.

Then we can use git add command to prepare our files or use git GUI to make it easier. I use gitcola. First, stage the files, then commit and push. Done!

Create Controllers in Magento 2
ref: https://www.mageplaza.com/magento-2-module-development/how-to-create-controllers-magento-2.html
In Magento 2 Controller has one or more files in Controller folder of module, it includes actions of class which contain execute() method. There are 2 different controllers, they are frontend controller and backend controller. They are generally similar of workflow, but admin controller is a little different. There is a checking permission method in admin controller.
Here for the first step, we follow the same step as above like create routes.xml in /app/Advcha/HelloWorld/etc/frontend/ directory. But we change the id to ‘helloworld’.

Then create controller file Index.php in /app/Advcha/HelloWorld/Controller/Index/ directory.

All controller must extend from \Magento\Framework\App\Action\Action class which has dispatched method which will call execute method in action class. In this execute() method, we will write all of our controller logic and will return response for the request.
Then create layout file helloworld_index_index.xml in /app/Advcha/HelloWorld/view/frontend/layout/ directory. the layout filename has a pattern <router_name>_<controller_name>_<action_name>.xml. Therefore <router_name> is helloworld, <controller_name> is index and <action_name> is index (the classname). The Frontend layout always in /view/frontend/layout/ directory.

For the blockAdvcha\HelloWorld\Block\Index\Index“, create a new file Index.php. The full path is in /app/code/Advcha/HelloWorld/Block/Index/Index.php.

For the template is “Advcha_HelloWorld::index/index.phtml“. The full path is in /app/code/Advcha/HelloWorld/view/frontend/templates/index/index.phtml. The Frontend template always in /view/frontend/templates/ directory. Create a new file index.phtml and here is the content:

Okay. It’s time to test but first flush magento cache with command: php bin/magento cache:flush. Then open this url: http://magentoce215.dev/helloworld/index/index. IT SHOULD SHOW Welcome Advcha.
IF IT SHOW EMPTY PAGE, Please flush the magento cache or check again the id in routes.xml or make sure the ‘block’ is exist or modify ‘layout=”empty”‘ in helloworld_index_index.xml (ref: http://magento.stackexchange.com/questions/84370/magento-2-sample-module-displays-blank-page).
We can also inspect the elements with Magento DevTools.CRUD
ref: https://www.mageplaza.com/magento-2-module-development/how-to-create-crud-model-magento-2.html
Here I want to create a new table ‘advcha_post‘ with these following columns:
post_id – the post unique identifier
title – the title of the post
content – the content of the post
creation_time – the date created
To create a magento model, first setup a script in InstallSchema.php to create the table. Here is the full path: app/code/Advcha/HelloWorld/Setup/InstallSchema.php. Here is the file content:
NOTE: I updated the content from the github link: https://github.com/mageplaza/magento-2-sample-module/blob/master/Setup/InstallSchema.php

Then run php bin/magento setup:upgrade
This should create a new table ‘advcha_helloworld_post‘ in your magento database. If it didn’t create it, please check ‘setup_module‘ table, then find ‘Advcha_HelloWorld’ record and remove it. Then run again php bin/magento setup:upgrade.
If you find this error

This mean you haven’t define ‘sample_upload_file’ field in InstallSchema.php file above. Please look again the above file carefully or see the file from the github: https://github.com/mageplaza/magento-2-sample-module/blob/master/Setup/InstallSchema.php.
Create Model
First create an interface in PostInterface.php file in app/code/Advcha/HelloWorld/Model/Api/Data/ directory.

This interface has defined the set and get method to table data which we would use when interacting with the model. This interface plays an important role when it comes time to exporting CRUD models to Magento service contracts based API.
Now create a model Post in app/code/Advcha/HelloWorld/Model/Post.php.

$_eventPrefix – a prefix for events to be triggered
$_eventObject – a object name when access in event
$_cacheTag – a unique identifier for use within caching
Create a Resource Model
the model file contain overall database logic, it do not execute sql queries. The resource model will do that. Now we will create the Resource Model for this table: Advcha\HelloWorld\Model\ResourceModel\Post.php.

Resource Model Collection – Get Model Collection
The collection model is considered a resource model which allow us to filter and fetch a collection table data. The collection model will be placed in: Advcha\HelloWorld\Model\ResourceModel\Post\Collection.php.

Factory Object and create Block Post
Create a Post block: Advcha\HelloWorld\Block\Post.php.

Then how to run this CRUD?

Create View: Block, Layouts, Templates
ref: https://www.mageplaza.com/magento-2-module-development/view-block-layout-template-magento-2.html
Here we want to create a module to show/display a text on the magento frontend.
A View will be use to output representation of the page. In Magento 2, View is built by three path: block, layout and template.
Call view in controller
In the previous Hello World Module topic, we have build a simple module and show the Hello World message on the screen directly by controller. Now we will edit it to call view to render page. File: app/code/Advcha/HelloWorld/Controller/Index/Display.php.

Create layout file .xml
The Layout is the major path of view layer in Magento 2 module. The layout file is a XML file which will define the page structure and will be locate in {module_root}/view/{area}/layout/ directory. The Area path can be frontend or adminhtml which define where the layout will be applied.
There is a special layout file name default.xml which will be applied for all the page in it’s area. Otherwise, the layout file will have name as format: {router_id}_{controller_name}_{action_name}.xml. We can find the frontend {router_id} is helloworld in app/code/Advcha/HelloWorld/etc/frontend/routes.xml. The {controller_name} is index and {action_name} is display (from Display.php where Action exist: Magento\Framework\App\Action\Action). We will create a layout handle file for this module: File: app/code/Advcha/HelloWorld/view/frontend/layout/helloworld_index_display.xml.

Block class: Advcha\HelloWorld\Block\Display, Template file: Advcha_HelloWorld::sayhello.phtml.
Create block
The Block file should contain all the view logic required, it should not contain any kind of html or css. Block file are supposed to have all application view logic. Create a file: app/code/Advcha/HelloWorld/Block/Display.php.

Every block in Magento 2 must extend from Magento\Framework\View\Element\Template. In this block we will define a method sayHello() to show the word “Hello World, Advcha!”. We will use it in template file.
Create template file
Create a template file call sayhello.phtml: app/code/Advcha/HelloWorld/view/frontend/templates/sayhello.phtml.

In the layout file, we define the template by Advcha_HelloWorld::sayhello.phtml. It mean that Magento will find the file name sayhello.phtml in templates folder of module Advcha_HelloWorld. The template folder of the module is app/code/{vendor_name}/{module_name}/view/frontend/templates/.
In the template file, we can use the variable $block for the block object. As you see, we call the method sayHello() in Block. It’s done, please access to this page again (http://magentoce215.dev/helloworld/index/display) and see the result.If you find an error like this (put “ini_set(‘display_errors’, ‘1’);” in root index.php and /pub/index.php):

Then run this command: php bin/magento setup:upgrade then refresh your browser.

The Backend – system.xml Configuration
ref: https://www.mageplaza.com/magento-2-module-development/create-system-xml-configuration-magento-2.html
Create System.xml
In the admin page, the magento 2 system configuration page is divided logically in few parts: Tabs, Sections, Groups, Fields. So let’s start to create a simple configuration for the simple Module Hello World. The system.xml is located in etc/adminhtml directory of the module, we will create it a new Tab for our vendor “Advcha”, a new Section for our module Hello World, a Group to contain some simple fields: enable module and text. File: app/code/Advcha/HelloWorld/etc/adminhtml/system.xml.

Set default value
Each field in system.xml after create will not have any value. When you call them, you will receive ‘null’ result. So for the module, we will need to set the default value for the field and you will call the value without go to config, set value and save it. This default value will be saved in config.xml which is located in etc folder. Let’s create it for this simple configuration: File: app/code/Advcha/HelloWorld/etc/config.xml.

You can put the path to the field in the <default> element to set value default for it. The format is:

We need to flush the cache and see the result above.
Get value from configuration
First all of let’s save value and flush cache, then you can get saved value from database. In the system.xml, we have added 2 fields: enable and display_text. So the path should be: helloworld/general/enable and helloworld/general/display_text. We can call them through simple calling or use helper (recommended). Also please read for more samples:  http://magento.stackexchange.com/questions/87789/magento2-how-to-get-data-from-system-configuration
Simple calling:

Create a helper file (standard)
Create file: Advcha/HelloWorld/Helper/Data.php.

Now we can get those value and call the helper from .phtml file like this:


Magento CE 2.1.5 (With Sample Data) Installation

I want to install Magento CE 2.1.5 (with sample data) in my machine Ubuntu 14.04 and PHP 7.0.
Ref: http://devdocs.magento.com/guides/v2.1/install-gde/prereq/zip_install.html

  1. Download the installation file from magento website. Here I downloaded the file with sample data in tar.bz2 format
  2. Extract the compressed file into your web root. I extract them in ‘magentoce215’ directory.
  3. Modify the files permission of ‘magentoce215’ directory. Here I used this command to make it easier for me to deal with the many security issues.
  4. Open it the first time on your browser: http://localhost/works/magentoce215. It’d setup magento for the first time.Click ‘Agree and Setup Magento’ button. It’d bring us to next step, the check install page. Here is the looksI want to make sure anything would be okay so I click ‘Start Readiness Check’ button. It’d check my php version and the php extension I have. It seemed I miss some extensions. Here is the result.I need to sort its out first. Install the missing php extensions.

    Then don’t forget to restart apache server

    Back to the browser then click ‘Try Again’ button at the top of the page. If everything okay, I’ll get this page.Then click ‘Next’ button. It’d bring you to the database setting page. That is my database setting. I already created a new database ‘magentoce215’ (utf8-general-ci) via phpmyadmin. Make sure the setting is correct! Then click ‘Next’ button. Oops! I have MySQL Server 5.5.54 that not supported by magento ce 2.1.5. It recommended to use MySQL 5.6.0 or later!SO I NEED TO UPGRADE THE MYSQL VERSION TO MYSQL 5.6.0 OR LATER? OK. I upgraded my MySQL server to 5.7 version. Now everything is fine. Then I got this screen about my local magento web configuration.magento url: http://localhost/works/magentoce215/
    magento admin url: http://localhost/works/magentoce215/admin_dgj2ff
    Then click ‘Next’. Then I modify my store setting like this:I checked ‘Select All’ for ‘Advanced Modules Configuration’ because I want to use the samples data. Then click ‘Next’. Then fill out the admin form.SORRY, ONLY ADMIN CAN SHOW THIS!
    Then click ‘Next’. This is the last page to install magento.Click ‘Install Now’ button. Wait until installation completed and you get the success page.SORRY, ONLY ADMIN CAN SHOW THIS!
    It’s recommended for security, remove write permissions from these directories: ‘/home/teddy/Documents/works/magentoce215/app/etc’.
    When ‘Launch Magento Admin’ button is clicked, it’d go to the admin page (http://localhost/works/magentoce215/admin_dgj2ff).Use your correct username and password to sign in. Here is the main admin page.Somehow I got an error like this:“One or more indexers are invalid. Make sure your Magento cron job is running.”. I think no need to worry right now.
    Here is the main page (http://localhost/works/magentoce215/) looks:
  5. Use VirtualHost
    I prefer to use virtualhost so I can open this magento with more pleasing url like http://magentoce215.dev. Here is the step:
    Create an apache file configuration:

    Here is the file content:

    Enable the site:

    Put the url in hosts file

    Here is the line:

    Restart apache server

    We need to clean and flush the cache and build and deploy the static files:

    Test it on your browser: http://magentoce215.dev
    If there is no change on the url and still use the url:  http://localhost/works/magentoce215, we need to update ‘base-url’ and ‘base-url-secure’ (ref: http://blog.netgloo.com/2016/05/13/magento-2-change-base-url-using-the-command-line/) like this:

    Test it again on your browser: http://magentoce215.dev and the admin url is http://magentoce215.dev/admin_dgj2ff
  6. The looks are different with the version 1.X. Please read https://www.atwix.com/magento-2/magento-1-vs-magento-2/, https://www.shopping-cart-migration.com/blog/42-magento/43708-the-key-differences-between-magento-1x-and-20, https://www.apptha.com/blog/magento-1-vs-magento-2-for-building-multi-vendor-marketplace/, etc.
  7. Create a setup for nginx and php7.0-fpm
    Create the config file

    Here is the content:

    Enable file config

    Register the host on my system

    Like this:

    CHECK THE NGINX SETTING AND RESTART IT:


    Set file permission and owner:

    Test: http://magentoce215.test –> IT’S WORKING

Questionair App with Loopback and Angular

Ref: https://github.com/hellsan631/questionair
http://stackoverflow.com/questions/32132324/n-level-hierarchy-array-angular-js
Installation:

  1. Clone the github: https://github.com/hellsan631/questionair.git

    It’d create a new dir ‘questionair’.
  2. Go to the dir then install the node packages

     
  3. Here I found no ‘lb-services.js’ in /client/app/js/ directory, so let create it

    The file ‘lb-services.js’ would be created in /client/app/js/ directory.
    Then don’t forget to hook the file in /client/app/index.html file

    NOTE: I missed this step before because I didn’t check ‘lb-services.js’ file then I got this error:

     
  4. Now let run the node server

    Then open it on our browser: http://localhost:3000/
    Nothing found there because this app still haven’t completed yet.
    The main controller ‘questionairController’ is in /client/app/index.html file. We need to call it in /client/app/js/app.js file like this

    The parameter ‘Question’ we found from /server/model-config.json file. It represent ‘Question’ table. Also look the table structure in /server/models/question.json. There are also the others tables like ‘Answer’, ‘Role’, etc.

Quiz App With AngularJS and Loopback

Ref: https://github.com/tomchal/Quiz4All
Installation:

  1. Go to your favorite directory and Clone the app
  2. Go to the ‘Quiz4All’ dir
  3. Install the node packages with npm
  4. Go to ‘client’ dir and use bower to install the packages

     
  5. Modify /server/datasources.json file. At ‘TchMySql’, match with your database setting. SORRY, ONLY ADMIN CAN SHOW THIS!
    If you haven’t created the database ‘Quiz4All’, please do it manually (via phpmyadmin?).
    NOTE: Loopback has a functionality to create the tables and fill the data/fixture into the tables when the app run for the first time (create ‘quiz’ table, create ‘user’ table, insert the default user data into the table, etc). It’s called ‘autoMigrate’ (https://loopback.io/doc/en/lb2/Creating-a-database-schema-from-models.html#auto-migrate). It’d run the scripts in /server/boot/ directory like ’02_create-appusers.js’, ’04_load_quizzes.js’, and so on. We know the scripts also load the other scripts to create the tables structure in /common/models/ directory. For example ‘quiz.json’ to create ‘quiz’ table, ‘answer.json’ to create ‘answer’ table, and so on. It’d also fill the tables from the fixture ‘quizDane.js’ in /server/data/ directory. In the above scripts ’02_create-appusers.js’ and ’04_load_quizzes.js’, there is a line responsible to do that (create table, fill the tables with the fixtures) when the app is starting. For example:

    The loopback link above says:
    If there are existing tables in a database, running autoMigrate() will drop and re-create the tables: Therefore, data will be lost. To avoid this problem use auto-update(). Instead of dropping tables and recreating them, autoupdate() calculates the difference between the LoopBack model and the database table definition and alters the table accordingly. This way, the column data will be kept as long as the property is not deleted from the model.“.
    BECAUSE WE ONLY NEED/WANT TO CREATE THE TABLES FOR THE FIRST TIME, THEN MODIFY THE SCRIPTS TO ‘autoupdate()’ AFTER THAT OR WE’D LOST OUR DATA CHANGES AT THE NEXT START! –> UPDATE: I TRIED TO MODIFY ‘.automigrate()’ to ‘.autoupdate()’ AFTER THE NEXT START BUT IT DIDN’T WORK.

    SO WHAT IS WORK IS TO DELETE/RENAME THE FILES IN /server/boot/ DIRECTORY (I RENAMED THEM TO ’02_create-appusers.js.bak’ AND ’04_load_quizzes.js.bak’)
  6. Go back to the root app then start the node server

    Here are the looks from http://localhost:3000/ or http://localhost:3000/#!/quizzes If any user is logged in (or you can also register and login. Here I registered with email: advcha@yahoo.com and password: admin), here is the lookNew quiz (http://localhost:3000/#!/newquiz)Here is the created quizNOTE: DON’T FORGET TO RENAME THE SCRIPTS IN /server/boot/ DIR TO ’02_create-appusers.js.bak’ AND ’04_load_quizzes.js.bak’ RESPECTIVELY SO THE ABOVE DATA WOULD NOT BE DELETED IF THE NODE SERVER RUN AGAIN!
    Anyway this is very good. But I think it needs some improvements like edit the quizzes (if user is logged in), admin panel, user member (student or admin), etc.