Here’s a step-by-step guide to create a simple login form using ASP.NET Core (C#) and MS SQL Server with VS Code and Linux:
- Install .NET SDK If you haven’t already, install the .NET SDK for your Linux distribution. You can find instructions on the official Microsoft website.check your dotnet version
[codesyntax lang=”bash”]
12dotnet --version8.0.405
[/codesyntax] - Create a new ASP.NET Core project Open a terminal and run:
1dotnet new mvc -n LoginApp
[codesyntax lang=”bash”]
123456789satria@teddy:~/Documents/projects/aspnet$ dotnet new mvc -n LoginAppThe template "ASP.NET Core Web App (Model-View-Controller)" was created successfully.This template contains technologies from parties other than Microsoft, see https://aka.ms/aspnetcore/8.0-third-party-notices for details.Processing post-creation actions...Restoring /home/satria/Documents/projects/aspnet/LoginApp/LoginApp.csproj:Determining projects to restore...Restored /home/satria/Documents/projects/aspnet/LoginApp/LoginApp.csproj (in 83 ms).Restore succeeded.
[/codesyntax]Go to the project directory ‘LoginApp’ with ‘cd LoginApp’
- Install required NuGet packages Run the following commands:
[codesyntax lang=”bash”]123dotnet add package Microsoft.EntityFrameworkCore.SqlServerdotnet add package Microsoft.EntityFrameworkCore.Designdotnet add package Microsoft.AspNetCore.Identity.EntityFrameworkCore[/codesyntax]
Make sure the version is match in LoginApp.csproj
[codesyntax lang=”csharp”]12345678<ItemGroup><PackageReference Include="Microsoft.AspNetCore.Identity.EntityFrameworkCore" Version="8.0.0" /><PackageReference Include="Microsoft.EntityFrameworkCore.SqlServer" Version="8.0.0" /><PackageReference Include="Microsoft.EntityFrameworkCore.Design" Version="8.0.0"><IncludeAssets>runtime; build; native; contentfiles; analyzers; buildtransitive</IncludeAssets><PrivateAssets>all</PrivateAssets></PackageReference></ItemGroup>[/codesyntax]
- Set up the database connection Open
appsettings.jsonand add the connection string:
[codesyntax lang=”text”]123"ConnectionStrings": {"DefaultConnection": "Server=localhost;Database=LoginApp;User Id=your_username;Password=your_password;TrustServerCertificate=True;"},[/codesyntax]
Note: I need to add ‘TrustServerCertificate=True;’ - Create ApplicationDbContext Create a new file
ApplicationDbContext.cs
[codesyntax lang=”csharp”]12345678910111213using Microsoft.AspNetCore.Identity.EntityFrameworkCore;using Microsoft.EntityFrameworkCore;namespace LoginApp{public class ApplicationDbContext : IdentityDbContext{public ApplicationDbContext(DbContextOptions<ApplicationDbContext> options): base(options){}}}[/codesyntax]
- Update Program.cs Replace the content of
Program.cs:
[codesyntax lang=”csharp”]123456789101112131415161718192021222324252627282930313233343536373839404142434445464748495051525354using LoginApp;using Microsoft.AspNetCore.Identity;using Microsoft.EntityFrameworkCore;var builder = WebApplication.CreateBuilder(args);// Add services to the container.builder.Services.AddControllersWithViews();builder.Services.AddDbContext<ApplicationDbContext>(options =>options.UseSqlServer(builder.Configuration.GetConnectionString("DefaultConnection")));builder.Services.AddIdentity<IdentityUser, IdentityRole>().AddEntityFrameworkStores<ApplicationDbContext>();var app = builder.Build();// Configure the HTTP request pipeline.if (!app.Environment.IsDevelopment()){app.UseExceptionHandler("/Home/Error");app.UseHsts();}app.UseHttpsRedirection();app.UseStaticFiles();app.UseRouting();app.UseAuthentication();app.UseAuthorization();app.MapControllerRoute(name: "default",pattern: "{controller=Home}/{action=Index}/{id?}");// Initialize the databaseusing (var scope = app.Services.CreateScope()){var services = scope.ServiceProvider;try{var context = services.GetRequiredService<ApplicationDbContext>();context.Database.EnsureCreated();await DbInitializer.Initialize(services);}catch (Exception ex){var logger = services.GetRequiredService<ILogger<Program>>();logger.LogError(ex, "An error occurred while seeding the database.");}}app.Run();[/codesyntax]
- Create Login Model Create
Models/LoginModel.cs:
[codesyntax lang=”csharp”]123456789101112131415161718using System.ComponentModel.DataAnnotations;namespace LoginApp.Models{public class LoginModel{[Required][EmailAddress]public string Email { get; set; } = string.Empty;[Required][DataType(DataType.Password)]public string Password { get; set; } = string.Empty;[Display(Name = "Remember me?")]public bool RememberMe { get; set; }}}[/codesyntax]
- Create Account Controller Create
Controllers/AccountController.cs:
[codesyntax lang=”csharp”]12345678910111213141516171819202122232425262728293031323334353637using LoginApp.Models;using Microsoft.AspNetCore.Identity;using Microsoft.AspNetCore.Mvc;namespace LoginApp.Controllers{public class AccountController : Controller{private readonly SignInManager<IdentityUser> _signInManager;public AccountController(SignInManager<IdentityUser> signInManager){_signInManager = signInManager;}[HttpGet]public IActionResult Login(){return View();}[HttpPost]public async Task<IActionResult> Login(LoginModel model){if (ModelState.IsValid){var result = await _signInManager.PasswordSignInAsync(model.Email, model.Password, model.RememberMe, lockoutOnFailure: false);if (result.Succeeded){return RedirectToAction("Index", "Home");}ModelState.AddModelError(string.Empty, "Invalid login attempt.");}return View(model);}}}[/codesyntax]
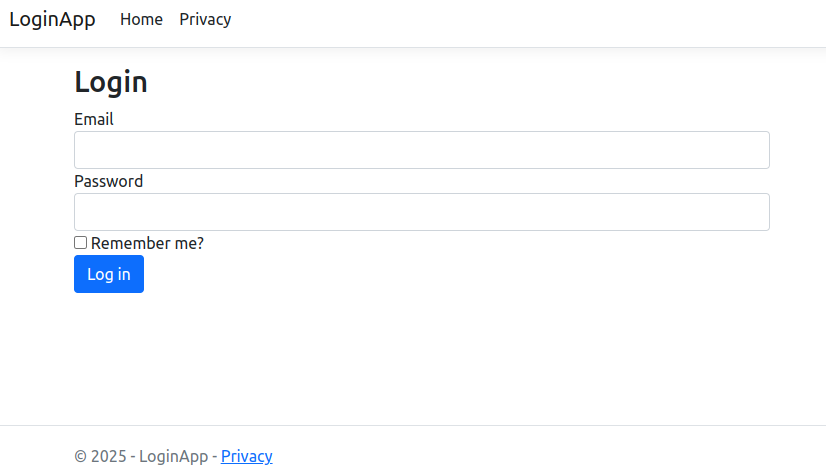
- Create Login View Create
Views/Account/Login.cshtml:
[codesyntax lang=”html4strict”]12345678910111213141516171819202122232425@model LoginApp.Models.LoginModel<h2>Login</h2><form asp-action="Login" method="post"><div asp-validation-summary="ModelOnly" class="text-danger"></div><div class="form-group"><label asp-for="Email"></label><input asp-for="Email" class="form-control" /><span asp-validation-for="Email" class="text-danger"></span></div><div class="form-group"><label asp-for="Password"></label><input asp-for="Password" class="form-control" /><span asp-validation-for="Password" class="text-danger"></span></div><div class="form-group"><div class="checkbox"><label><input asp-for="RememberMe" /> @Html.DisplayNameFor(m => m.RememberMe)</label></div></div><button type="submit" class="btn btn-primary">Log in</button></form>[/codesyntax]
- Set up the database. Create a new database ‘LoginApp’
- Add a test user Create
DbInitializer.cs:
[codesyntax lang=”csharp”]123456789101112131415161718192021using Microsoft.AspNetCore.Identity;namespace LoginApp{public static class DbInitializer{public static async Task Initialize(IServiceProvider serviceProvider){var userManager = serviceProvider.GetRequiredService<UserManager<IdentityUser>>();string email = "admin@example.com";string password = "Admin123!";if (await userManager.FindByEmailAsync(email) == null){var user = new IdentityUser { UserName = email, Email = email };await userManager.CreateAsync(user, password);}}}}[/codesyntax]
Note: it’ll create a new dummy user with
email: admin@example.com
password: Admin123! - Run the application Execute:
1dotnet run
- Navigate to
http://localhost:5000/Account/Loginin your browser.
- create some navigation menus (login, logout, etc) on the homepage
Create a new file called_NavBar.cshtmlin theViews/Sharedfolder with the following content:
[codesyntax lang=”html4strict”]1234567891011121314151617181920212223242526272829303132333435@using Microsoft.AspNetCore.Identity@inject SignInManager<IdentityUser> SignInManager@inject UserManager<IdentityUser> UserManager<nav class="navbar navbar-expand-sm navbar-toggleable-sm navbar-light bg-white border-bottom box-shadow mb-3"><div class="container"><a class="navbar-brand" asp-area="" asp-controller="Home" asp-action="Index">LoginApp</a><button class="navbar-toggler" type="button" data-toggle="collapse" data-target=".navbar-collapse" aria-controls="navbarSupportedContent"aria-expanded="false" aria-label="Toggle navigation"><span class="navbar-toggler-icon"></span></button><div class="navbar-collapse collapse d-sm-inline-flex justify-content-between"><ul class="navbar-nav flex-grow-1"><li class="nav-item"><a class="nav-link text-dark" asp-area="" asp-controller="Home" asp-action="Index">Home</a></li>@if (SignInManager.IsSignedIn(User)){<li class="nav-item"><a class="nav-link text-dark" asp-area="" asp-controller="Account" asp-action="Logout">Logout</a></li>}else{<li class="nav-item"><a class="nav-link text-dark" asp-area="" asp-controller="Account" asp-action="Login">Login</a></li><li class="nav-item"><a class="nav-link text-dark" asp-area="" asp-controller="Account" asp-action="Register">Register</a></li>}</ul></div></div></nav>[/codesyntax]
Now, let’s include this partial view in your layout file. Open the
Views/Shared/_Layout.cshtmlfile and add the following line just after the opening<body>tag:
[codesyntax lang=”html4strict”]12345678910111213141516171819202122232425<body><partial name="_NavBar" /><!--header><nav class="navbar navbar-expand-sm navbar-toggleable-sm navbar-light bg-white border-bottom box-shadow mb-3"><div class="container-fluid"><a class="navbar-brand" asp-area="" asp-controller="Home" asp-action="Index">LoginApp</a><button class="navbar-toggler" type="button" data-bs-toggle="collapse" data-bs-target=".navbar-collapse" aria-controls="navbarSupportedContent"aria-expanded="false" aria-label="Toggle navigation"><span class="navbar-toggler-icon"></span></button><div class="navbar-collapse collapse d-sm-inline-flex justify-content-between"><ul class="navbar-nav flex-grow-1"><li class="nav-item"><a class="nav-link text-dark" asp-area="" asp-controller="Home" asp-action="Index">Home</a></li><li class="nav-item"><a class="nav-link text-dark" asp-area="" asp-controller="Home" asp-action="Privacy">Privacy</a></li></ul></div></div></nav></header--><!-- ... existing content ... --></body>[/codesyntax]
Note: I need to remove the default <header> tag to use the new partial navbar - create controller for account logout
modify Controllers/AccountController.cs
[codesyntax lang=”csharp”]12345678910111213141516171819202122232425using LoginApp.Models;using Microsoft.AspNetCore.Identity;using Microsoft.AspNetCore.Mvc;namespace LoginApp.Controllers{public class AccountController : Controller{...[HttpPost]public async Task<IActionResult> Login(LoginModel model){...}[HttpPost][ValidateAntiForgeryToken]public async Task<IActionResult> Logout(){await _signInManager.SignOutAsync();return RedirectToAction("Index", "Home");}}}[/codesyntax]
Now, let’s update the
_NavBar.cshtmlpartial view to use a form for the logout action, as it should be a POST request. Update the logout link in the_NavBar.cshtmlfile like this:
[codesyntax lang=”html4strict”]
12345678910// ... existing code ...@if (SignInManager.IsSignedIn(User)){<li class="nav-item"><form asp-area="" asp-controller="Account" asp-action="Logout" method="post" id="logoutForm" class="navbar-right"><button type="submit" class="btn btn-link navbar-btn navbar-link">Logout</button></form></li>}// ... existing code ...
[/codesyntax]
at the end of this file, add this javascript
[codesyntax lang=”html4strict”]
12345678<script>$(function() {$('#logoutForm').on('click', function(e) {e.preventDefault();$(this).submit();});});</script>
[/codesyntax] - Add controller for registration and forgot password?