Ref: https://santrikoding.com/tutorial-restful-api-golang-1-membuat-project-golang
Note: Make sure golang is already installed by checking with ‘go version’ on your linux terminal
[codesyntax lang=”bash”]
|
1 2 |
satria@teddy:~$ go version go version go1.18.3 linux/amd64 |
[/codesyntax]
Note: it’ll be better to use the newest go version. I already installed go version 1.23.4
[codesyntax lang=”bash”]
|
1 2 |
satria@teddy:~/Downloads$ go version go version go1.23.4 linux/amd64 |
[/codesyntax]
Note: don’t forget to run ‘go mod tidy’ on your go project
1. Create a new directory for this project named ‘go-restful-api’ then go into the directory
[codesyntax lang=”bash”]
|
1 2 |
satria@teddy:~/Documents/projects$ mkdir go-restful-api satria@teddy:~/Documents/projects$ cd go-restful-api/ |
[/codesyntax]
then type this to create a new module ‘advcha/backend-api’
[codesyntax lang=”bash”]
|
1 2 |
satria@teddy:~/Documents/projects/go-restful-api$ go mod init advcha/backend-api go: creating new go.mod: module advcha/backend-api |
[/codesyntax]
2. Install ‘Gin’ and the libraries. Gin is a go-based web framework
[codesyntax lang=”bash”]
|
1 2 3 4 5 6 7 |
satria@teddy:~/Documents/projects/go-restful-api$ go get -u github.com/gin-gonic/gin go: downloading github.com/gin-gonic/gin v1.10.0 ... github.com/gin-gonic/gin imports github.com/gin-gonic/gin/binding imports github.com/pelletier/go-toml/v2 imports slices: package slices is not in GOROOT (/usr/local/go/src/slices) |
[/codesyntax]
3. Create a ‘Hello World’ with Gin
create a new file ‘main.go’ then here is the content
[codesyntax lang=”text”]
|
1 2 3 4 5 6 7 8 9 10 11 12 13 14 15 16 17 18 19 20 21 |
package main import ( "github.com/gin-gonic/gin" ) func main() { // initialize Gin router := gin.Default() // create a GET route with an endpoint "/" router.GET("/", func(c *gin.Context) { // return JSON response c.JSON(200, gin.H{ "message": "Hello World!", }) }) // start the server with port 3000 router.Run(":3000") // listen and serve on } |
[/codesyntax]
4. Run it with ‘go run main.go’
[codesyntax lang=”bash”]
|
1 2 3 4 5 6 7 8 9 10 11 |
satria@teddy:~/Documents/projects/go-restful-api$ go run main.go [GIN-debug] [WARNING] Creating an Engine instance with the Logger and Recovery middleware already attached. [GIN-debug] [WARNING] Running in "debug" mode. Switch to "release" mode in production. - using env: export GIN_MODE=release - using code: gin.SetMode(gin.ReleaseMode) [GIN-debug] GET / --> main.main.func1 (3 handlers) [GIN-debug] [WARNING] You trusted all proxies, this is NOT safe. We recommend you to set a value. Please check https://pkg.go.dev/github.com/gin-gonic/gin#readme-don-t-trust-all-proxies for details. [GIN-debug] Listening and serving HTTP on :3000 |
[/codesyntax]
5. open it on your browser with http://localhost:3000/
it should print
|
1 |
{"message":"Hello World!"} |
Install GORM (Go ORM). it’s a Object Relational Mapping (ORM) for Golang
1. Install GORM with MySQL driver
[codesyntax lang=”bash”]
|
1 2 3 4 5 6 7 8 9 10 11 12 13 14 15 |
satria@teddy:~/Documents/projects/go-restful-api$ go get -u gorm.io/gorm gorm.io/driver/mysql go: downloading gorm.io/gorm v1.25.12 go: downloading gorm.io/driver/mysql v1.5.7 go: downloading github.com/go-sql-driver/mysql v1.7.0 go: downloading github.com/jinzhu/now v1.1.5 go: downloading github.com/jinzhu/inflection v1.0.0 go: downloading github.com/go-sql-driver/mysql v1.8.1 go: downloading filippo.io/edwards25519 v1.1.0 go: added filippo.io/edwards25519 v1.1.0 go: added github.com/go-sql-driver/mysql v1.8.1 go: added github.com/jinzhu/inflection v1.0.0 go: added github.com/jinzhu/now v1.1.5 go: upgraded golang.org/x/text v0.15.0 => v0.21.0 go: added gorm.io/driver/mysql v1.5.7 go: added gorm.io/gorm v1.25.12 |
[/codesyntax]
2. Create a new .env file to store the variables like the database name, password, etc.
[codesyntax lang=”text”]
|
1 2 3 4 5 |
export DB_USERNAME=your_mysql_username export DB_PASSWORD=your_mysql_password export DB_HOST=127.0.0.1 export DB_PORT=3306 export DB_NAME=db_go_restful_api |
[/codesyntax]
Note: rename ‘your_mysql_username’ and ‘your_mysql_password’ for your mysql account
‘db_go_restful_api’ is the database name we will create later
We need to install a package ‘github.com/joho/godotenv’ on the terminal ‘go get github.com/joho/godotenv’ to read the .env file
Note: run ‘go mod tidy’ to install any missing packages if exist
2. Create a Post model
create a new directory ‘models’ then create a new file ‘post.go’ in it. here is the file content
[codesyntax lang=”text”]
|
1 2 3 4 5 6 7 8 9 10 |
package models type Post struct { // ID is the unique identifier of the post ID int `json:"id" gorm:"primary_key"` // Title is the title of the post Title string `json:"title"` // Content is the content of the post Content string `json:"content"` } |
[/codesyntax]
3. create a database connection
create a new file ‘setup.go’ in the ‘models’ directory. here is the file content
[codesyntax lang=”text”]
|
1 2 3 4 5 6 7 8 9 10 11 12 13 14 15 16 17 18 19 20 21 22 23 24 25 26 27 28 29 30 31 32 33 34 35 36 37 38 39 |
package models import ( "fmt" "os" "gorm.io/driver/mysql" "gorm.io/gorm" ) var DB *gorm.DB func ConnectDatabase() { // create a database connection. The connection string is in the format: username := os.Getenv("DB_USERNAME") password := os.Getenv("DB_PASSWORD") host := os.Getenv("DB_HOST") port := os.Getenv("DB_PORT") dbname := os.Getenv("DB_NAME") dsn := fmt.Sprintf("%s:%s@tcp(%s:%s)/%s?charset=utf8mb4&parseTime=True&loc=Local", username, password, host, port, dbname) database, err := gorm.Open(mysql.Open(dsn), &gorm.Config{}) // check if there is an error when connecting to the database if err != nil { panic("Failed to connect to database!") } // if there is no error, then create a table for the 'Post' model database.AutoMigrate(&Post{}) // assign the database connection to the global variable 'DB' DB = database } func GetDB() *gorm.DB { return DB } |
[/codesyntax]
4. create a new mysql database ‘db_go_restful_api’
5. Create a new Post controller ‘postController.go’ in ‘controllers’ directory
[codesyntax lang=”text”]
|
1 2 3 4 5 6 7 8 9 10 11 12 13 14 15 16 17 18 19 20 |
package controllers import ( "advcha/backend-api/models" "github.com/gin-gonic/gin" ) // get all posts func FindPosts(c *gin.Context) { // get all posts from the database var posts []models.Post models.DB.Find(&posts) // return JSON response c.JSON(200, gin.H{ "status": "success", "message": "All posts retrieved successfully", "data": posts }) } |
[/codesyntax]
6. Create a route API Post
edit main.go to import the models and controllers. Also put the route in it. so it’ll be like this
[codesyntax lang=”text”]
|
1 2 3 4 5 6 7 8 9 10 11 12 13 14 15 16 17 18 19 20 21 22 23 24 25 26 27 28 29 30 31 32 33 34 35 36 37 |
package main import ( "advcha/backend-api/controllers" "advcha/backend-api/models" "github.com/joho/godotenv" "github.com/gin-gonic/gin" "log" ) func main() { // load the .env file err := godotenv.Load() if err != nil { log.Fatal("Error loading .env file") } // initialize Gin router := gin.Default() // connect to the database models.ConnectDatabase() // create a GET route with an endpoint "/" router.GET("/", func(c *gin.Context) { // return JSON response c.JSON(200, gin.H{ "message": "Hello World!", }) }) // create a GET route with an endpoint "/posts" router.GET("/api/posts", controllers.FindPosts) // start the server with port 3000 router.Run(":3000") // listen and serve on } |
[/codesyntax]
7. Run it and open it on your browser
If everything okay, the url http://localhost:3000/api/posts will show
|
1 |
{"data":[],"message":"All posts retrieved successfully","status":"success"} |
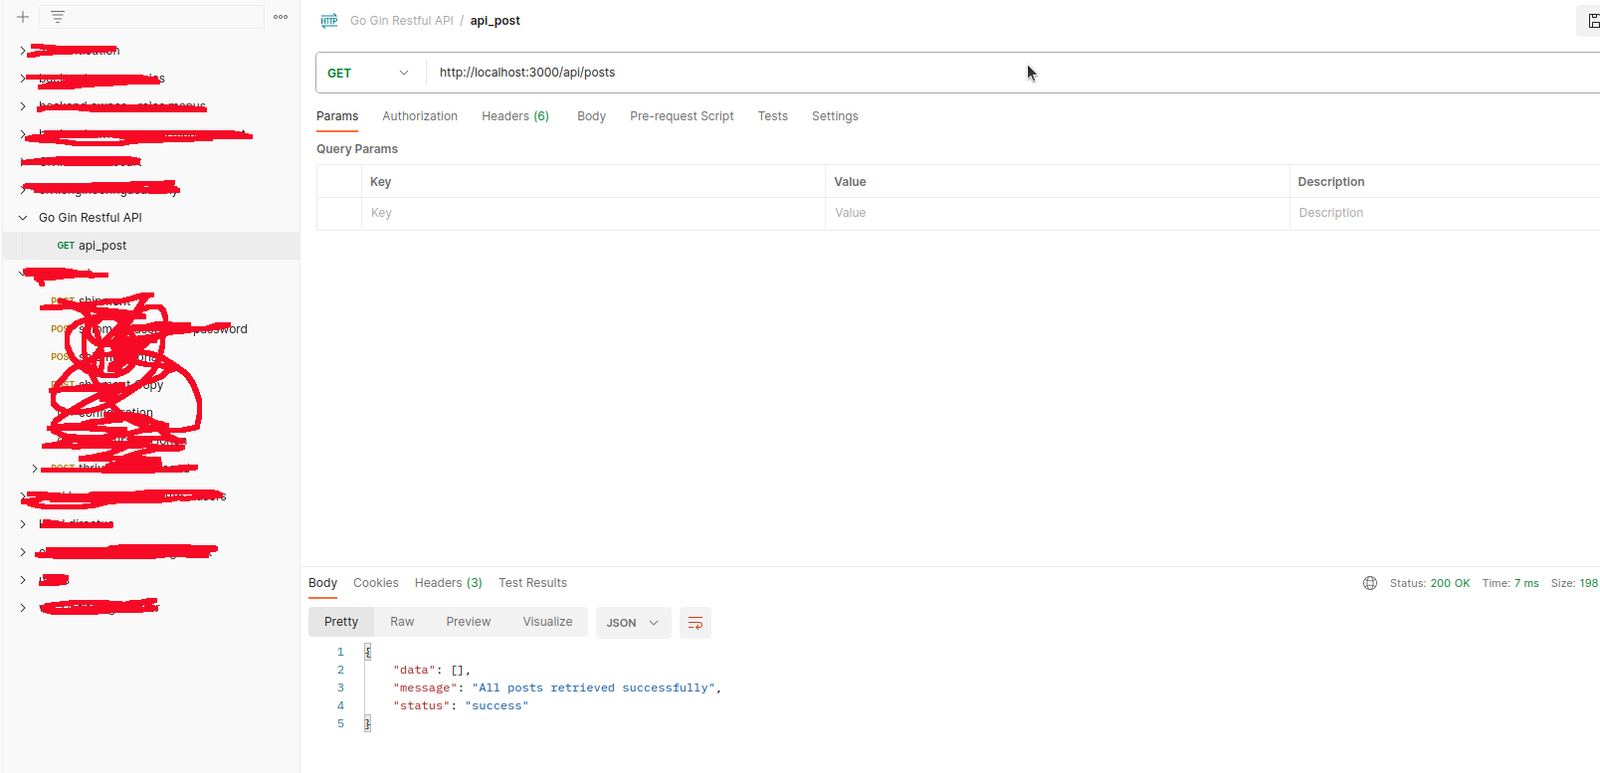
Note: Also we can check it via Postman
create a new collection ‘Go Gin Restful API’ then create a new GET request ‘api_posts’ with url http://localhost:3000/api/posts
Insert data into the database
1. Create a new function ‘InsertPost’ in postController.go
note: first, we need to install a package ‘github.com/go-playground/validator/v10′[codesyntax lang=”bash”]
|
1 2 3 4 5 6 7 |
satria@teddy:~/Documents/projects/go-restful-api$ go get github.com/go-playground/validator/v10 go: upgraded github.com/gabriel-vasile/mimetype v1.4.3 => v1.4.8 go: upgraded github.com/go-playground/validator/v10 v10.20.0 => v10.24.0 go: upgraded golang.org/x/crypto v0.23.0 => v0.32.0 go: upgraded golang.org/x/net v0.25.0 => v0.34.0 go: upgraded golang.org/x/sys v0.20.0 => v0.29.0 satria@teddy:~/Documents/projects/go-restful-api$ go mod tidy |
[/codesyntax]
[codesyntax lang=”text”]
|
1 2 3 4 5 6 7 8 9 10 11 12 13 14 15 16 17 18 19 20 21 22 23 24 25 26 27 28 29 30 31 32 33 34 35 36 37 38 39 40 41 42 43 44 45 46 47 48 49 50 51 52 53 54 55 56 57 58 59 60 61 62 63 64 65 66 67 68 69 70 71 72 73 74 |
package controllers import ( "errors" "net/http" "advcha/backend-api/models" "github.com/gin-gonic/gin" "github.com/go-playground/validator/v10" ) // ValidatePostInput struct is used to validate the input of the post type ValidatePostInput struct { Title string `json:"title" binding:"required"` Content string `json:"content" binding:"required"` } // ErrorMsg struct is used to return the error message type ErrorMsg struct { Field string `json:"field"` Message string `json:"message"` } // GetErrorMsg function is used to get the error message func GetErrorMsg(fe validator.FieldError) string { switch fe.Tag() { case "required": return "This field is required" } return "Unknown error" } // get all posts func FindPosts(c *gin.Context) { // get all posts from the database var posts []models.Post models.DB.Find(&posts) // return JSON response c.JSON(200, gin.H{ "status": "success", "message": "All posts retrieved successfully", "data": posts, }) } func InsertPost(c *gin.Context) { // validate the input var input ValidatePostInput if err := c.ShouldBindJSON(&input); err != nil { var ve validator.ValidationErrors if errors.As(err, &ve) { out := make([]ErrorMsg, len(ve)) for i, fe := range ve { out[i] = ErrorMsg{fe.Field(), GetErrorMsg(fe)} } c.AbortWithStatusJSON(http.StatusBadRequest, gin.H{"error": out}) } return } // create a new post post := models.Post{Title: input.Title, Content: input.Content} // insert the new post into the database models.DB.Create(&post) // return JSON response c.JSON(200, gin.H{ "status": "success", "message": "Post created successfully", "data": post, }) } |
[/codesyntax]
2. Then add a route in main.go to insert the post like this
[codesyntax lang=”text”]
|
1 2 3 4 5 6 7 8 9 10 11 12 |
func main() { ... // create a GET route with an endpoint "/posts" router.GET("/api/posts", controllers.FindPosts) // create a POST route with an endpoint "/posts" router.POST("/api/posts", controllers.InsertPost) // start the server with port 3000 router.Run(":3000") // listen and serve on } |
[/codesyntax]
3. Run and test with Postman
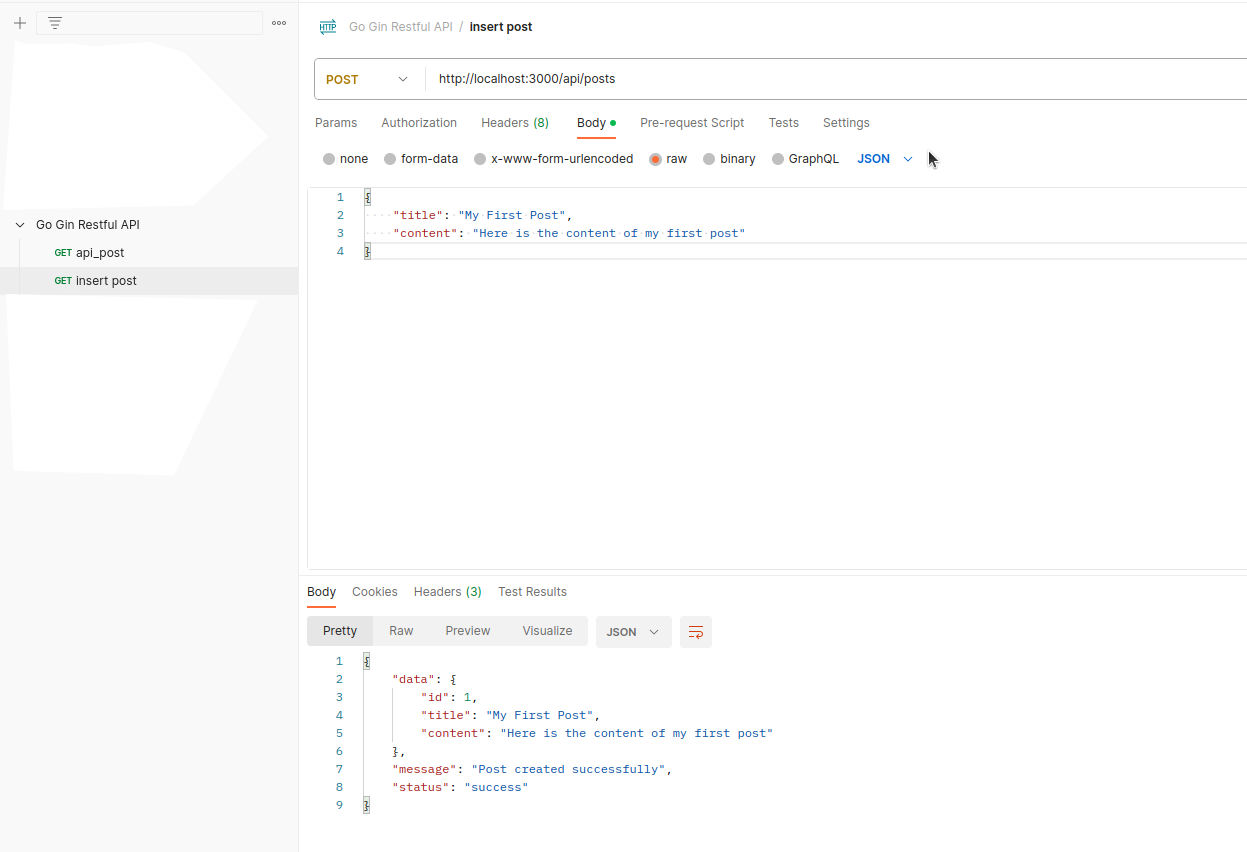
Note: also need to test the validation with a json for empty title and content to make sure the validation is working.
the above screen showed the json with title and content and the success result
the output on http://localhost:3000/api/posts will be like this:
|
1 |
{"data":[{"id":1,"title":"My First Post","content":"Here is the content of my first post"}],"message":"All posts retrieved successfully","status":"success"} |