Ref: https://www.rosehosting.com/blog/how-to-install-osticket-on-ubuntu-22-04/
Install osTicket 1.10
LOCAL SETUP (I uses PHP 7.4)
I tried to setup a virtualhost:
sudo gedit /etc/apache2/sites-available/osticket-v1.10.test.conf
Here is the file osticket-v1.10.test.conf:
[codesyntax lang=”text”]
|
1 2 3 4 5 6 7 8 9 10 11 12 13 |
<VirtualHost osticket-v1.10.test:80> ServerName osticket-v1.10.test ServerAlias www.osticket-v1.10.test DocumentRoot "/home/satria/Documents/projects/osticket-v1.10/upload" DirectoryIndex index.php <Directory "/home/satria/Documents/projects/osticket-v1.10"> AllowOverride All Allow from All Require all granted </Directory> ErrorLog /var/log/apache2/osticket-v1.10.error.log CustomLog /var/log/apache2/osticket-v1.10.access.log combined </VirtualHost> |
[/codesyntax]
activate it:
sudo a2ensite osticket-v1.10.test
Restart/reload the server:
sudo systemctl reload apache2
Insert osticket-v1.10.test in my local host:
sudo gedit /etc/hosts
Here is the entry that need to be put in:
127.0.0.1 osticket-v1.10.test
Restart/reload the server:
sudo systemctl reload apache2
Change the files & dir permission:
satria@teddy:~/Documents/projects/osticket-v1.10$ sudo chmod -R 777 .
I need to install some php 7.4 extensions missing:
sudo apt install php7.4-imap && sudo apt install php7.4-apcu
Now the site is http://osticket-v1.10.test
SETUP:
rename/copy
from:
/home/satria/Documents/projects/osticket-v1.10/upload/include/ost-sampleconfig.php
to:
/home/satria/Documents/projects/osticket-v1.10/upload/include/ost-config.php
create a new database : osticket_110
set user account
username: adminOT
password: adminOT
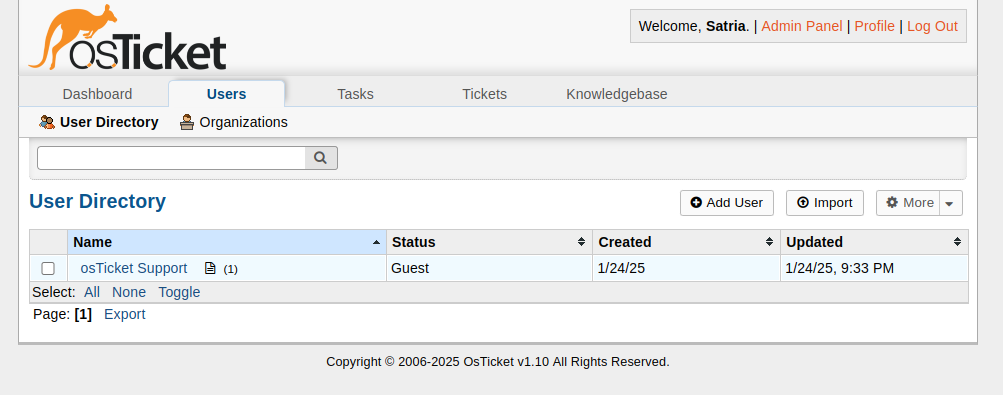
after the successful installation:
satria@teddy:~/Documents/projects/osticket-v1.10$ sudo chmod 0644 upload/include/ost-config.php
Your osTicket URL:
http://osticket-v1.10.test/
Your Staff Control Panel or admin:
http://osticket-v1.10.test/scp
after the admin login, I got ‘Valid CSRF Token Required’
SOLUTION:
REF: https://stackoverflow.com/questions/41542268/valid-csrf-token-required-in-osticket-after-login
in include/class.ostsession.php
Just add this line:
$this->data->session_data = “”;
After:
catch (DoesNotExist $e) {
$this->data = new SessionData([‘session_id’ => $id]);
}
So it will be:
catch (DoesNotExist $e) {
$this->data = new SessionData([‘session_id’ => $id]);
$this->data->session_data = “”;
}
Then try to login from scratch, don’t just refresh the submission.
Install osTicket 1.18.1
LOCAL SETUP (I uses PHP 8.2)
[codesyntax lang=”bash”]
|
1 2 3 4 5 |
sudo a2dismod php7.4 sudo systemctl reload apache2 sudo a2enmod php8.2 sudo systemctl reload apache2 |
[/codesyntax]
I tried to setup a virtualhost:
sudo gedit /etc/apache2/sites-available/osticket-v1.18.1.test.conf
Here is the file osticket-v1.18.1.test.conf:
[codesyntax lang=”text”]
|
1 2 3 4 5 6 7 8 9 10 11 12 13 |
<VirtualHost osticket-v1.18.1.test:80> ServerName osticket-v1.18.1.test ServerAlias www.osticket-v1.18.1.test DocumentRoot "/home/satria/Documents/projects/osticket-v1.18.1/osticket-v1.18.1/upload" DirectoryIndex index.php <Directory "/home/satria/Documents/projects/osticket-v1.18.1"> AllowOverride All Allow from All Require all granted </Directory> ErrorLog /var/log/apache2/osticket-v1.18.1.error.log CustomLog /var/log/apache2/osticket-v1.18.1.access.log combined </VirtualHost> |
[/codesyntax]
activate it:
sudo a2ensite osticket-v1.18.1.test
Restart/reload the server:
sudo systemctl reload apache2
Insert osticket-v1.18.1.test in my local host:
sudo gedit /etc/hosts
Here is the entry that need to be put in:
127.0.0.1 osticket-v1.18.1.test
Restart/reload the server:
sudo systemctl reload apache2
Change the files & dir permission:
satria@teddy:~/Documents/projects/osticket-v1.18.1$ sudo chmod -R 777 .
I need to install some php 8.2 extensions missing (if not exist):
sudo apt install php8.2-imap && sudo apt install php8.2-apcu
Now the site is http://osticket-v1.18.1.test
SETUP:
rename/copy
from:
/home/satria/Documents/projects/osticket-v1.18.1/osticket-v1.18.1/upload/include/ost-sampleconfig.php
to:
/home/satria/Documents/projects/osticket-v1.18.1/osticket-v1.18.1/upload/include/ost-config.php
create a new database : osticket_1181
set user account
username: adminOT
password: adminOT
after the successful installation:
satria@teddy:~/Documents/projects/osticket-v1.18.1/osticket-v1.18.1/$ sudo chmod 0644 upload/include/ost-config.php
Your osTicket URL:
http://osticket-v1.18.1.test/
Your Staff Control Panel or admin:
http://osticket-v1.18.1.test/scp
THE EMAIL SETTING:
configure emails setting (http://osticket-v1.18.1.test/scp/emails.php)
Note: Create a few emails alias for satria@advchaweb.com on the hostinger like osticket1@advchaweb.com, osticket2@advchaweb.com, osticket3@advchaweb.com
Create a new email ->
Account Tab:
Email Address: osticket1@advchaweb.com
Email Name: osticket1@advchaweb.com
Department:
Priority: Normal
Help Topic:
Auto Response: (unchecked)
Remote Mailbox Tab:
Mailbox Setting:
Hostname: imap.hostinger.com
Port Number: 993
Mail Folder: INBOX
Protocol: IMAP
Authentication: Basic Authentication -> Click ‘Config’ button
–>
Email Address: satria@advchaweb.com
password: +PL5x8mQ
Email Fetching:
Status: Enable –> to fetch the incoming email
Fetch Frequency: 15 minutes
Emails Per Fetch: 50
Fetched Emails: Archive – move to folder -> 2023OstFetched
Outgoing (SMTP) Tab:
Status: Enable –> MUST BE
Hostname: smtp.hostinger.com –> NO. USE THE smtp-relay.brevo.com SETTING BELOW
Port Number: 465
Authentication: Same as Remote Mailbox
Header Spoofing: (checked) Allow for this email