- Download the latest version from https://download.moodle.org/
- Extract the zip file to your webroot directory
- Install via your browser http://localhost/works/moodle32/install.php
My setting:
123Web address: http://localhost/works/moodle32Moodle directory : /home/teddy/Documents/works/moodle32Data directory : /home/teddy/moodledata
Make sure the ‘Data directory’ can be written!
I created the dir ‘moodledata’ then set the permission to 777 - Select the database ‘Improved MySQL/mysqli)
My setting:
12Database name: moodle32Tables prefix: mdl_
But create the new database ‘moodle32’ via phpmyadmin first (collation: utf8-general-ci) - Install and enable some php extensions required. For example I need to install also two php extension xmlrpc and intl (dont forget to restart the apache server after the installation)
123teddy@teddy-K43SJ:~$ sudo apt-get install php5.6-xmlrpcteddy@teddy-K43SJ:~$ sudo apt-get install php5.6-intlteddy@teddy-K43SJ:~$ sudo service apache2 restart
Then refresh the page to see the changes - Create an username and password
12345username: adminpassword: Admin@123First Name: AdminSur Name: User
- Site setting
12Full site name (fullname) : Moodle 3.2.1 TestShort name for site (eg single word) (shortname) : moodle
- Done. Here is the screenshot
Admin dashboard (http://localhost/works/moodle32/my/)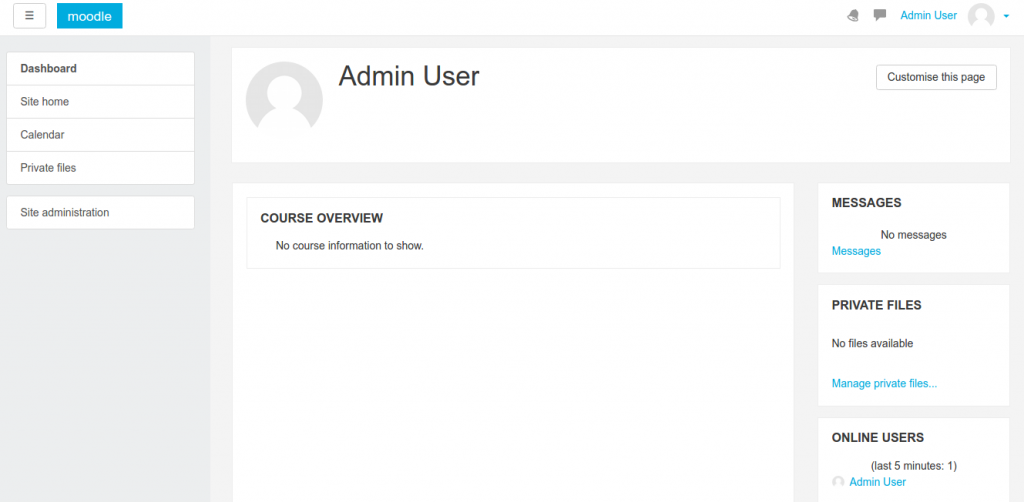 Site Home (http://localhost/works/moodle32/?redirect=0)
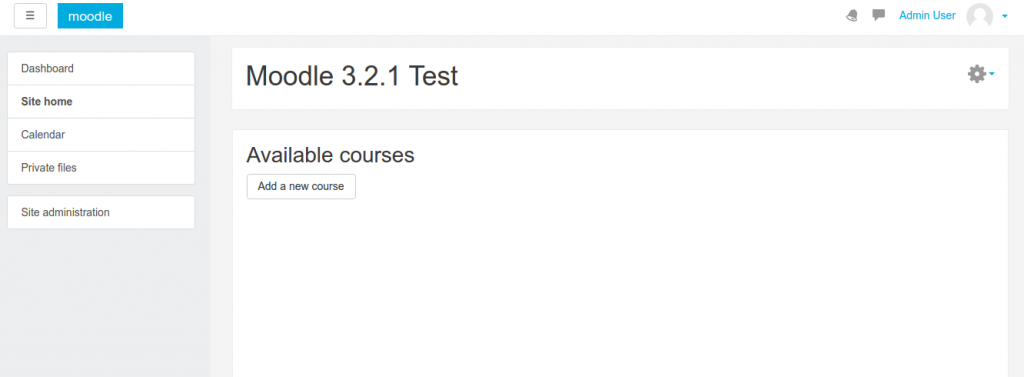
- Install and Change theme
Currently the default theme is ‘Boost’. If you want to change the theme, you can find them on the internet. The free themes can be found in https://moodle.org/plugins/browse.php?list=category&id=3. Please find the correct support version (here, it should support moodle version 3.2). I use ‘Campus’ theme as an example (https://moodle.org/plugins/theme_campus). The tutorial for the theme installation can be read in https://github.com/dasistwas/moodle-theme_campus/.
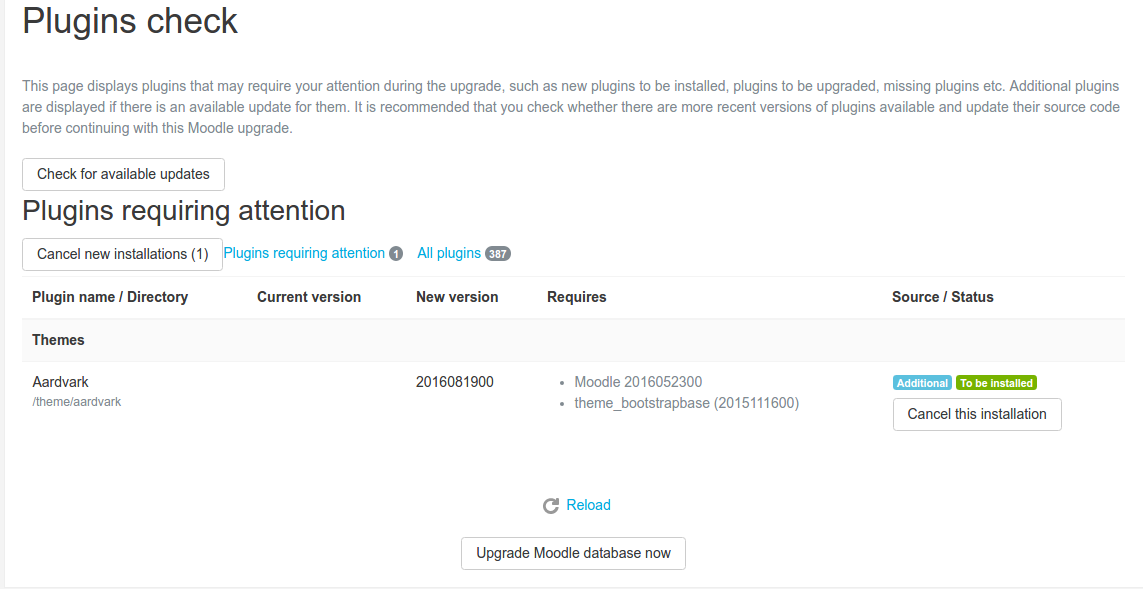
I downloaded the theme (https://moodle.org/plugins/download.php/13006/theme_campus_moodle32_2016121403.zip) then extract it in ‘/theme/’ directory of my moodle installation (/moodle32/theme/). Then Go to ‘Site Administration’ -> ‘Notification’ or http://localhost/works/moodle32/admin/index.php. It’d show this page (note: I use ‘Aadvark’ theme here but the step is relatively same)
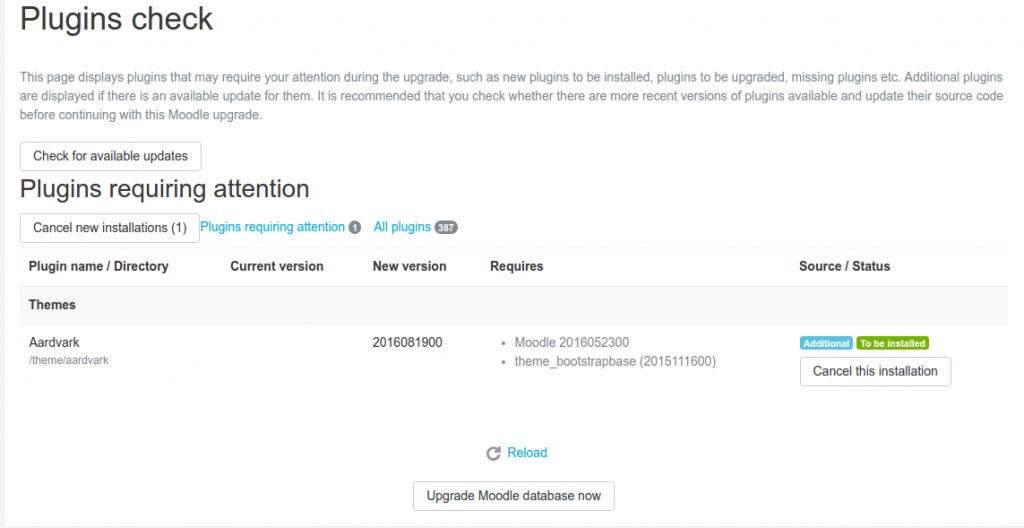 Then click ‘Upgrade Moodle database now’ button. ATTN: SOMETIMES THE PROCESS TO UPGRADE THE DB IS SLOW (FOR CAMPUS THEME)!
If success, click ‘Continue’ button!.
Then We’d face the page setting for the theme (http://localhost/works/moodle32/admin/upgradesettings.php?). Make any change if necessary then click ‘Save Changes’ button.
DONE - To use the theme, Pls go to ‘Site Administration’ -> ‘Appearance’ -> ‘Themes’ -> ‘Theme Selector’ or http://localhost/works/moodle32/theme/index.php. On ‘Default’, click ‘Change theme’
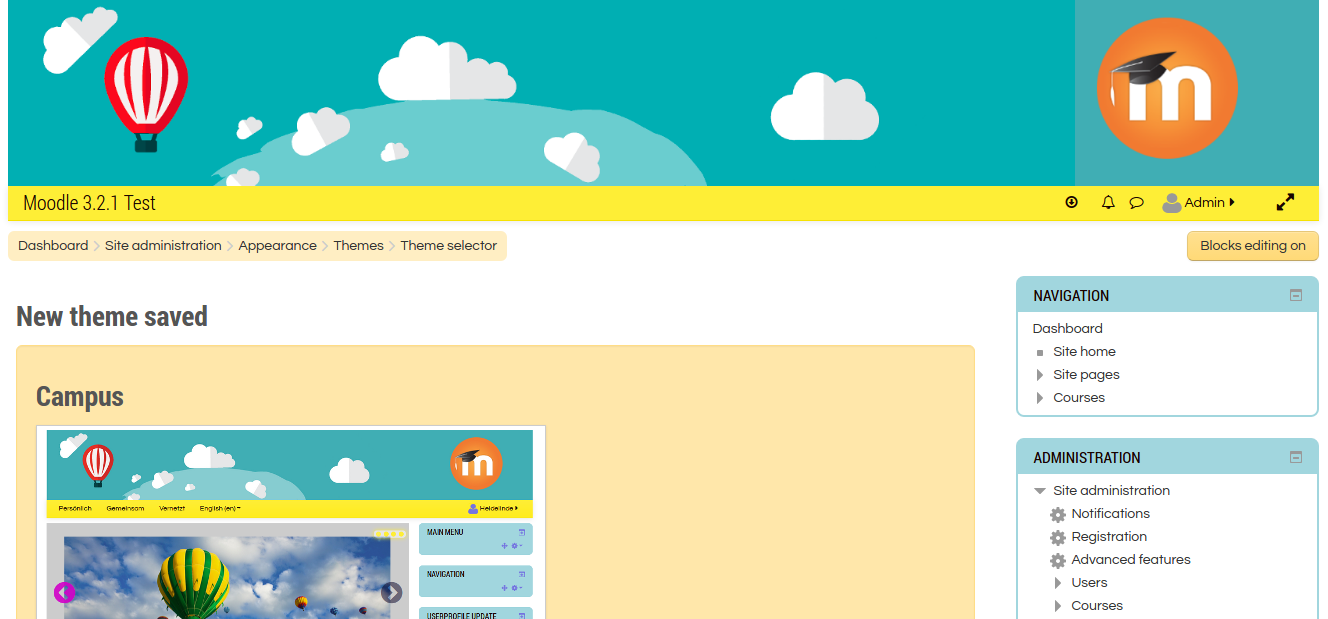
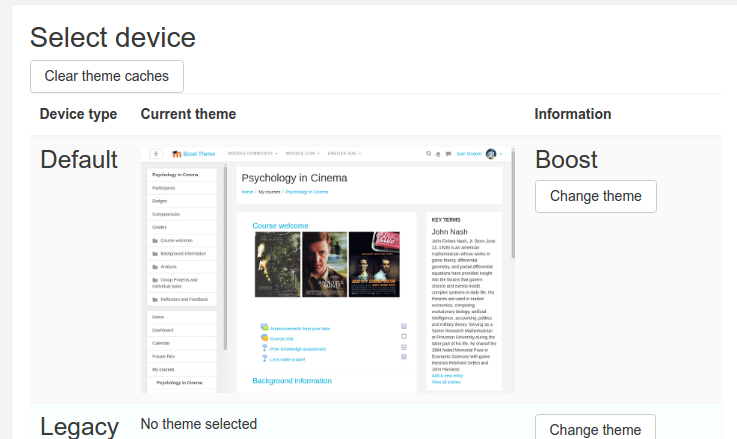 Then select ‘Campus’ theme. Click ‘Use theme’ button (http://localhost/works/moodle32/theme/index.php?confirmation=1&choose=campus).
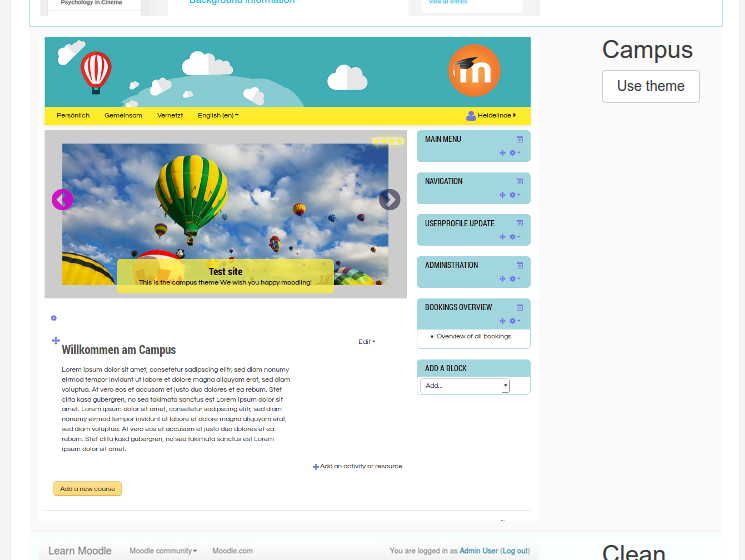 Here is the ‘Campus’ theme looks!
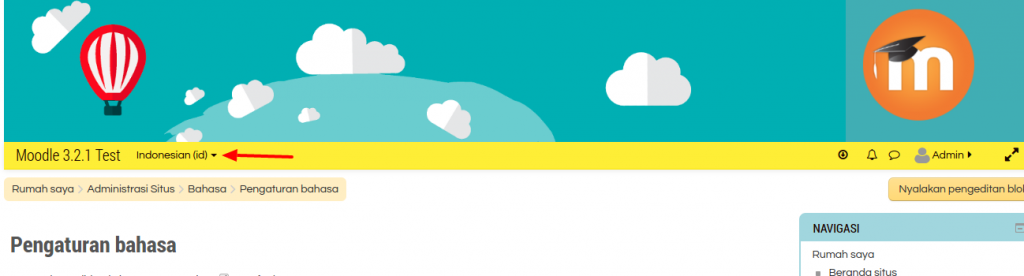
- I can do many things else like install and use your own language (Install new language: Site Administration -> Language -> Language Packs) then at ‘Language Settings’, change the default language. Then you can select and change the language from the frontend
- Create a new user
Pls go to Site administration -> Users -> Accounts -> Add a new user (http://localhost/works/moodle32/user/editadvanced.php?id=-1). Then fill the form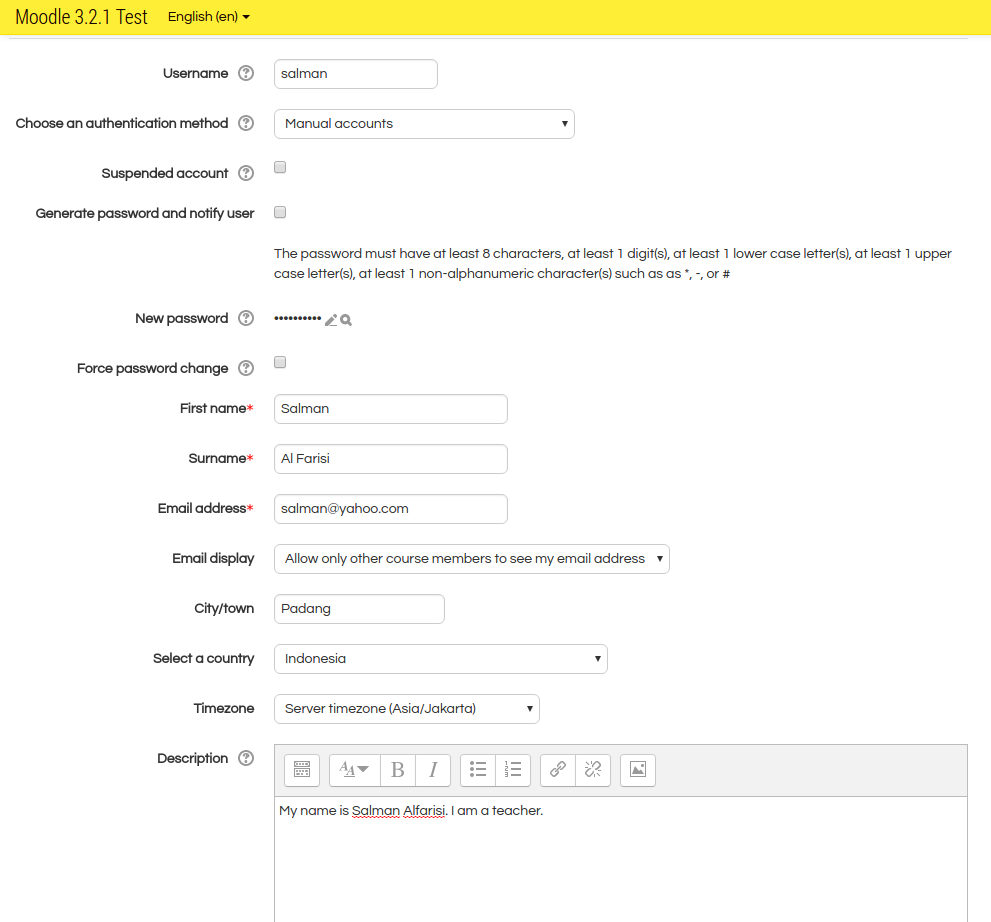 Then click ‘Create User’
 - Create the courses (and the course category)
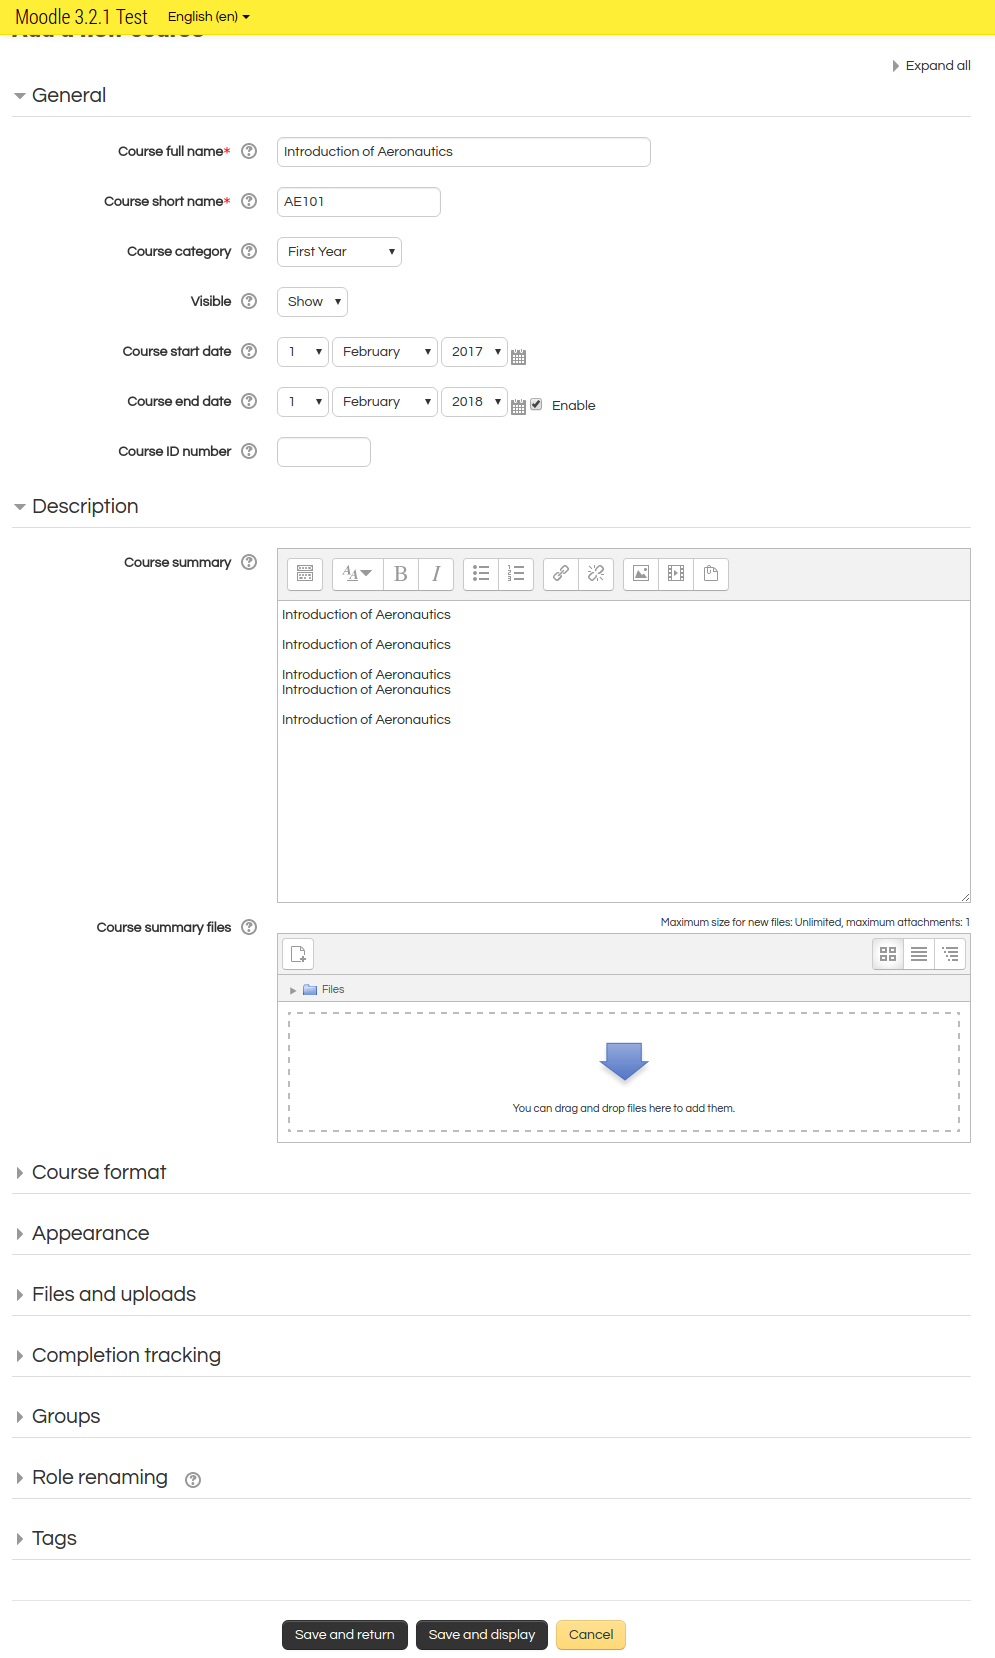
Pls go to Site administration -> Courses -> Add a category (http://localhost/works/moodle32/course/editcategory.php?parent=0) then fill the form.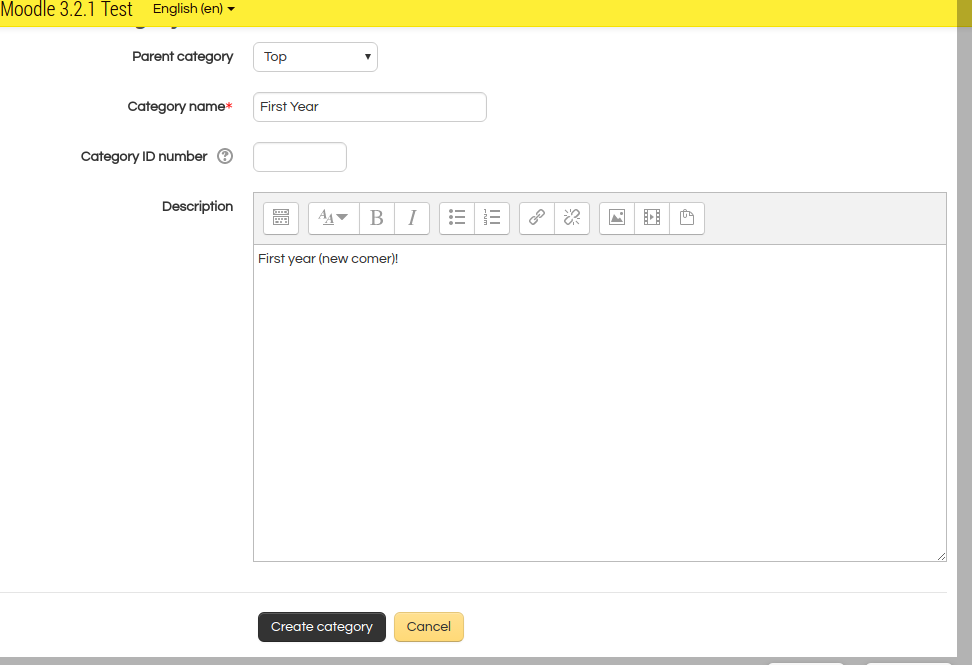 Then click ‘Create category’.
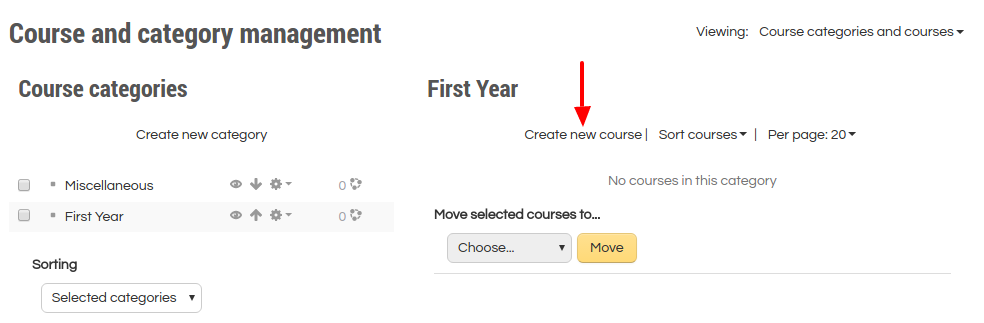 Then click ‘Create new course’. Then fill the form.
 Then click ‘Save and return’. You can add some more courses. So here is the looks.
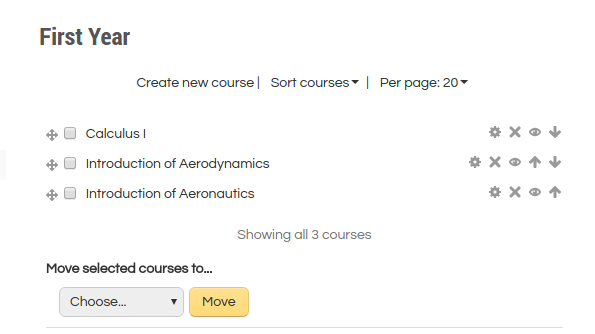
- Enroll (Add) users to the courses
For example for adding the new user ‘salman’ to the course ‘Calculus I’. First, click the course ‘Calculus I,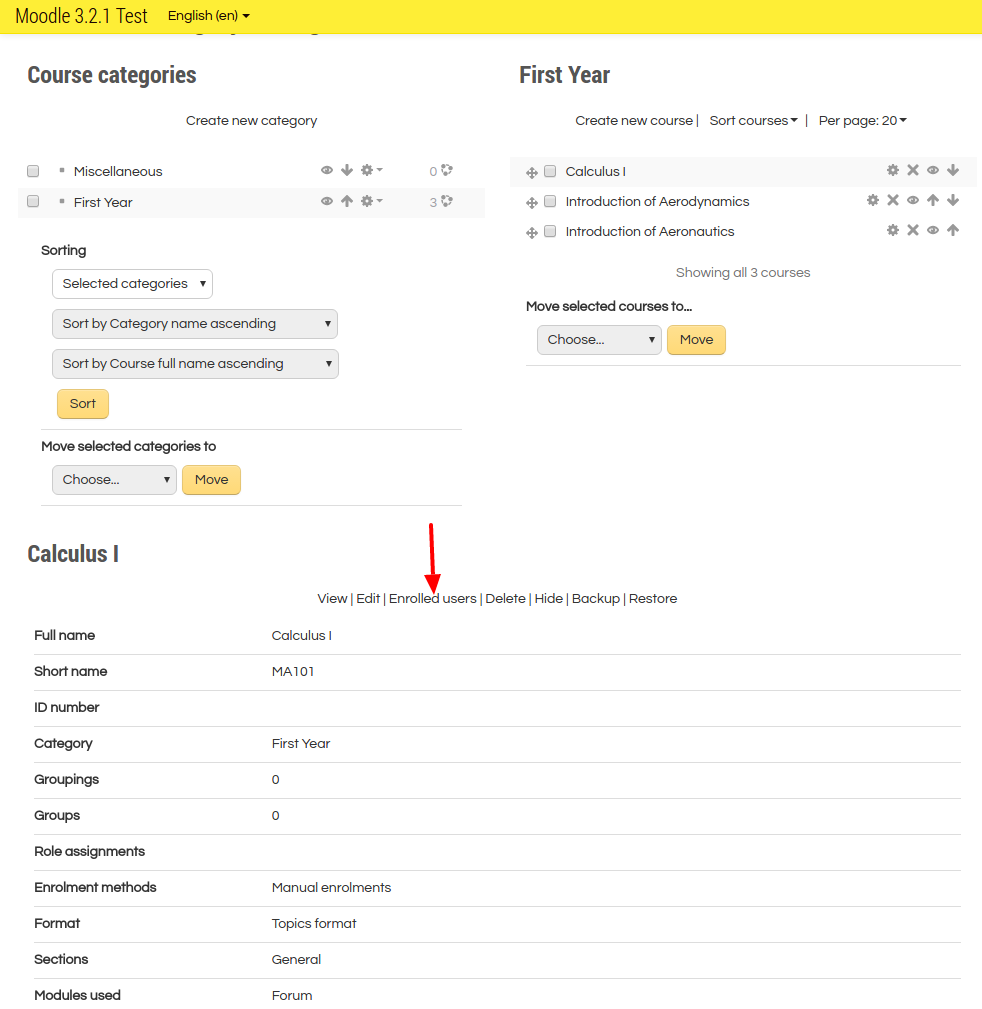 then click ‘Enrolled users’ link.
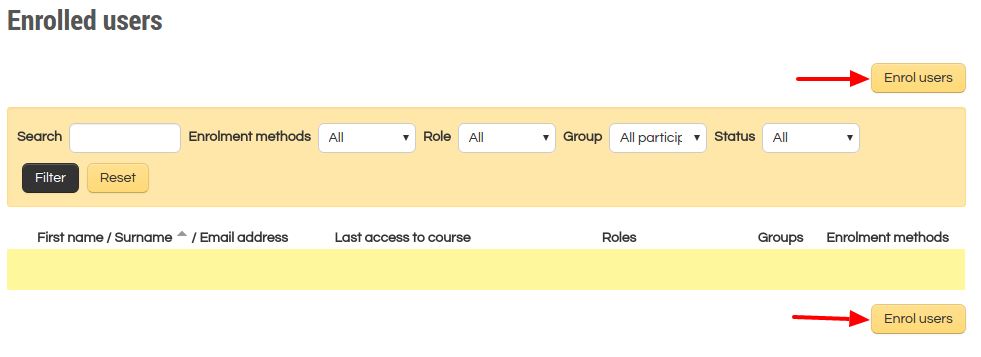 then click ‘Enroll user’ button.
 then modify ‘Assign roles’ to ‘Teacher’ and click ‘Enrol’ for user ‘Salman’. At the end, click ‘Finish enrolling users’ button. Here is the result.
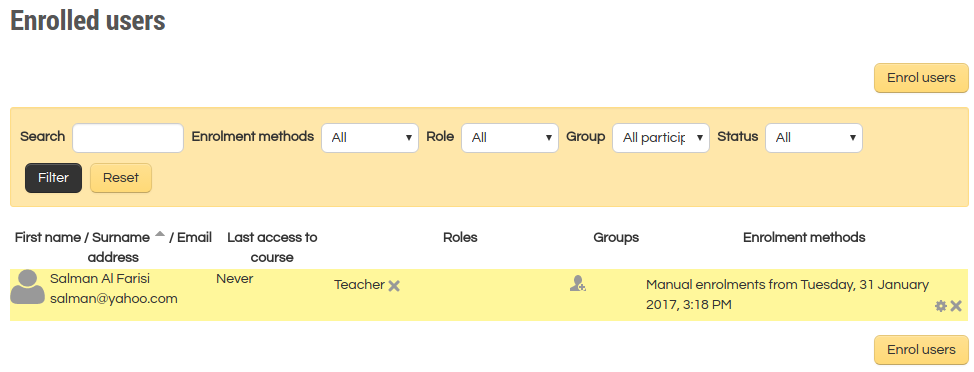 To add/enroll a new user as a student, please create the new user like #12 then enroll this user as a student like above!
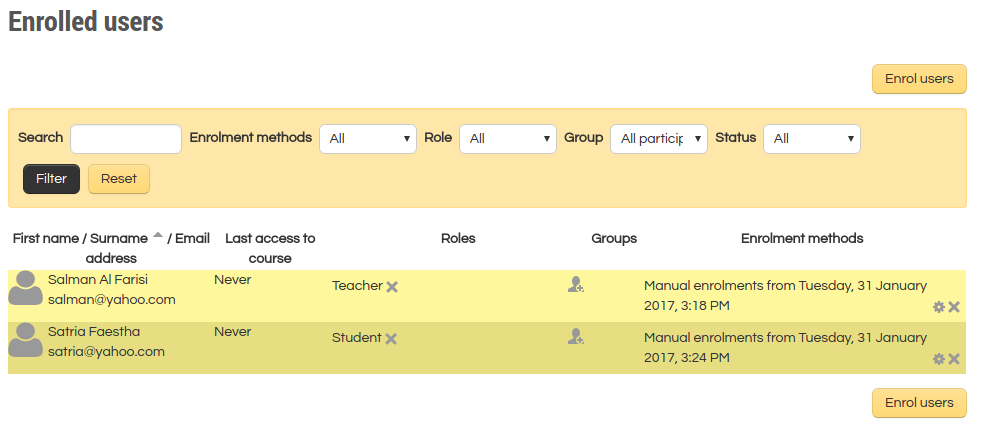
- ourses view as a teacher and a student.
Logout from the admin account. Here is the frontpage (http://localhost/works/moodle32/) looks.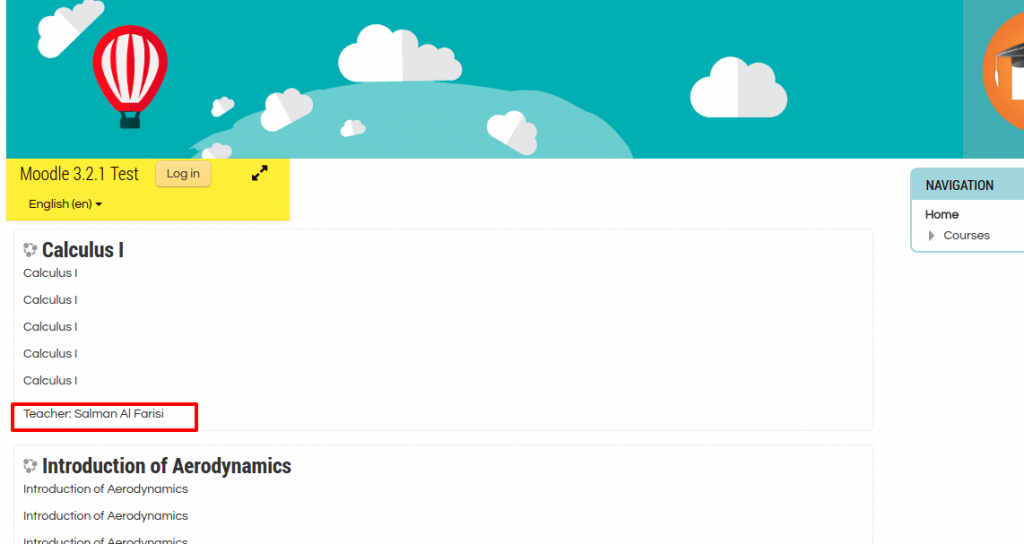 Then try to login as a teacher (user: salman, password: Salman@123). As a teacher, he/she can change/modify the course content (press the right button to on/off the edit mode) and give/add activity.
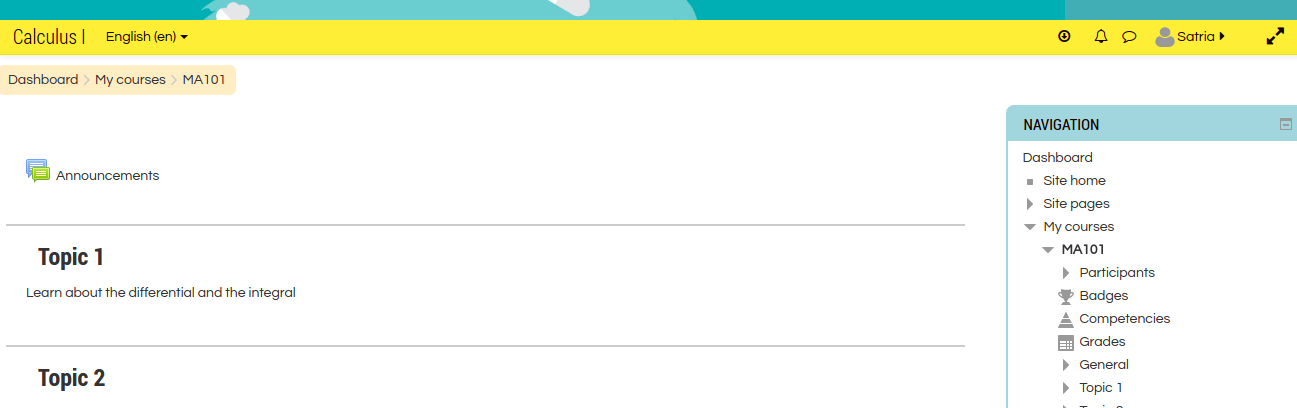
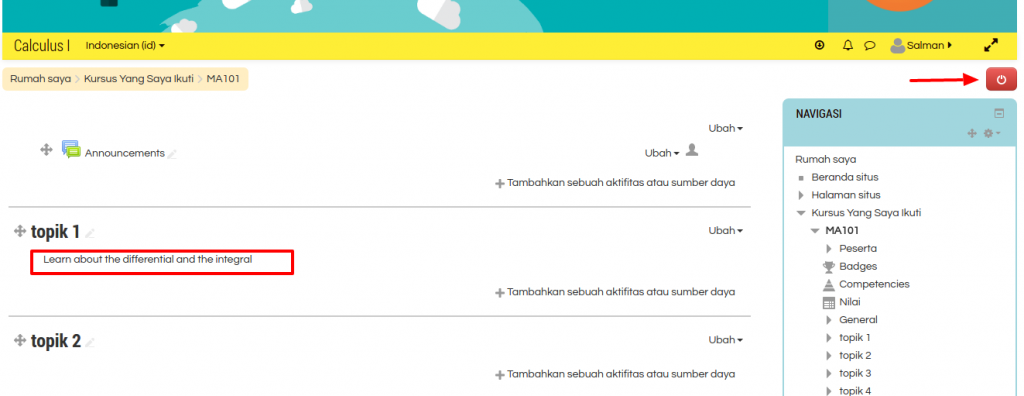 Then try to login as a student (user: satria, password: Satria@123). As a student, he/she can only read/view the courses (cannot edit the course).
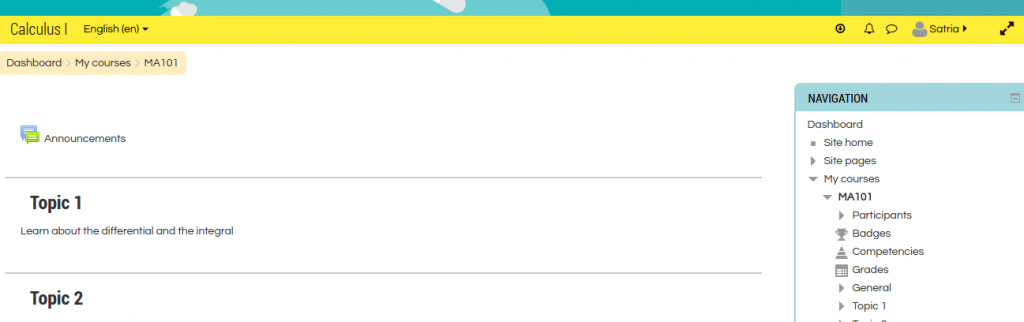 Moodle 1.9.7
USE PHP 5.6 — NO NEED TO CHANGE PHP CLI
1teddy@teddy:~$ sudo ln -sfn /usr/bin/php5.6 /etc/alternatives/php
Setup with Nginx
1teddy@teddy:~$ sudo gedit /etc/nginx/sites-available/moodle_1917.test
Here is the content
1234567891011121314151617181920212223242526272829303132333435363738394041424344454647server {listen 80;listen [::]:80;root /home/teddy/Documents/works/moodle1917;index index.php index.html index.htm;server_name www.moodle_1917.test moodle_1917.test;error_log /home/teddy/Documents/works/moodle1917/var/log/moodle_errors.log;access_log /home/teddy/Documents/works/moodle1917/var/log/moodle_access.log;location / {try_files $uri $uri/ =404;}location /dataroot/ {internal;alias /home/teddy/Documents/works/moodle1917data/;}location ~ [^/]\.php(/|$) {include snippets/fastcgi-php.conf;fastcgi_pass unix:/run/php/php5.6-fpm.sock;fastcgi_param SCRIPT_FILENAME $document_root$fastcgi_script_name;include fastcgi_params;}gzip on;gzip_disable "msie6";gzip_comp_level 6;gzip_min_length 1100;gzip_buffers 16 8k;gzip_proxied any;gzip_typestext/plaintext/csstext/jstext/xmltext/javascriptapplication/javascriptapplication/x-javascriptapplication/jsonapplication/xmlapplication/xml+rssimage/svg+xml;gzip_vary on;}
NOTE: Pay attention on these lines
1234location /dataroot/ {internal;alias /home/teddy/Documents/works/moodledata/;}
I HAVE TO PUT THEM THERE. IF NOT, I’D GET SESSION PROBLEM AND THE STATIC FILES (JS AND CSS) PATH WOULD NOT BE RECOGNIZED
REF: https://www.sudutbaca.com/cara-install-moodle-di-debian-9-menggunakan-nginx-mariadb-php7-2-fpm/XXXdon’t forget to create the log file in var/log/system.log
Then
1teddy@teddy:~$ sudo ln -s /etc/nginx/sites-available/moodle_1917.test /etc/nginx/sites-enabled/moodle_1917.test
Then
1teddy@teddy:~$ sudo gedit /etc/hosts
Insert this line:
123...127.0.0.1 moodle_1917.test...
Then check the nginx config and restart nginx
12345teddy@teddy:~/Documents/works/moodle$ sudo nginx -tnginx: [warn] conflicting server name "" on 0.0.0.0:80, ignorednginx: the configuration file /etc/nginx/nginx.conf syntax is oknginx: configuration file /etc/nginx/nginx.conf test is successfulteddy@teddy:~/Documents/works/moodle$ sudo service nginx restart
Set the files owner
1teddy@teddy:~/Documents/works/moodle1917$ sudo chown www-data:www-data -R .
Open it on your browser http://moodle_1917.test. For the first time, it’ll install Moodle.