Source: (local) http://localhost/works/laravel/mybooking/public/
(from) https://github.com/prehire/php-23093023909ad09a09
TASK:
NOTE: I do this without using because it’s heavier for my laptop. I can use vagrant later but need to set some configuration. Please read Laravel Homestead VirtualBox Vagrant.
- Copy the available local ‘php-23093023909ad09a09’ directory then paste to be ‘mybooking’. If you dont have the source code of ‘php-23093023909ad09a09’, then clone from https://github.com/prehire/php-23093023909ad09a09 then rename it to ‘mybooking’
- Go to the directory ‘mybooking’ then use composer to install the dependency packages.
1teddy@teddy-K43SJ:~/Documents/works/laravel/mybooking$ composer install - Because I want to use SQLite, so modify .env to use SQLite
1DB_CONNECTION=sqlite
Also modify /config/database.php to make sure these settings:
12345678910'default' => 'sqlite',...'connections' => ['sqlite' => ['driver' => 'sqlite','database' => database_path('homework_database.sqlite'),'prefix' => '',],...
Also make sure the sqlite database ‘homework_database.sqlite’ is in /database/ directory! - Set the files permission for these directories:
123teddy@teddy-K43SJ:~/Documents/works/laravel/mybooking$ sudo chmod -R 777 database/teddy@teddy-K43SJ:~/Documents/works/laravel/mybooking$ sudo chmod -R 777 storage/teddy@teddy-K43SJ:~/Documents/works/laravel/mybooking$ sudo chmod -R 777 bootstrap/
- Test the app for the first time http://localhost/works/laravel/mybooking/public/. Here is how it looks
 It only shows Homework (http://localhost/works/laravel/mybooking/public/), Booking (http://localhost/works/laravel/mybooking/public/booking), Customer (http://localhost/works/laravel/mybooking/public/customer) and Cleaner (http://localhost/works/laravel/mybooking/public/cleaner).
 - OK. It’s time for the task description!
Summary
We are a local home cleaning company called Homework. Today we are keeping track of all our bookings using a spreadsheet and we want to move it into a web application. Our main goal with this project is to make it possible for customers to schedule a booking online. I’ve already created the scaffolding of the app for you and now I need you to add some functionality to it. This should take you about 1-2 hours, but you have up to 4 hours to complete it.
Deliverables
1. All models and columns should have validation as described in the model spec below, plus any common-sense validation you’ll put on new models.
2. We need to split the site in to Admin-only and Customer-only. Right now all the admin functionality is exposed to the world.
3. Currently we operate in 10 cities, but plan to expand quickly. We need a way to admin the list of cities we operate in and the ability to add to the list. You should create a new table to do this.
4. On the admin cleaner form we need a way to select the cities a cleaner works in. This should be a checkbox list populated by the list of the cities we operate in. You may need to create a new table to store this data.
5. We need a way for customers to signup and schedule a booking all on one form. To accomplish this you will need to do the following:
– Make the site root a customer-facing form designed for customers to sign up and book a cleaner.
– On this form, capture all the data needed to create a customer in the database (first name, last name, phone number).
– If the customer already exists in the database (use phone number to determine this) use the existing record instead of creating a new one. You should probably add a validation to enforce this.
– Let the customer select what city they are in from the cities table created earlier.
– Let the customer specify a date and time when they would like their house cleaned.
– When the user submits the form, look for cleaners that work in the specified city that do not have any bookings that conflict with the time specified.
– If you can find an available cleaner, create the booking and display the name of the cleaner assigned to the booking.
– If you can’t find an available cleaner, tell the user that we could not fulfill their request.
6. Write tests for the parts of the application you feel need it the most.
7. When you are done, please zip up the entire root directory including your SQLite database and vendor files — do not cherry-pick folders.
Restrictions
1. Do NOT switch the database from SQLite to MySQL.
2. If you create a password-protected account, use credentials “admin@admin.com” and password “admin”.Existing Models
1. customer
– first_name (required)
– last_name (required)
– phone_number (optional)
2. booking
– customer (required, enforce referential integrity)
– cleaner (required, enforce referential integrity)
– date (required)
3. cleaner
– first_name (required)
– last_name (required)
– quality_score (required, must be a number between 0.0 and 5.0)
Setup
https://github.com/prehire/php-23093023909ad09a09Summary
The following deliverables are not required but are nice-to-haves. If you choose to implement them, it should take around 1 hour but you must complete this section within 3 hours. You can complete any number of the bonus deliverables: you don’t need to complete all of them.Bonus Deliverables
1. Use a free theme to make the application look a little better, especially the pages seen by our customers.
2. Add security to the admin pages on our site. Customers and cleaners do not need to be able to login at the moment.
3. The cleaner form should have one additional field: ’email’
o Email should be required
0 Check that it is a valid email address
4. When a new booking is created, email the cleaner with information on the booking and customer.
5. The Customer Show view should show all associated bookings below the form and link to them.
6. The Cleaner Show view should show all associated bookings below the form and link to them.
7. When you are done, please zip up the whole app directory with dependencies and upload it below. - Step by step the task completion!
“2. We need to split the site in to Admin-only and Customer-only. Right now all the admin functionality is exposed to the world.”. For the Admin-only page, It’d need a login. But it not needed for Customer-only page! So we’re going to show the homepage for customer and also the login link for the admin!
Use ‘Auth’ to create the login/register scaffolding
12teddy@teddy-K43SJ:~/Documents/works/laravel/mybooking$ php artisan make:authAuthentication scaffolding generated successfully.
NOTE: This will modify ‘app.blade.php’ in /resources/views/layouts/ directory and would mess the web looks. But no worry. We’d fix this later!
Then modify ‘web.php’ in /routes/ like this:
123456Route::get('/', function () {return redirect('/home');});Route::get('/home', 'Home\HomeController@index');Auth::routes();
Then create ‘HomeController’ in ‘Home’ directory:
12teddy@teddy-K43SJ:~/Documents/works/laravel/mybooking$ php artisan make:controller Home/HomeControllerController created successfully.
You’ll see ‘HomeController.php’ in /app/Http/Controllers/Home/ directory!
NOTE: You can remove ‘HomeController.php’ file in /app/Http/Controllers/ directory created by Auth scaffoldiing!
Then add a new function ‘index’ in the new controller. Here is the controller content look
123456789101112131415<?phpnamespace App\Http\Controllers\Home;use Illuminate\Http\Request;use App\Http\Requests;use App\Http\Controllers\Controller;class HomeController extends Controller{public function index(){return view('home.index');}}
Then create a new directory ‘home’ in /resources/views/ and a new blade template ‘index.blade.php’ in the new directory. Here is the temporary content of the file
1234567@extends('layouts.app')@section('content')<h1>Hello My Customer!</h1>@endsection
I also need to modify ‘app.blade.php’ in /layouts/ directory so we can fix the web layout and the login (and register) link can be showed up. We also need to add some bootstrap links for the CSS and Javascript/JQuery. Here is the modification in app.blade.php
123456789101112131415161718192021222324252627282930313233343536373839404142434445464748495051525354555657585960616263646566676869707172737475767778798081828384858687888990919293949596979899<!DOCTYPE html><html lang="en"><head><meta charset="utf-8"><meta http-equiv="X-UA-Compatible" content="IE=edge"><meta name="viewport" content="width=device-width, initial-scale=1"><title>Homework</title><!-- Fonts --><link rel="stylesheet" href="https://cdnjs.cloudflare.com/ajax/libs/font-awesome/4.5.0/css/font-awesome.min.css"integrity="sha384-XdYbMnZ/QjLh6iI4ogqCTaIjrFk87ip+ekIjefZch0Y+PvJ8CDYtEs1ipDmPorQ+" crossorigin="anonymous"><link rel="stylesheet" href="https://fonts.googleapis.com/css?family=Lato:100,300,400,700"><!-- Styles --><link rel="stylesheet" href="https://cdnjs.cloudflare.com/ajax/libs/twitter-bootstrap/3.3.6/css/bootstrap.min.css"integrity="sha384-1q8mTJOASx8j1Au+a5WDVnPi2lkFfwwEAa8hDDdjZlpLegxhjVME1fgjWPGmkzs7" crossorigin="anonymous">{{-- <link href="{{ elixir('css/app.css') }}" rel="stylesheet"> --}}<style>body {font-family: 'Lato';}.fa-btn {margin-right: 6px;}</style></head><body><div id="app"><nav class="navbar navbar-default navbar-static-top"><div class="container"><div class="navbar-header"><!-- Collapsed Hamburger --><button type="button" class="navbar-toggle collapsed" data-toggle="collapse" data-target="#app-navbar-collapse"><span class="sr-only">Toggle Navigation</span><span class="icon-bar"></span><span class="icon-bar"></span><span class="icon-bar"></span></button><!-- Branding Image --><a class="navbar-brand" href="{{ url('/') }}">Homework</a></div><div class="collapse navbar-collapse" id="app-navbar-collapse"><!-- Left Side Of Navbar --><ul class="nav navbar-nav"> </ul><!-- Right Side Of Navbar --><ul class="nav navbar-nav navbar-right"><!-- Authentication Links -->@if (Auth::guest())<li><a href="{{ url('/login') }}">Login</a></li><li><a href="{{ url('/register') }}">Register</a></li>@else<li class="dropdown"><a href="#" class="dropdown-toggle" data-toggle="dropdown" role="button" aria-expanded="false">{{ Auth::user()->name }} <span class="caret"></span></a><ul class="dropdown-menu" role="menu"><li><a href="{{ url('/logout') }}"onclick="event.preventDefault();document.getElementById('logout-form').submit();">Logout</a><form id="logout-form" action="{{ url('/logout') }}" method="POST" style="display: none;">{{ csrf_field() }}</form></li></ul></li>@endif</ul></div></div></nav>@yield('content')</div><!-- JavaScripts --><script src="https://cdnjs.cloudflare.com/ajax/libs/jquery/2.2.3/jquery.min.js"integrity="sha384-I6F5OKECLVtK/BL+8iSLDEHowSAfUo76ZL9+kGAgTRdiByINKJaqTPH/QVNS1VDb"crossorigin="anonymous"></script><script src="https://cdnjs.cloudflare.com/ajax/libs/twitter-bootstrap/3.3.6/js/bootstrap.min.js"integrity="sha384-0mSbJDEHialfmuBBQP6A4Qrprq5OVfW37PRR3j5ELqxss1yVqOtnepnHVP9aJ7xS"crossorigin="anonymous"></script>{{-- <script src="{{ elixir('js/app.js') }}"></script> --}}</body></html>
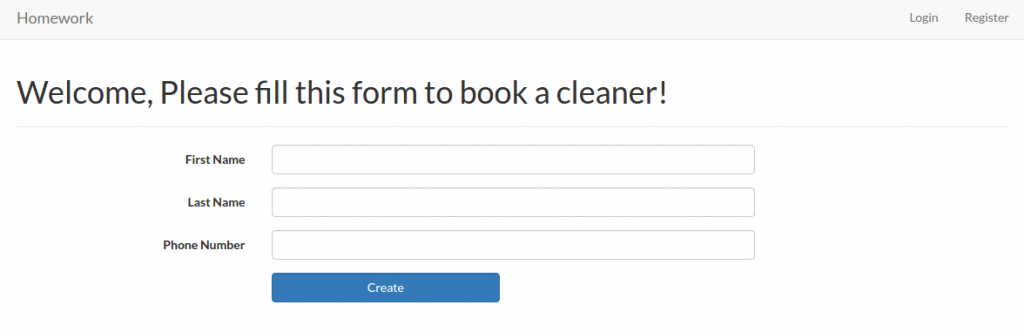
OK. Here is the homepage looks Then try to add a new user (customer) by clicking the register link (http://localhost/works/laravel/mybooking/public/register). Then add a new user with Name: ‘Admin’, email: ‘advcha@admin.com’ and password: ‘admin123’. This is a ‘fake admin’ user!. Not actual admin user. We’re going to add the real admin later. (NOTE: I think also I need to differentiate the login/register page for the customer and cleaner. May be add an option if the user want to be a customer or a cleaner!)
Now we can login with the name. But where is the links to Booking, Customer and Cleaner? Here is how to show them up. Modify ‘app.blade.php’ again, then put the links like this:
12345678910111213<div class="collapse navbar-collapse" id="app-navbar-collapse"><!-- Left Side Of Navbar -->@if (!Auth::guest())<ul class="nav navbar-nav"><li><a href="{{ url('/') }}">Booking</a></li><li><a href="{{ url('/') }}">Customer</a></li><li><a href="{{ url('/') }}">Cleaner</a></li></ul>@endif<!-- Right Side Of Navbar --><ul class="nav navbar-nav navbar-right">...
Here is the looks Okay. but the links still can be clicked properly. We need to add some routes in /routes/web.app like this:
12345...Route::resource('admin/customer', 'Admin\CustomerController');Route::resource('admin/booking', 'Admin\BookingController');Route::resource('admin/cleaner', 'Admin\CleanerController');...
So create a new directory ‘Admin’ in /app/Http/Controllers/ then move BookingController.php, CleanerController.php and CustomerController.php into the new directory.
Then (don’t forget) to modify the namespace in those three files to
1namespace App\Http\Controllers\Admin;
Now we can put the routes for the links in ‘app.blade.php’ like this:
1234567@if (!Auth::guest())<ul class="nav navbar-nav"><li><a href="{{ url('/admin/booking') }}">Booking</a></li><li><a href="{{ url('/admin/customer') }}">Customer</a></li><li><a href="{{ url('/admin/cleaner') }}">Cleaner</a></li></ul>@endif
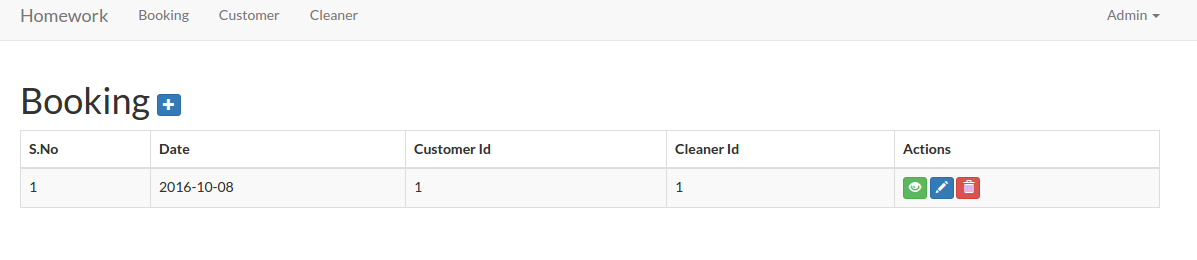
Now we’ve completed the links! You can see the working urls like Booking (http://localhost/works/laravel/mybooking/public/admin/booking), Customer (http://localhost/works/laravel/mybooking/public/admin/customer) and Cleaner (http://localhost/works/laravel/mybooking/public/admin/cleaner). Here is the example for the admin booking page. But there is another thing we need to pay attention for the above links. If we’re logged out, the above links and the urls should not be displayed and opened. Here we need to employ the middleware auth for each the controllers files (BookingController.php, CleanerController.php and CustomerController.php) in ‘__construct’ function like this:
1234public function __construct(){$this->middleware('auth');}
Now if we open the url (for example: http://localhost/works/laravel/mybooking/public/admin/customer) without login first, we’d be redirected to the login page!
<IF YOU HAVE MORE TIME, PLS DO THIS. BUT IT’D TAKE MANY WORKS AND TIME!!!>
To make the view structures tidier, we need to create a new directory ‘admin’ in /resources/views/ then move these directories ‘booking’, ‘customer’ and ‘cleaner’ into it. Then don’t forget to modify the ‘index’ function in our three controller files to refer to the new location:
1234567891011121314151617181920212223BookingController.php:public function index(){$booking = Booking::paginate(25);return view('admin.booking.index', compact('booking'));}CustomerController.php:public function index(){$customer = Customer::paginate(25);return view('admin.customer.index', compact('customer'));}CleanerController.php:public function index(){$cleaner = Cleaner::paginate(25);return view('admin.cleaner.index', compact('cleaner'));}
Also do the same thing for others functions like ‘create’, ‘edit’ and ‘show’. Dont forget to modify also almost all the blade template for them!!! for example: /admin/customer/index.blade.php, modify the urls like url(‘/customer/create’) to url(‘/admin/customer/create’) and the others same urls in the file!!!
</IF YOU HAVE MORE TIME, PLS DO THIS. BUT IT’D TAKE MANY WORKS AND TIME!!!>
CRUD
To make CRUD works for them, I need to modify also some functions in the controller files to redirect to the correct route. For example for CustomerController.php, modify the redirect to ‘admin/customer’ for ‘store’, ‘update’ and ‘destroy’ functions. Do the same thing for Booking and Cleaner controllers! Also modify the blade templates!
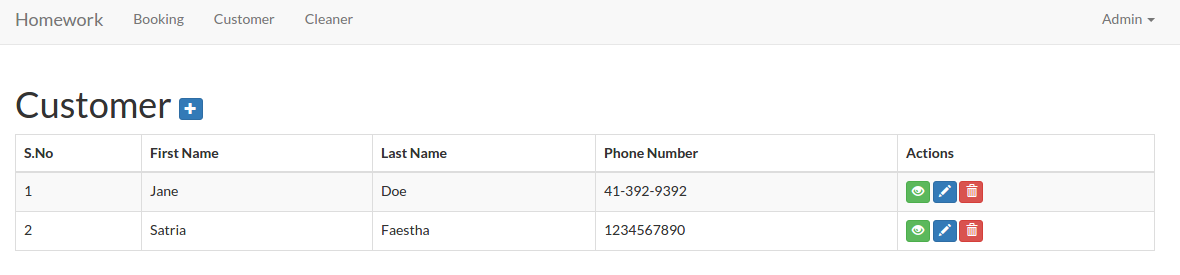
Here is the look for the admin customer (http://localhost/works/laravel/mybooking/public/admin/customer)
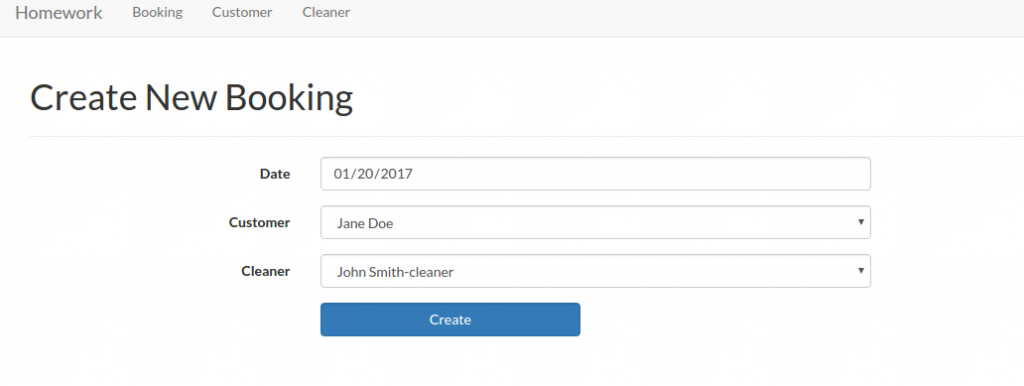
 I think I’ve completed the Admin page. NO!! WAIT!! How about the Admin page for Booking??? The Booking form need CustomerId, CleanerId and Date. On the create form, currently the Ids need to be typed manually, I want to change it to a select box to avoid any error like undefined Id. OK. First, modify ‘BookingController.php’ in /app/Http/Controllers/Admin/ to retrieve the customers and cleaners data
123456789101112131415161718192021222324252627282930313233343536373839404142...use App\Booking;use App\Customer;use App\Cleaner;....class BookingController extends Controller{static $select_customers;static $select_cleaners;public function __construct(){// get customers for drop-down menu$customers = Customer::all();self::$select_customers = [];foreach ($customers as $item) {self::$select_customers[$item->id] = $item->first_name . ' ' . $item->last_name;}// get cleaners for drop-down menu$cleaners = Cleaner::all();self::$select_cleaners = [];foreach ($cleaners as $item) {self::$select_cleaners[$item->id] = $item->first_name . ' ' . $item->last_name;}$this->middleware('auth');}...public function create(){return view('admin.booking.create', ['select_customers' => self::$select_customers,'select_cleaners' => self::$select_cleaners,]);}...}
Then modify ‘create.blade.php’ in /resources/views/admin/booking/ to display the selection of the customers and the cleaners
1234567891011121314<div class="form-group {{ $errors->has('customer_id') ? 'has-error' : ''}}">{!! Form::label('customer_id', 'Customer', ['class' => 'col-sm-3 control-label']) !!}<div class="col-sm-6">{!! Form::select('customer_id', $select_customers, null, ['class' => 'form-control']) !!}{!! $errors->first('customer_id', '<p class="help-block">:message</p>') !!}</div></div><div class="form-group {{ $errors->has('cleaner_id') ? 'has-error' : ''}}">{!! Form::label('cleaner_id', 'Cleaner', ['class' => 'col-sm-3 control-label']) !!}<div class="col-sm-6">{!! Form::select('cleaner_id', $select_cleaners, null, ['class' => 'form-control']) !!}{!! $errors->first('cleaner_id', '<p class="help-block">:message</p>') !!}</div></div>
 We need also change the booking table in /resources/views/admin/booking/index.blade.php to show the names instead of the ids. First, modify the model ‘Booking.php’ in /app/ directory to add relation with customer and cleaner models
123456789101112131415...class Booking extends Model{...public function customer(){return $this->belongsTo('App\Customer');}public function cleaner(){return $this->belongsTo('App\Cleaner');}}
Then modify ‘index’ function in /app/Http/Controllers/Admin/BookingController.php to retrieve also the customer and cleaner data
123456public function index(){$booking = Booking::with('customer', 'cleaner')->paginate(25);return view('admin.booking.index', compact('booking'));}
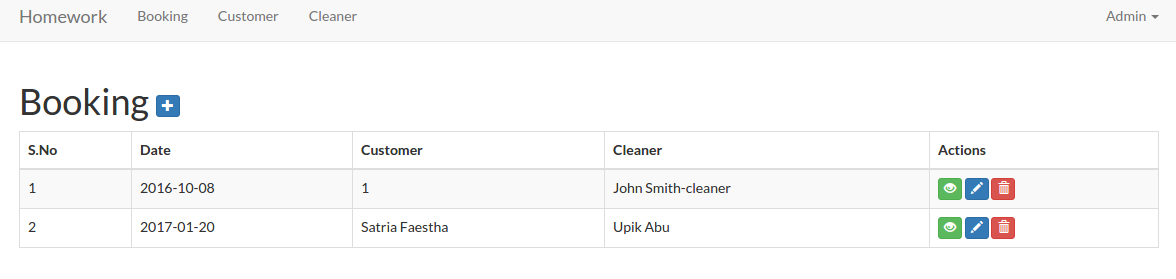
Now in /resources/views/admin/booking/index.blade.php, we can show the names instead of the ids
123456789101112131415161718...<thead><tr><th>S.No</th><th> Date </th><th> Customer </th><th> Cleaner </th><th>Actions</th></tr></thead><tbody>@foreach($booking as $item)<tr><td>{{ $loop->iteration }}</td><td>{{ $item->date }}</td><td>@if(is_null($item->customer)){{ $item->customer_id }}@else{{$item->customer->first_name.' '.$item->customer->last_name}}@endif</td><td>@if(is_null($item->cleaner)){{ $item->cleaner_id }}@else{{ $item->cleaner->first_name.' '.$item->cleaner->last_name}}@endif</td><td>...</td></tr>@endforeach</tbody>...
Here is the looks For the booking edit function, we only need to do a small changes. In /app/Http/Controllers/Admin/BookingController.php, modify ‘edit’ function to pass also the customer and the cleaner data
1234567891011public function edit($id){$booking = Booking::findOrFail($id);//return view('admin.booking.edit', compact('booking'));return view('admin.booking.edit', ['booking' => $booking,'select_customers' => self::$select_customers,'select_cleaners' => self::$select_cleaners,]);}
Then modify /resources/views/admin/booking/edit.blade.php to display the customer and the cleaner options
1234567891011121314<div class="form-group {{ $errors->has('customer_id') ? 'has-error' : ''}}">{!! Form::label('customer_id', 'Customer', ['class' => 'col-sm-3 control-label']) !!}<div class="col-sm-6">{!! Form::select('customer_id', $select_customers, null, ['class' => 'form-control']) !!}{!! $errors->first('customer_id', '<p class="help-block">:message</p>') !!}</div></div><div class="form-group {{ $errors->has('cleaner_id') ? 'has-error' : ''}}">{!! Form::label('cleaner_id', 'Cleaner', ['class' => 'col-sm-3 control-label']) !!}<div class="col-sm-6">{!! Form::select('cleaner_id', $select_cleaners, null, ['class' => 'form-control']) !!}{!! $errors->first('cleaner_id', '<p class="help-block">:message</p>') !!}</div></div>
NOTE: If any customer or the cleaner is not exists (may be because it’s already deleted) in the selection, the selection SHOWS THE FIRST OPTION NOT NULL. IT CAN BE MISLEADING AS IF THE FIRST OPTION IS SELECTED. HOW TO HANDLE THIS???
Now I’m going to work on the Customer page (homepage). The current homepage (http://localhost/works/laravel/mybooking/public/home) content still show the ugly text ‘Hello My Customer!’. Please modify the home template ‘app.blade.php’ in /resources/views/layouts/ to make it tidier. especially in the body tag, add class ‘container’ to wrap the content:
12345678910111213141516171819202122...<body id="app-layout"><!--div id="app"--><nav class="navbar navbar-default navbar-static-top">...</nav><div class="container">@if (Session::has('flash_message'))<div class="alert alert-success">{{ Session::get('flash_message') }}</div>@endif@yield('content')</div><!-- JavaScripts -->...</body>...
Then add a form and a few text input in /resources/views/home/index.blade.php. So it’ll be like this:
123456789101112131415161718192021222324252627282930313233343536373839404142434445464748@extends('layouts.app')@section('content')<h1>Welcome, Please fill this form to book a cleaner!</h1><hr/>{!! Form::open(['url' => '/home/book/', 'class' => 'form-horizontal', 'files' => true]) !!}<div class="form-group {{ $errors->has('first_name') ? 'has-error' : ''}}">{!! Form::label('first_name', 'First Name', ['class' => 'col-sm-3 control-label']) !!}<div class="col-sm-6">{!! Form::text('first_name', null, ['class' => 'form-control']) !!}{!! $errors->first('first_name', '<p class="help-block">:message</p>') !!}</div></div><div class="form-group {{ $errors->has('last_name') ? 'has-error' : ''}}">{!! Form::label('last_name', 'Last Name', ['class' => 'col-sm-3 control-label']) !!}<div class="col-sm-6">{!! Form::text('last_name', null, ['class' => 'form-control']) !!}{!! $errors->first('last_name', '<p class="help-block">:message</p>') !!}</div></div><div class="form-group {{ $errors->has('phone_number') ? 'has-error' : ''}}">{!! Form::label('phone_number', 'Phone Number', ['class' => 'col-sm-3 control-label']) !!}<div class="col-sm-6">{!! Form::text('phone_number', null, ['class' => 'form-control']) !!}{!! $errors->first('phone_number', '<p class="help-block">:message</p>') !!}</div></div><div class="form-group"><div class="col-sm-offset-3 col-sm-3">{!! Form::submit('Create', ['class' => 'btn btn-primary form-control']) !!}</div></div>{!! Form::close() !!}@if ($errors->any())<ul class="alert alert-danger">@foreach ($errors->all() as $error)<li>{{ $error }}</li>@endforeach</ul>@endif@endsection
 The layout looks same with the customer form for adding a new one. But this moment leave it as is. We’re going to change it later with some new features. For the front end booking, it’ll go to ‘/home/book/’ url to save the inputs. We need to add this to our route in /routes/web.php
123...Route::post('/home/book', 'Home\HomeController@book');...
Then modify /app/Http/Controllers/Home/HomeController.php to add a new function ‘book’ to store the data into the customer table.
1234567891011121314151617181920<?php...use App\Customer;use Session;class HomeController extends Controller{...public function book(Request $request){$requestData = $request->all();Customer::create($requestData);Session::flash('flash_message', 'Customer added!');return view('home');}}
The ‘book’ function is pretty same with ‘store’ function in CustomerController.php file.
OK. The Next task: “3. Currently we operate in 10 cities, but plan to expand quickly. We need a way to admin the list of cities we operate in and the ability to add to the list. You should create a new table to do this.”
First we need to create a new model ‘City’. Use artisan to do this job
12teddy@teddy-K43SJ:~/Documents/works/laravel/mybooking$ php artisan make:model CityModel created successfully.
A new file ‘City.php’ would be in /app/ directory. Here is the content
12345678910<?phpnamespace App;use Illuminate\Database\Eloquent\Model;class City extends Model{//}
I’m going to add some variables into the file to represent the table name, the primary key and so on. So it’d be like this:
1234567891011121314151617181920212223242526272829<?phpnamespace App;use Illuminate\Database\Eloquent\Model;class City extends Model{/*** The database table used by the model.** @var string*/protected $table = 'cities';/*** The database primary key value.** @var string*/protected $primaryKey = 'id';/*** Attributes that should be mass-assignable.** @var array*/protected $fillable = ['city_name'];}
Then we need to create a new table ‘cities’ via ‘migration’ command
12teddy@teddy-K43SJ:~/Documents/works/laravel/mybooking$ php artisan make:migration create_cities_table --create=citiesCreated Migration: 2017_01_14_044005_create_cities_table
NOTE: If you get an error like this
12PHP Fatal error: Uncaught UnexpectedValueException: The stream or file "/home/teddy/Documents/works/laravel/mybooking/storage/logs/laravel.log" could not be opened: failed to open stream: Permission denied in /home/teddy/Documents/works/laravel/mybooking/vendor/monolog/monolog/src/Monolog/Handler/StreamHandler.php:107Stack trace: ...
it means you need to set the file permission of ‘storage’ directory to 777 in order to let the migration command to create a new file
1teddy@teddy-K43SJ:~/Documents/works/laravel/mybooking$ sudo chmod -R 777 storage/
Here is the migration file created (2017_01_14_044005_create_cities_table.php in /database/migrations/)
12345678910111213141516171819202122232425262728293031<?phpuse Illuminate\Support\Facades\Schema;use Illuminate\Database\Schema\Blueprint;use Illuminate\Database\Migrations\Migration;class CreateCitiesTable extends Migration{/*** Run the migrations.** @return void*/public function up(){Schema::create('cities', function (Blueprint $table) {$table->increments('id');$table->timestamps();});}/*** Reverse the migrations.** @return void*/public function down(){Schema::dropIfExists('cities');}}
In ‘up’ function, I need to add a new field ‘city_name’ with ‘string’ type. So it’d be like this
12345678public function up(){Schema::create('cities', function (Blueprint $table) {$table->increments('id');$table->string('city_name');$table->timestamps();});}
Then do create the new table ‘cities’ via ‘migrate’ command
12teddy@teddy-K43SJ:~/Documents/works/laravel/mybooking$ php5.6 artisan migrate --database=sqliteMigrated: 2017_01_14_044005_create_cities_table
NOTE: I got a confusing error the first time when tried to execute ‘migrate’ command. Here is the error
1234teddy@teddy-K43SJ:~/Documents/works/laravel/mybooking$ php artisan migrate --database=sqlite[PDOException]could not find driver
I JUST DIDN’T REALIZE MY PHP VERSION VIA TERMINAL IS VERSION 7.0! SO I USE ‘php5.6’ INSTEAD AN IT’S WORKS! IT SEEMS I HAVEN’T CONFIGURED THE PDO FOR SQLITE ON PHP 7.0.
NOTE: ‘migration’ command ONLY RUN ON THE NEW FILE. IT’D NOT RUN THE FILES ALREADY MIGRATED!
Now create a new controller ‘CityController’ in ‘Admin’ directory
12teddy@teddy-K43SJ:~/Documents/works/laravel/mybooking$ php artisan make:controller Admin/CityControllerController created successfully.
The new file ‘CityController.php’ would be in /app/Http/Controllers/Admin/ directory!. Here is the content
12345678910111213<?phpnamespace App\Http\Controllers\Admin;use Illuminate\Http\Request;use App\Http\Requests;use App\Http\Controllers\Controller;class CityController extends Controller{//}
Here we want some functions/methods for CRUD the city data. The function much similar within the others controllers like Cleaner. Here it is
123456789101112131415161718192021222324252627282930313233343536373839404142434445464748495051525354555657585960616263646566676869707172737475767778798081828384858687888990919293949596979899100101102103104105106107108109110111112113114115116117118119120121122123124<?phpnamespace App\Http\Controllers\Admin;use Illuminate\Http\Request;use App\Http\Requests;use App\Http\Controllers\Controller;use App\City;use Session;class CityController extends Controller{/*** Display a listing of the resource.** @return \Illuminate\View\View*/public function __construct(){$this->middleware('auth');}public function index(){$city = City::paginate(25);return view('admin.city.index', compact('city'));}/*** Show the form for creating a new resource.** @return \Illuminate\View\View*/public function create(){return view('admin.city.create');}/*** Store a newly created resource in storage.** @param \Illuminate\Http\Request $request** @return \Illuminate\Http\RedirectResponse|\Illuminate\Routing\Redirector*/public function store(Request $request){$requestData = $request->all();City::create($requestData);Session::flash('flash_message', 'City added!');return redirect('admin/city');}/*** Display the specified resource.** @param int $id** @return \Illuminate\View\View*/public function show($id){$city = City::findOrFail($id);return view('admin.city.show', compact('city'));}/*** Show the form for editing the specified resource.** @param int $id** @return \Illuminate\View\View*/public function edit($id){$city = City::findOrFail($id);return view('admin.city.edit', compact('city'));}/*** Update the specified resource in storage.** @param int $id* @param \Illuminate\Http\Request $request** @return \Illuminate\Http\RedirectResponse|\Illuminate\Routing\Redirector*/public function update($id, Request $request){$requestData = $request->all();$city = City::findOrFail($id);$city->update($requestData);Session::flash('flash_message', 'City updated!');return redirect('admin/city');}/*** Remove the specified resource from storage.** @param int $id** @return \Illuminate\Http\RedirectResponse|\Illuminate\Routing\Redirector*/public function destroy($id){City::destroy($id);Session::flash('flash_message', 'City deleted!');return redirect('admin/city');}}
Then modify our routes in /routes/web.php for this ‘city’
123...Route::resource('admin/city', 'Admin\CityController');...
The last step is to create the blades templates for this ‘city’. Create a new directory ‘city’ in /resources/views/admin/. Then create some files ‘index.blade.php’, ‘create.blade.php’, ‘edit.blade.php’ and ‘show.blade.php’. The content of the files are pretty similar with Cleaner! Just modify some details like change ‘cleaner’ to ‘city’ and the others things. Also don’t forget to add ‘City’ menu in /resources/views/layouts/app.blade.php
12345678@if (!Auth::guest())<ul class="nav navbar-nav"><li><a href="{{ url('/admin/booking') }}">Booking</a></li><li><a href="{{ url('/admin/customer') }}">Customer</a></li><li><a href="{{ url('/admin/cleaner') }}">Cleaner</a></li><li><a href="{{ url('/admin/city') }}">City</a></li></ul>@endif
http://localhost/works/laravel/mybooking/public/admin/city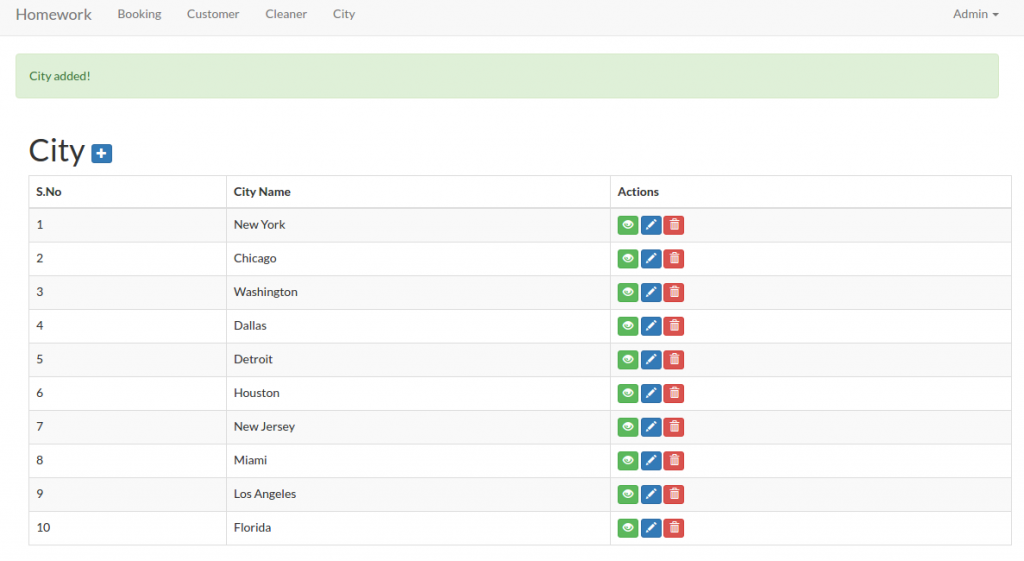 The next task: “4. On the admin cleaner form we need a way to select the cities a cleaner works in. This should be a checkbox list populated by the list of the cities we operate in. You may need to create a new table to store this data.”.
Here I need to create a new table ‘cleaner_cities’. This new table would store the cleaner id and the city id values. Then I also need to modify the form input of the cleaner to include the cities they can work in (they can select more than one city). Then store the selection in the new table ‘cleaner_cities’. Same solution with the above, we need to create a new model ‘CleanerCity’. Use artisan to do this job
12teddy@teddy-K43SJ:~/Documents/works/laravel/mybooking$ php artisan make:model CleanerCityModel created successfully.
Then modify /app/CleanerCity.php file to add a few variables like cleaner_id and city_id. So it’d be like this:
1234567891011121314151617181920212223242526272829<?phpnamespace App;use Illuminate\Database\Eloquent\Model;class CleanerCity extends Model{/*** The database table used by the model.** @var string*/protected $table = 'cleaner_cities';/*** The database primary key value.** @var string*/protected $primaryKey = 'id';/*** Attributes that should be mass-assignable.** @var array*/protected $fillable = ['cleaner_id','city_id'];}
Then we need to create a new table ‘cleaner_cities’ via ‘migration’ command
12teddy@teddy-K43SJ:~/Documents/works/laravel/mybooking$ php artisan make:migration create_cleaner_cities_table --create=cleaner_citiesCreated Migration: 2017_01_14_070618_create_cleaner_cities_table
Then modify ‘up’ function in the migration file created (2017_01_14_070618_create_cleaner_cities_table.php in /database/migrations/)
123456789public function up(){Schema::create('cleaner_cities', function (Blueprint $table) {$table->increments('id');$table->integer('cleaner_id');$table->integer('city_id');$table->timestamps();});}
Use ‘migrate’ command to create the new table
12teddy@teddy-K43SJ:~/Documents/works/laravel/mybooking$ php5.6 artisan migrate --database=sqliteMigrated: 2017_01_14_070618_create_cleaner_cities_table
Then modify the model ‘Cleaner.php’ to add ‘City’ and ‘CleanerCity’ model
1234567891011...public function city(){return $this->belongsTo('App\City');}public function cleanercity(){return $this->belongsTo('App\CleanerCity');}...
Then modify ‘CleanerController.php’ in /app/Https/Controllers/Admin/ directory. For example at ‘create’ function, we need to show up the cities checkboxes. So pass the ‘city’ data in the function
1234567891011121314151617181920212223242526272829...use App\City;use App\CleanerCity;...class CleanerController extends Controller{static $select_cities;...public function __construct(){// get cities for checkbox menu$cities = City::all();self::$select_cities = [];foreach ($cities as $item) {self::$select_cities[$item->id] = $item->city_name;}$this->middleware('auth');}...public function create(){return view('admin.cleaner.create',['select_cities' => self::$select_cities]);}...}
Then modify ‘create.blade.php’ in /resources/views/admin/cleaner/ directory to display the checboxes
12345678<div class="form-group">{!! Form::label('city', 'City', ['class' => 'col-sm-3 control-label']) !!}<div class="col-sm-6">@foreach($select_cities as $idx=>$item)<div class="chk_city">{!! Form::checkbox('city[]', $idx, null, ['class' => 'field']) !!} <span>{!! $item !!}</span></div>@endforeach</div></div>
Here I need to add a class ‘chk_city’ to manage the checkboxes display (side by side). I need to create a new css file ‘style.css’ in /public/css/ directory. Here is the css content
1234.chk_city{padding-right: 15px;float:left;}
Also I need to add the css link in /resources/views/layouts/app.blade.php file
123...<link href="{{ URL::asset('css/style.css') }}" rel="stylesheet">...
OK. Here is the looks (http://localhost/works/laravel/mybooking/public/admin/cleaner/create)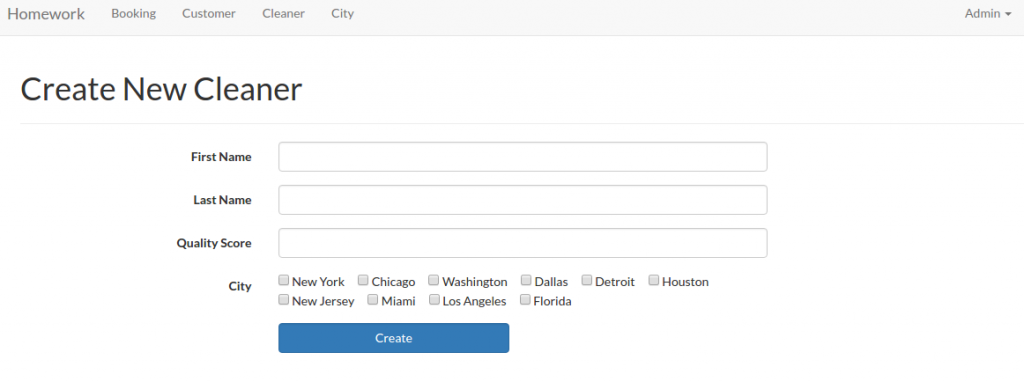 OK. To make sure the create cleaner function work properly, modify ‘store’ function in /app/Http/Controllers/Admin/CleanerController.php like this:
1234567891011121314151617181920212223242526272829303132333435363738394041424344454647public function store(Request $request){$requestData = $request->all();//search if this cleaner is already exist in the cleaner table$cleaner = Cleaner::where(['first_name' => $requestData['first_name'],'last_name'=> $requestData['last_name'],])->take(1)->get();if (count($cleaner) == 0) {Cleaner::create(['first_name' => $requestData['first_name'],'last_name' => $requestData['last_name'],'quality_score' => $requestData['quality_score'],]);if(isset($requestData['city'])){$new_cleaner = Cleaner::where([['first_name', '=', $requestData['first_name']],['last_name', '=', $requestData['last_name']],])->take(1)->get();$new_cleaner_id=0;foreach ($new_cleaner as $item) {$new_cleaner_id = $item->id;};if($new_cleaner_id){foreach($requestData['city'] as $city_id){CleanerCity::create(['cleaner_id' => $new_cleaner_id,'city_id' => $city_id,]);}}}Session::flash('flash_message', 'Cleaner added!');}else{Session::flash('flash_warning', 'Sorry, Your data is already exist!');}return redirect('admin/cleaner');}
So this function also check the input if already exist or not then also insert the cleaner_id and city_id into ‘cleaner_cities’ table!
We can do the same thing for ‘edit’ and ‘update’ function. Modify ‘edit’ and ‘update’ function in /app/Http/Controllers/Admin/CleanerController.php like this
1234567891011121314151617181920212223242526272829303132333435363738394041424344454647484950515253545556575859public function edit($id){$cleaner = Cleaner::findOrFail($id);$cities = self::$select_cities;$cleaner_cities = CleanerCity::where('cleaner_id',$id)->select('id','city_id')->get()->toArray();return view('admin.cleaner.edit', compact('cleaner','cities','cleaner_cities'));}public function update($id, Request $request){$requestData = $request->all();$cleaner = Cleaner::findOrFail($id);$cleaner->update($requestData);$cleaner_city = CleanerCity::where('cleaner_id',$id)->get();if (count($cleaner_city) == 0) {if($requestData['city']){foreach($requestData['city'] as $city_id){CleanerCity::create(['cleaner_id' => $id,'city_id' => $city_id,]);}}}else{if(isset($requestData['city'])){$new_city=$requestData['city'];foreach($cleaner_city as $cc){if(in_array($cc['city_id'], $requestData['city'])){$new_city=array_diff($new_city, array($cc['city_id']));continue;}else{CleanerCity::destroy($cc['id']);}}if($new_city){foreach($new_city as $city){CleanerCity::create(['cleaner_id' => $id,'city_id' => $city,]);}}}else{foreach($cleaner_city as $cc){CleanerCity::destroy($cc['id']);}}}Session::flash('flash_message', 'Cleaner updated!');return redirect('admin/cleaner');}
The ‘update’ function is more complicated. If there is no city selected, remove all the cities if exist in the cleaner_cities related to the cleaner_id. If some cities selected and same within the table, just leave it. But if different cities are selected, add the new cities and remove the unselected ones.
Then modify also /resources/views/admin/cleaner/edit.blade.php to show the selected/unselected cities
12345678910111213141516...<div class="form-group">{!! Form::label('city', 'City', ['class' => 'col-sm-3 control-label']) !!}<div class="col-sm-6">@foreach($cities as $idx=>$item)<?php $checked=null; ?>@foreach($cleaner_cities as $city)@if($idx == $city['city_id'])<?php $checked=true; ?>@endif@endforeach<div class="chk_city">{!! Form::checkbox('city[]', $idx, $checked, ['class' => 'field']) !!} <span>{!! $item !!}</span></div>@endforeach</div></div>...
Now, we want to display the cities also on the cleaner table. So modify ‘index’ function in /app/Http/Controllers/Admin/CleanerController.php like this:
123456789101112public function index(){//$cleaner = Cleaner::paginate(25);$cleaner = DB::table('cleaners')->join('cleaner_cities','cleaners.id','=','cleaner_cities.cleaner_id')->join('cities','cleaner_cities.city_id','=','cities.id')->select('cleaners.id','cleaners.first_name','cleaners.last_name','cleaners.quality_score',DB::raw('(GROUP_CONCAT(cities.city_name)) AS city'))->groupBy('cleaners.id','cleaners.first_name','cleaners.last_name','cleaners.quality_score')->paginate(25);return view('admin.cleaner.index', compact('cleaner'));}
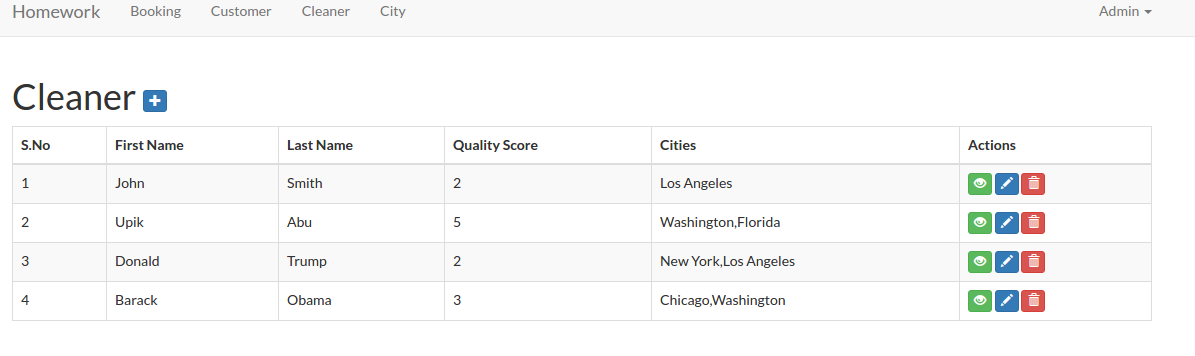
Then modify /resources/views/admin/cleaner/index.blade.php to display the cities
12345678910111213141516171819<table class="table table-bordered table-striped table-hover"><thead><tr><th>S.No</th><th> First Name </th><th> Last Name </th><th> Quality Score </th><th> Cities </th><th>Actions</th></tr></thead><tbody>@foreach($cleaner as $item)<tr><td>{{ $loop->iteration }}</td><td>{{ $item->first_name }}</td><td>{{ $item->last_name }}</td><td>{{ $item->quality_score }}</td><td>{{ $item->city }}</td><td>...</td></tr>@endforeach</tbody></table>
Here is the looks: The last thing for the ‘show’ function. Modify the function to get the cities then pass it to the view
123456789101112public function show($id){$cleaner = Cleaner::findOrFail($id);$cleaner_cities = DB::table('cleaner_cities')->join('cities','cleaner_cities.city_id','=','cities.id')->select(DB::raw('(GROUP_CONCAT(cities.city_name)) AS city_name'))->where('cleaner_cities.cleaner_id',$id)->groupBy('cities.city_name')->get();return view('admin.cleaner.show', compact('cleaner','cleaner_cities'));}
Then modify /resources/views/admin/cleaner/show.blade.php, to display the cities
123456789101112131415161718192021<div class="table-responsive"><table class="table table-bordered table-striped table-hover"><tbody><tr><th>ID</th><td>{{ $cleaner->id }}</td></tr><tr><th> First Name </th><td> {{ $cleaner->first_name }} </td></tr><tr><th> Last Name </th><td> {{ $cleaner->last_name }} </td></tr><tr><th> Quality Score </th><td> {{ $cleaner->quality_score }} </td></tr><tr><th> City </th><td> {{ $cleaner_cities->implode('city_name', ', ') }} </td></tr></tbody></table></div>
COMPLETED!
The next task: “5. We need a way for customers to signup and schedule a booking all on one form. To accomplish this you will need to do the following:
– Make the site root a customer-facing form designed for customers to sign up and book a cleaner.
– On this form, capture all the data needed to create a customer in the database (first name, last name, phone number).”
We already have it. Please look http://localhost/works/laravel/mybooking/public/home. Also look the two routes for this in /routes/web.php
12Route::get('/home', 'Home\HomeController@index');Route::post('/home/book', 'Home\HomeController@book');
Look the function ‘index’ and ‘book’ (We’ll get it done at the next task) in /app/Http/Controllers/Home/HomeController.php.
“- If the customer already exists in the database (use phone number to determine this) use the existing record instead of creating a new one. You should probably add a validation to enforce this.”
Modify /app/Http/Controllers/Home/HomeController.php at ‘book’ function like this:
12345678910111213141516171819202122public function book(Request $request){$requestData = $request->all();$customer = Customer::where('phone_number',$requestData['phone_number'])->take(1)->get();if (count($customer) == 0) {//create/register a new customerCustomer::create(['first_name' => $requestData['first_name'],'last_name' => $requestData['last_name'],'phone_number' => $requestData['phone_number'],]);Session::flash('flash_message', 'Customer added!');}else{Session::flash('flash_warning', 'Sorry, A customer with phone number "'.$requestData['phone_number'].'" is already exist!');}return view('home.index');}
Here we add a check and validation if a phone number entered is already exist in the customer table. If so, please give a message about it. Here is the look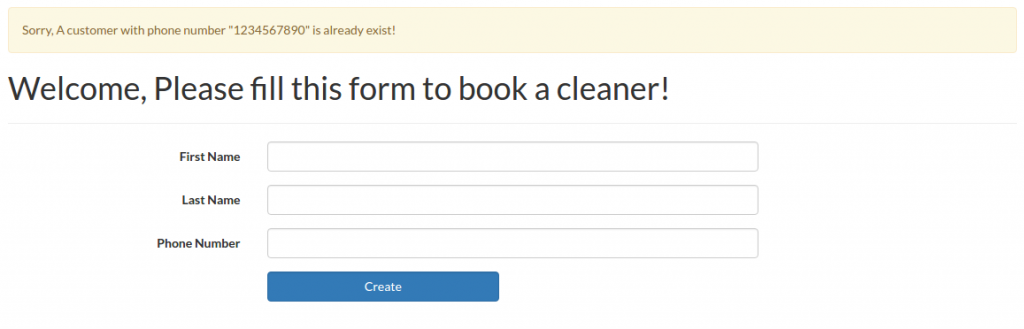
“- Let the customer select what city they are in from the cities table created earlier.”
Modify /app/Http/Controllers/Home/HomeController.php to add the city data and pass it to the view
123456789101112131415161718192021222324252627...use App\City;...class HomeController extends Controller{static $select_cities;public function __construct(){// get cities$cities = City::all();self::$select_cities = [];foreach ($cities as $item) {self::$select_cities[$item->id] = $item->city_name;}}public function index(){return view('home.index',['select_cities' => self::$select_cities]);}...}
Then show the city selection in /resources/views/home/index.blade.php file
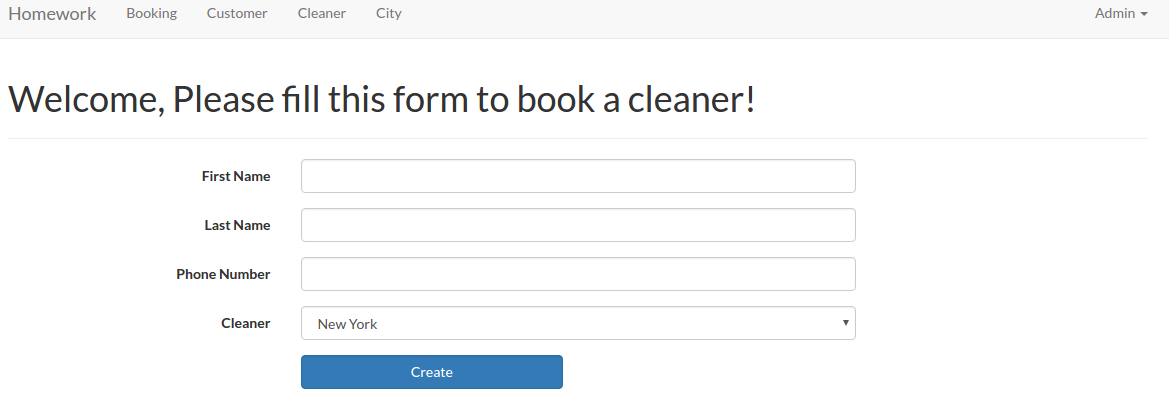
123456789...<div class="form-group">{!! Form::label('city_id', 'Cleaner', ['class' => 'col-sm-3 control-label']) !!}<div class="col-sm-6">{!! Form::select('city_id', $select_cities, null, ['class' => 'form-control']) !!}{!! $errors->first('city_id', '<p class="help-block">:message</p>') !!}</div></div>...
Here is the new looks: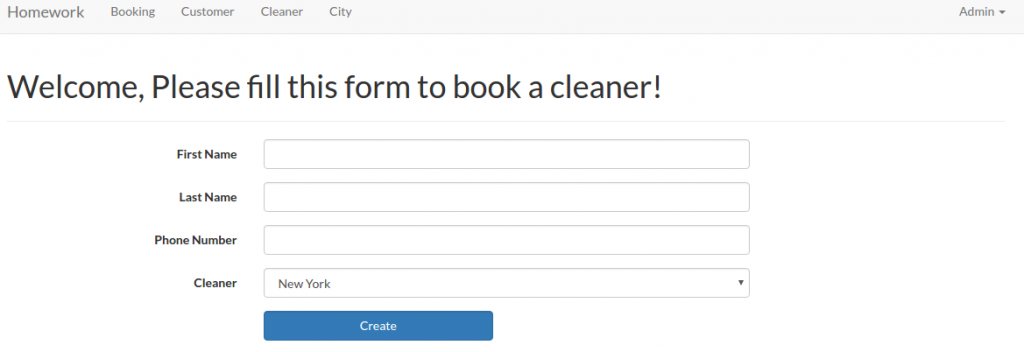 We’ll do the rest after working on the below task!
“- Let the customer specify a date and time when they would like their house cleaned.”
Put like this to show the datetime inputs in /resources/views/home/index.blade.php file
1234567891011121314151617181920212223242526...<div class="form-group {{ $errors->has('date') ? 'has-error' : ''}}">{!! Form::label('cleaning_time_from', 'Cleaning Time (From)', ['class' => 'col-sm-3 control-label']) !!}<div class="col-sm-6"><div class='input-group date' id='dtp_cleaning_form'><input type='text' class="form-control" name="cleaning_time_from" /><span class="input-group-addon"><span class="glyphicon glyphicon-calendar"></span></span></div>{!! $errors->first('cleaning_time_from', '<p class="help-block">:message</p>') !!}</div></div><div class="form-group {{ $errors->has('date') ? 'has-error' : ''}}">{!! Form::label('cleaning_time_to', 'Cleaning Time (To)', ['class' => 'col-sm-3 control-label']) !!}<div class="col-sm-6"><div class='input-group date' id='dtp_cleaning_to'><input type='text' class="form-control" name="cleaning_time_to" /><span class="input-group-addon"><span class="glyphicon glyphicon-calendar"></span></span></div>{!! $errors->first('cleaning_time_to', '<p class="help-block">:message</p>') !!}</div></div>...
I added two datetime input here: Cleaning Time (From) and Cleaning Time (To). I can’t use ‘Form::date’ here because I need ‘Datetime’ not just ‘Date’. I have to use datetimepicker from bootstrap. To make sure the dropdown of the datetime work properly, I have to add/import ‘bootstrap-datetimepicker’ libraries in /resources/views/layouts/app.blade.php file
123456789101112131415...<!-- Styles -->...<link rel="stylesheet" href="https://cdnjs.cloudflare.com/ajax/libs/bootstrap-datetimepicker/4.17.37/css/bootstrap-datetimepicker.min.css" crossorigin="anonymous" />...<!-- JavaScripts -->...<script src="https://cdnjs.cloudflare.com/ajax/libs/bootstrap-datetimepicker/4.17.37/js/bootstrap-datetimepicker.min.js" crossorigin="anonymous"></script><script type="text/javascript">$(function () {$('#dtp_cleaning_form').datetimepicker();$('#dtp_cleaning_to').datetimepicker();});</script>...
Here is the looks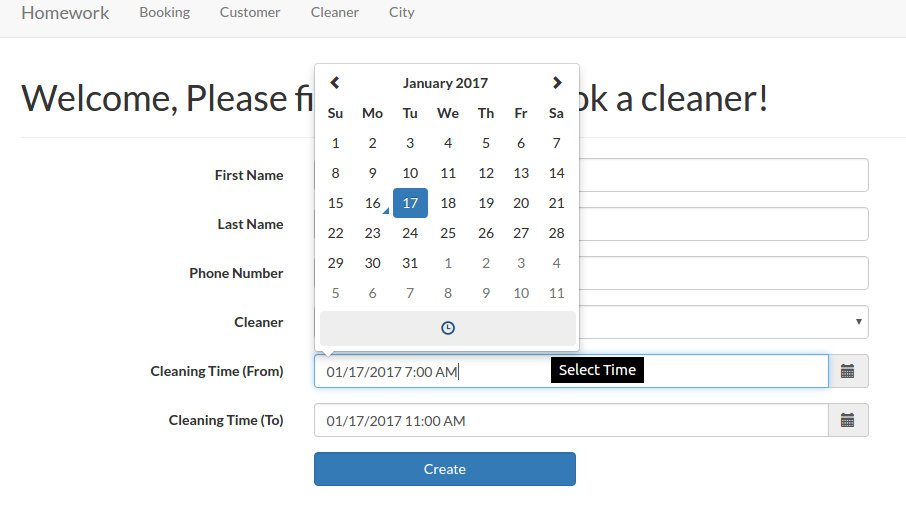 Then I need to create a new model ‘CityCleaningTime’ to store the city id and the cleanings time.
1teddy@teddy-K43SJ:~/Documents/works/laravel/mybooking$ php artisan make:model CityCleaningTime
Then modify ‘CityCleaningTime.php’ file
1234567891011121314151617181920212223242526272829<?phpnamespace App;use Illuminate\Database\Eloquent\Model;class CityCleaningTime extends Model{/*** The database table used by the model.** @var string*/protected $table = 'citycleaningtimes';/*** The database primary key value.** @var string*/protected $primaryKey = 'id';/*** Attributes that should be mass-assignable.** @var array*/protected $fillable = ['customer_id', 'city_id', 'cleaning_time_from', 'cleaning_time_to'];}
Then do migration to create the migration file
1teddy@teddy-K43SJ:~/Documents/works/laravel/mybooking$ php artisan make:migration create_citycleaningtimes_table --create=citycleaningtimes
Then do migrate to create the new table ‘citycleaningtimes’.
1teddy@teddy-K43SJ:~/Documents/works/laravel/mybooking$ php5.6 artisan migrate --database=sqlite
NOTE: I did some mistakes about the migration file and the migrate. First I forgot to put ‘customer_id’ in the migration file. I realized it after I created the new table. I updated the migration file and did the migrate but I got a message ‘Nothing to migrate.’ Because I was in a hurry, I deleted the migration file so I thought I can create a new one. But when I wanted to create the new migration file, I got this error:
1234[ErrorException]include(/home/teddy/Documents/works/laravel/mybooking/vendor/composer/../../database/migrations/2017_01_16_141740_create_citycleaningtimes_table.php):failed to open stream: No such file or directory
To solve this problem, I have to type this ‘composer dump-autoload’:
1teddy@teddy-K43SJ:~/Documents/works/laravel/mybooking$ composer dump-autoload
Then did the migration again. After fixing the file, I wanted to create the table again. But, of course, the same table is already exists!
12[PDOException]SQLSTATE[HY000]: General error: 1 table "citycleaningtimes" already exists
I tried to fix this mistake by doing the ‘migrate:rollback’
1teddy@teddy-K43SJ:~/Documents/works/laravel/mybooking$ php5.6 artisan migrate:rollback
But I got another error
12[ErrorException]Undefined index: 2017_01_16_141740_create_citycleaningtimes_table
Then I created again (manually) the old migration file (copy and paste the new migration file then rename it!). I did the rollback again. but here is another error:
12teddy@teddy-K43SJ:~/Documents/works/laravel/mybooking$ php5.6 artisan migrate:rollbackPHP Fatal error: Cannot redeclare class CreateCitycleaningtimesTable in /home/teddy/Documents/works/laravel/mybooking/database/migrations/2017_01_16_151401_create_citycleaningtimes_table.php on line 35
After some thought, I have to remove (or move it to another directory) the new migration file and let the old one (the above name!). Then did the rollback again. SUCCESS! Fixed the old migration file by adding ‘customer_id’ then did the migrate again. SUCCESS!
OK. HERE IS THE IMPORTANT LESSON, IF I FOUND AN ERROR/NOT COMPLETED IN MY LAST MIGRATE/MIGRATION FILE, DO THE ROLLBACK IF THE TABLE IS ALREADY CREATED! DONT REMOVE THE MIGRATION FILE!.
“- When the user submits the form, look for cleaners that work in the specified city that do not have any bookings that conflict with the time specified.
– If you can find an available cleaner, create the booking and display the name of the cleaner assigned to the booking.
– If you can’t find an available cleaner, tell the user that we could not fulfill their request.” - First, add a free theme like bootstrap or materialize css.